You are using an out of date browser. It may not display this or other websites correctly.
You should upgrade or use an alternative browser.
You should upgrade or use an alternative browser.
THE CANNABIS THREAD 101!!
- Thread starter roots69
- Start date

Study: Use Of CBD Products For Health Becoming Widespread

San Diego, CA: The use of cannabidiol products for the treatment of either a specific health condition or for general well-being is becoming prevalent among the general public, according to survey data published in the journal Cannabis and Cannabinoid Research.
Researchers at San Diego State University and at the National University of Natural Medicine in Portland, Oregon surveyed a self-selected cohort of 2,409 respondents with regard to their use of CBD products. Respondents typically ranged between 55 and 74 years of age.
Almost 62 percent of respondents reported using CBD for the purposes of treating a specific medical condition. The top three most commonly cited medical conditions were pain, anxiety, and depression. Almost 36 percent of subjects reported that CBD treats their medical conditions "very well by itself," while only 4.3 percent reported the substance to be largely ineffective.
Authors concluded: "The use of CBD among individuals for both specific health conditions and general health and well-being is widespread. ... CBD is being used as a specific therapy for a number of diverse medical conditions - particularly pain and inflammatory disorders, in addition to anxiety, depression, and sleep disorders. A large percentage of respondents indicate that CBD treats their condition(s) effectively in the absence of conventional medicine and with non-serious adverse effects. These data provide a compelling rationale for further research to better understand the therapeutic potential of CBD in treating chronic pain, anxiety, depression, sleep disorders, and other medical conditions."
These Senators Are All Talk, No Action on Cannabis Legalization

‘The Haymaker’ is Leafly Deputy Editor Bruce Barcott’s weekly column on cannabis politics and culture.
Talk is cheap. In Congress it goes for pennies on the pound.
In the days following Attorney General Jeff Sessions’ decision to rescind the Cole memo, politicians around the country raised their voices in outrage.
Many have spoken out against Jeff Sessions. But who has acted? We tallied the votes.
Governors, state attorneys general, and members of Congress issued statements and tweets about states’ rights. They pledged to protect adult-use laws and the rights of medical patients.
But who has acted? Almost no one, so far.
In fact, a number of senators who expressed a burning desire to halt Sessions and his cannabis-hating crusade in its tracks have not so much as signed on as a co-sponsor of any of the four major pieces of legislation addressing the issue in the US Senate. As of mid-January, one of the most powerful bills—Sen. Cory Booker’s Marijuana Justice Act—had only a single co-sponsor, Oregon Sen. Ron Wyden.
The four Senate bills currently treading water in the upper chamber are:

The Purity Tester
 @WAProgressive
https://twitter.com/WAProgressive/status/950853635336036353
Is Senator Kamala Harris Sincere About Supporting Marijuana Reform? She has yet to cosponsor any reform bills like other Senate Dems have. https://www.weednews.co/is-senator-kamala-harris-sincere-about-supporting-marijuana-reform/ …
5:15 PM - Jan 9, 2018

Is Senator Kamala Harris Sincere About Supporting Marijuana Reform?
It wasn’t that long ago that many in the political world considered supporting cannabis reform to be political suicide. After Oregon failed to legalize cannabis in 2012 I text my friend that...
I’ve compiled a table of senators from the eight legal adult-use states, their public words on the Sessions move, and their actions in the senate, below.
Senators from Legal Adult-Use States:

Click on table to enlarge.

It’s Not Just the Legal States
Surprisingly, much of the support for the Senate’s leading cannabis measures comes from elected officials who don’t represent adult-use states. Some come from states where medical cannabis is legal. Some, like Rand Paul (R-KY) and Mike Lee (R-UT), hail from places where nearly all forms of cannabis are highly illegal.
And some, like Sen. Chuck Schumer of New York, talk a big game but so far have delivered big fat zeroes when it comes to co-sponsorship of cannabis bills.
Senators from Other States:

Click on table to enlarge.
Who’s Acted on Their Convictions?
I do have a roll of honor, though it’s a short one. The senators with the strongest record of standing up for patient protections, states’ rights, and the cannabis industry are:
I urge you to call the members of Congress from your state and ask them what they’re doing this week to support and protect state cannabis laws.
‘The Haymaker’ is Leafly Deputy Editor Bruce Barcott’s weekly column on cannabis politics and culture.
Talk is cheap. In Congress it goes for pennies on the pound.
In the days following Attorney General Jeff Sessions’ decision to rescind the Cole memo, politicians around the country raised their voices in outrage.
Many have spoken out against Jeff Sessions. But who has acted? We tallied the votes.
Governors, state attorneys general, and members of Congress issued statements and tweets about states’ rights. They pledged to protect adult-use laws and the rights of medical patients.
But who has acted? Almost no one, so far.
In fact, a number of senators who expressed a burning desire to halt Sessions and his cannabis-hating crusade in its tracks have not so much as signed on as a co-sponsor of any of the four major pieces of legislation addressing the issue in the US Senate. As of mid-January, one of the most powerful bills—Sen. Cory Booker’s Marijuana Justice Act—had only a single co-sponsor, Oregon Sen. Ron Wyden.
The four Senate bills currently treading water in the upper chamber are:
- The Marijuana Justice Act (S. 1689): Sponsored by Sen. Cory Booker (D-NJ), this act would get the federal government out of the marijuana prohibition business. Bonus: S. 1689 contains equity provisions for those people and places most damaged by the war on drugs.
- The CARERS Act (S. 1374): Prior to Booker’s MJA (above), this was the strongest serious measure brought forth in the post-2012 era. The bill would extend the principle of federalism to State drug policy, provide access to medical cannabis, and enable research into the plant’s medicinal properties.
- The SAFE Banking Act (S. 1152): Sponsored by Sen. Jeff Merkley (D-OR), this bill would create protections for depository institutions that provide financial services to cannabis-related businesses.
- The Small Business Tax Equity Act (S. 777): Sponsored by Sen. Ron Wyden (D-OR), this bill amends the Internal Revenue Code to exempt a trade or business that conducts marijuana sales in compliance with state law from the prohibition against allowing business-related tax credits or deductions for expenditures in connection with trafficking in controlled substances. It effectively ends the IRS’s glaring 280E rule, which economically hobbles legal cannabis companies.
The Purity Tester
@WAProgressivehttps://twitter.com/WAProgressive/status/950853635336036353
Is Senator Kamala Harris Sincere About Supporting Marijuana Reform? She has yet to cosponsor any reform bills like other Senate Dems have. https://www.weednews.co/is-senator-kamala-harris-sincere-about-supporting-marijuana-reform/ …
5:15 PM - Jan 9, 2018
Is Senator Kamala Harris Sincere About Supporting Marijuana Reform?
It wasn’t that long ago that many in the political world considered supporting cannabis reform to be political suicide. After Oregon failed to legalize cannabis in 2012 I text my friend that...
I’ve compiled a table of senators from the eight legal adult-use states, their public words on the Sessions move, and their actions in the senate, below.
Senators from Legal Adult-Use States:

Click on table to enlarge.
It’s Not Just the Legal States
Surprisingly, much of the support for the Senate’s leading cannabis measures comes from elected officials who don’t represent adult-use states. Some come from states where medical cannabis is legal. Some, like Rand Paul (R-KY) and Mike Lee (R-UT), hail from places where nearly all forms of cannabis are highly illegal.
And some, like Sen. Chuck Schumer of New York, talk a big game but so far have delivered big fat zeroes when it comes to co-sponsorship of cannabis bills.
Senators from Other States:

Click on table to enlarge.
Who’s Acted on Their Convictions?
I do have a roll of honor, though it’s a short one. The senators with the strongest record of standing up for patient protections, states’ rights, and the cannabis industry are:
- Sen. Cory Booker (D-NJ), initial sponsor of both the CARERS Act and the Marijuana Justice Act.
- Sen. Lisa Murkowski (R-AK), co-sponsor of the CARERS Act and the SAFE Banking Act.
- Sen. Cory Gardner (R-CO), who’s both co-sponsored bills and taken the lead this past week in resisting Sessions.
- Sen. Michael Bennet (D-CO), Gardner’s quieter compatriot from Colorado, defending his state’s cannabis jobs.
- Sen. Ron Wyden (D-OR), creator of the Small Business Tax Equity Act, to end the injustice of IRS Rule 280E.
- Sen. Jeff Merkley (D-OR), creator of the SAFE Banking Act to allow legal businesses in his state to bank safely.
- Sen. Mazie Hirono (D-HI), a newcomer to the cause, co-sponsor of both CARERS and SAFE Banking.
- Sen. Rand Paul (R-KY), whose state isn’t even medical-legal, but continues to support liberty on this issue.
I urge you to call the members of Congress from your state and ask them what they’re doing this week to support and protect state cannabis laws.
10 Beverages Enhanced by Cannabis Tinctures

(john shepherd/iStock)
Cannabis tinctures are one of the most convenient ways to consume a concentration of cannabinoids discreetly. Tinctures also have an accelerated onset, especially compared to traditional cannabis edibles like cookies or brownies. These subtle differences and distinctive qualities make tinctures a must for micro-dosers, edible enthusiasts, and discreet cannabis consumers looking to remain incognito.

Below are, in my opinion, 10 beverages worth a few drops of tincture. Before you try adding tinctures to a drink of your choosing, remember that setting and dosage are key. Tinctures are very easy to titrate, dose properly, because they usually come in a dropper bottle. Find out how many drops set you at your desired buzz by administering a dose directly and letting the tincture rest under your tongue for as long as comfortable before swallowing. This should help the tincture absorb more quickly into the bloodstream, expediting the onset.
1. Coffee
Note: Tinctures infused with chicory, vanilla, orange, or ginger are excellent options for this kind of beverage.
Cannabis and coffee are old companions in the Pacific Northwest, with the combination often affectionately referred to as a “Seattle Speedball.” Caffeine can help counteract the somewhat drowsy effects of cannabis, but beware, as the jolt of energy from caffeine in conjunction with some strong sativa can be overstimulating for some. (Luckily, most tinctures are not strain-specific.) To combine the two, either infuse milk with your preferred tincture in a saucepan or add some tincture to your perfect-temp coffee.

2. Tea
Note: Tinctures with an especially strong cannabis flavor or that are infused with peppermint, ginger, or lemon work well in this beverage.
Tea is enjoyed and consumed for a variety of personal and medicinal reasons. By design, tea is comprised of an assortment of botanical ingredients that are dried and combined to create certain flavors and aromas. People also drink it for a variety of health reasons, such as ginger or mint tea for digestion, chamomile for sleep, black tea for energy and alertness, or green tea for antioxidants.
While THC is not water-soluble, a tincture will still swirl about in your hot, brewed concoction and add a little something special to your tea of choice. If you plan to add cannabis to your tea bag or tea infuser, make sure it is decarboxylated already (use ABV, or already vaped bud, or freshly decarbed cannabis out of the oven).

3. Hot Chocolate
Note: Almost all the same tinctures that go well with coffee will go well with hot cocoa.
Hot cocoa might be the best hot beverage on Earth, in my humble opinion. Plus, since hot chocolate is made with milk (whole milk if you do it right), cannabis can be easily infused into this beverage. It’s as easy as adding a dropper or two of tincture to your freshly poured cup of hot chocolate, or simply infuse your milk with decarboxylated cannabis, strain, and stir in chocolate. For a little extra punch, add a half-ounce of peppermint schnapps or coffee liquor to your mix.

4. Smoothies
Note: Smoothies benefit from all types of tinctures, but complement your fruit or vegetable-based beverage with an extra drop of fruit-forward tincture to add a subtle, grassy dimension.
Smoothies are a great way to enjoy the health benefits of fruit and vegetables without having to actually eat them. Personally, I add a dollop of Greek or soy yogurt to my smoothies, alongside a variety of juices (like apple or orange) and an assortment of frozen fruits. Drop your tincture in right before mixing and enjoy. This will allow the tincture to incorporate smoothly throughout your pitcher or personal beverage.

5. Mocktails
Note: A tincture’s flavor infusion will predicate its usefulness in a mocktail. Trying to make an Old Fashioned? A dash of citrus-forward tincture will add a zesty nip to the mocktail. Is your tincture floral and herbal? Try adding a touch to a fine botanical-infused gin. In the right measure the flavors and aromas can be sensational!
Mocktails are a wonderful new way to enjoy a fancy beverage without the addition of alcohol. The composition of a good cocktail is balancing the sweet, sour, bold (usually alcohol-based) flavors with one another, and that can easily be done without the addition of spirits. Add your tincture directly to your cocktail or cocktail shaker, and go to town on your cannabis-infused mixers!

6. Cider/Seasonal Drinks
Note: Add some spice to your cider brew with the addition of clove or cinnamon-infused tinctures.
Each season has its own set of beverages: Summer has punches and umbrella drinks; spring has mint juleps and palomas; fall has cider and hot toddies; winter has eggnog and hot buttered rum. A tincture goes well in any of these drinks, hot or cold. Bring cannabis to whatever season you’re surviving through with a dropper or two of tincture in your next beverage.

7. Milkshakes
Milkshakes are a great way to get fat on ice cream and love every damn minute of it. This naturally rich beverage masks the flavor of cannabis extremely well, making a milkshake the perfect treat to share with cannabis-curious folks who dislike tinctures’ bold, concentrated flavor.

8. Soda Water + Squeezed Juice
Note: Try and match your tincture infusion to the squeeze of juice you’re using for a double dose of sweet or sour.
Making your own soda has always been pretty easy, but with the rise in popularity of La Croix, Talking Rain, and the SodaStream, quality, low-calorie carbonated beverages are almost always in reach. A dropper of tincture with a squeeze of lemon or lime always adds an enjoyable zing to plain or flavored soda water.

9. Drinking Vinegar + Water
Mocktails and cannabis beverages are nice, but they sometimes lack the zip or punch of a real cocktail or beer to elicit that satisfied sensation. Drinking vinegar, a flavorful and tart beverage concentrate, is an excellent and refreshing replacement that can be added to filtered water (bubbles optional). Add a dose of tincture to the mix and you’ve got your own Asian fusion-inspired beverage that is both unique and satisfying.

10. Bubble Tea
Bubble tea (or milk tea) is a weird and wonderful beverage with gummy balls at the bottom of it. This sweet beverage has a fun mouthfeel and unique flavors you’d be hard-pressed to find elsewhere. Bubble teas are usually sealed with a plastic top and then punctured with a massive straw to slurp up the tapioca balls at the bottom. This straw is also big enough to squirt dose of tincture through, adding a boost of cannabinoids to your fun and flavorful beverage.
DRINKS
(john shepherd/iStock)
Cannabis tinctures are one of the most convenient ways to consume a concentration of cannabinoids discreetly. Tinctures also have an accelerated onset, especially compared to traditional cannabis edibles like cookies or brownies. These subtle differences and distinctive qualities make tinctures a must for micro-dosers, edible enthusiasts, and discreet cannabis consumers looking to remain incognito.
Below are, in my opinion, 10 beverages worth a few drops of tincture. Before you try adding tinctures to a drink of your choosing, remember that setting and dosage are key. Tinctures are very easy to titrate, dose properly, because they usually come in a dropper bottle. Find out how many drops set you at your desired buzz by administering a dose directly and letting the tincture rest under your tongue for as long as comfortable before swallowing. This should help the tincture absorb more quickly into the bloodstream, expediting the onset.
1. Coffee
Note: Tinctures infused with chicory, vanilla, orange, or ginger are excellent options for this kind of beverage.
Cannabis and coffee are old companions in the Pacific Northwest, with the combination often affectionately referred to as a “Seattle Speedball.” Caffeine can help counteract the somewhat drowsy effects of cannabis, but beware, as the jolt of energy from caffeine in conjunction with some strong sativa can be overstimulating for some. (Luckily, most tinctures are not strain-specific.) To combine the two, either infuse milk with your preferred tincture in a saucepan or add some tincture to your perfect-temp coffee.
2. Tea
Note: Tinctures with an especially strong cannabis flavor or that are infused with peppermint, ginger, or lemon work well in this beverage.
Tea is enjoyed and consumed for a variety of personal and medicinal reasons. By design, tea is comprised of an assortment of botanical ingredients that are dried and combined to create certain flavors and aromas. People also drink it for a variety of health reasons, such as ginger or mint tea for digestion, chamomile for sleep, black tea for energy and alertness, or green tea for antioxidants.
While THC is not water-soluble, a tincture will still swirl about in your hot, brewed concoction and add a little something special to your tea of choice. If you plan to add cannabis to your tea bag or tea infuser, make sure it is decarboxylated already (use ABV, or already vaped bud, or freshly decarbed cannabis out of the oven).
3. Hot Chocolate
Note: Almost all the same tinctures that go well with coffee will go well with hot cocoa.
Hot cocoa might be the best hot beverage on Earth, in my humble opinion. Plus, since hot chocolate is made with milk (whole milk if you do it right), cannabis can be easily infused into this beverage. It’s as easy as adding a dropper or two of tincture to your freshly poured cup of hot chocolate, or simply infuse your milk with decarboxylated cannabis, strain, and stir in chocolate. For a little extra punch, add a half-ounce of peppermint schnapps or coffee liquor to your mix.
4. Smoothies
Note: Smoothies benefit from all types of tinctures, but complement your fruit or vegetable-based beverage with an extra drop of fruit-forward tincture to add a subtle, grassy dimension.
Smoothies are a great way to enjoy the health benefits of fruit and vegetables without having to actually eat them. Personally, I add a dollop of Greek or soy yogurt to my smoothies, alongside a variety of juices (like apple or orange) and an assortment of frozen fruits. Drop your tincture in right before mixing and enjoy. This will allow the tincture to incorporate smoothly throughout your pitcher or personal beverage.
5. Mocktails
Note: A tincture’s flavor infusion will predicate its usefulness in a mocktail. Trying to make an Old Fashioned? A dash of citrus-forward tincture will add a zesty nip to the mocktail. Is your tincture floral and herbal? Try adding a touch to a fine botanical-infused gin. In the right measure the flavors and aromas can be sensational!
Mocktails are a wonderful new way to enjoy a fancy beverage without the addition of alcohol. The composition of a good cocktail is balancing the sweet, sour, bold (usually alcohol-based) flavors with one another, and that can easily be done without the addition of spirits. Add your tincture directly to your cocktail or cocktail shaker, and go to town on your cannabis-infused mixers!
6. Cider/Seasonal Drinks
Note: Add some spice to your cider brew with the addition of clove or cinnamon-infused tinctures.
Each season has its own set of beverages: Summer has punches and umbrella drinks; spring has mint juleps and palomas; fall has cider and hot toddies; winter has eggnog and hot buttered rum. A tincture goes well in any of these drinks, hot or cold. Bring cannabis to whatever season you’re surviving through with a dropper or two of tincture in your next beverage.
7. Milkshakes
Milkshakes are a great way to get fat on ice cream and love every damn minute of it. This naturally rich beverage masks the flavor of cannabis extremely well, making a milkshake the perfect treat to share with cannabis-curious folks who dislike tinctures’ bold, concentrated flavor.
8. Soda Water + Squeezed Juice
Note: Try and match your tincture infusion to the squeeze of juice you’re using for a double dose of sweet or sour.
Making your own soda has always been pretty easy, but with the rise in popularity of La Croix, Talking Rain, and the SodaStream, quality, low-calorie carbonated beverages are almost always in reach. A dropper of tincture with a squeeze of lemon or lime always adds an enjoyable zing to plain or flavored soda water.
9. Drinking Vinegar + Water
Mocktails and cannabis beverages are nice, but they sometimes lack the zip or punch of a real cocktail or beer to elicit that satisfied sensation. Drinking vinegar, a flavorful and tart beverage concentrate, is an excellent and refreshing replacement that can be added to filtered water (bubbles optional). Add a dose of tincture to the mix and you’ve got your own Asian fusion-inspired beverage that is both unique and satisfying.
10. Bubble Tea
Bubble tea (or milk tea) is a weird and wonderful beverage with gummy balls at the bottom of it. This sweet beverage has a fun mouthfeel and unique flavors you’d be hard-pressed to find elsewhere. Bubble teas are usually sealed with a plastic top and then punctured with a massive straw to slurp up the tapioca balls at the bottom. This straw is also big enough to squirt dose of tincture through, adding a boost of cannabinoids to your fun and flavorful beverage.
DRINKS
I just lost a plant. Sucks it was about 3.5 feet tall and for some reason it didn't drain after a storm. The plant was flooded and never recovered. Shiznit marjoram
Damn, hate hearing that!! Well, put that in the memory bank of things to watch out for..
Four Ways Edibles Can Hit You Faster

(Foxys_forest_manufacture/iStock)
Unlike smoking, edibles can be a waiting game. Ever hear of “start low and go slow” when it comes to infused treats? It’s the best mantra to follow when you’re new to the edibles market—take too much and you’ll have an unhappy high. Then again, take too little and you won’t feel anything at all.

However, for those who aren’t a fan of the “going slow” part, there there are a few ways your infused eats can affect you faster. Whether you need quick relief for medical reasons or you simply can’t afford to wait around, check out the following tips to for efficient edibles consumption.
Sublingual Tinctures

(temmuzcan/iStock)
A traditional edible, with its THC most often attached to a fat (such as the cannabutter in a pot brownie), must surpass many hurdles for its cannabinoids to reach the bloodstream. The gastrointestinal tract is long, and an edible must pass through the stomach, intestines, and liver as it’s absorbed, contending with acids and bile along the way before it reaches your bloodstream. A tincture is a quick and handy alternative ingestible that bypasses all of that extra biology to get your THC exactly where you need it to go—your bloodstream.
To take something sublingually means to take it under the tongue. Why is this beneficial for faster absorption? Under your tongue there exist mucus membranes and an abundance of capillaries, which allow cannabinoids to be absorbed more directly. A few drops under the tongue—held there for 5 to 10 minutes—will allow the effects of the THC in a tincture to come on much quicker, letting you better control the length and strength of your dosage. It should be noted that tinctures’ effects don’t last as long as edibles—think of fat-based edibles as the “extended release” version of cannabis consumables—and that can be either a good thing or a bad thing depending on your situation.
Infused Beverages

(kizilkayaphotos/iStock)
Though long overlooked, cannabis-infused drinks are starting to make a splash in the edibles market. Coffee, tonics, elixirs, sodas, lemonade, tea, juices—if you can dream it, you can probably find it on the shelves of a dispensary. Not only are cannabis-infused drinks delicious, they are a fantastic way to enjoy a faster-acting edible.

In liquid form, the cannabinoids within a drink have the potential to be absorbed (in small part) sublingually as you sip, while also passing through the digestive tract more quickly than a lipid-packed cannabis cookie. Some, such as a concentrated cannabis “shot,” are even formulated for this exact purpose, claiming edible “insta-highs” that will come on in a matter of minutes.
Just like traditional edibles, you can find all manner of drinkables, so no matter your cannabinoid or flavor of choice, there’s something for everyone.
Specially Formulated Edibles

(Courtesy of 1906)
There are also solid edibles that are being formulated to hit you quicker. One such example comes from 1906, a Colorado-based producer of specially formulated chocolates intended to deliver a fast-acting high. The company claims the effects of these “rapid delivery” edibles can be felt as soon as 15–20 minutes after consumption.
Peter Barsoom, founder of 1906, explained in a recent Forbes article that due to his “proprietary lipid microencapsulation process,” the THC is able to “bypass the stomach and get into the small intestine faster. It also allows more of the THC to get into the blood.”

1906 offers a range of chocolates formulated for specific outcomes. There’s Midnight for sleep, Go for energy, Pause for relaxation, and High Love for lust. In addition to a balanced formula of THC and CBD, each chocolate also features a selection of additional botanicals that promote the sensation the chocolate is geared towards. For example, Go contains a blend of coffee and other natural stimulants for a buzzier high.
Increased Metabolism

(PeopleImages/iStock)
The final method in quickly bringing about the effects of edibles is to increase your metabolism so that the infused product can break down in your digestive tract and deliver the cannabinoids to your bloodstream as swiftly as possible. There are some general rules of thumb for keeping one’s metabolism sharp, such as consuming plenty of protein, drinking lots of water, working out, avoiding a sedentary lifestyle, and getting plenty of solid sleep.

However, if you’re seeking a quick fix and not a complete overhaul of your lifestyle, the winning ticket may be in consuming caffeine or tea. Green tea and oolong tea have been shown in some studies to increase metabolism by 4–5%. Likewise, the caffeine in coffee has been shown to increase metabolism by 3–11%. The next time you indulge in a traditional edible, try taking it alongside a cup of coffee or green tea to encourage increased metabolism and thus speedy digestion of your tasty treat.
(Foxys_forest_manufacture/iStock)
Unlike smoking, edibles can be a waiting game. Ever hear of “start low and go slow” when it comes to infused treats? It’s the best mantra to follow when you’re new to the edibles market—take too much and you’ll have an unhappy high. Then again, take too little and you won’t feel anything at all.
However, for those who aren’t a fan of the “going slow” part, there there are a few ways your infused eats can affect you faster. Whether you need quick relief for medical reasons or you simply can’t afford to wait around, check out the following tips to for efficient edibles consumption.
Sublingual Tinctures
(temmuzcan/iStock)
A traditional edible, with its THC most often attached to a fat (such as the cannabutter in a pot brownie), must surpass many hurdles for its cannabinoids to reach the bloodstream. The gastrointestinal tract is long, and an edible must pass through the stomach, intestines, and liver as it’s absorbed, contending with acids and bile along the way before it reaches your bloodstream. A tincture is a quick and handy alternative ingestible that bypasses all of that extra biology to get your THC exactly where you need it to go—your bloodstream.
To take something sublingually means to take it under the tongue. Why is this beneficial for faster absorption? Under your tongue there exist mucus membranes and an abundance of capillaries, which allow cannabinoids to be absorbed more directly. A few drops under the tongue—held there for 5 to 10 minutes—will allow the effects of the THC in a tincture to come on much quicker, letting you better control the length and strength of your dosage. It should be noted that tinctures’ effects don’t last as long as edibles—think of fat-based edibles as the “extended release” version of cannabis consumables—and that can be either a good thing or a bad thing depending on your situation.
Infused Beverages
(kizilkayaphotos/iStock)
Though long overlooked, cannabis-infused drinks are starting to make a splash in the edibles market. Coffee, tonics, elixirs, sodas, lemonade, tea, juices—if you can dream it, you can probably find it on the shelves of a dispensary. Not only are cannabis-infused drinks delicious, they are a fantastic way to enjoy a faster-acting edible.
In liquid form, the cannabinoids within a drink have the potential to be absorbed (in small part) sublingually as you sip, while also passing through the digestive tract more quickly than a lipid-packed cannabis cookie. Some, such as a concentrated cannabis “shot,” are even formulated for this exact purpose, claiming edible “insta-highs” that will come on in a matter of minutes.
Just like traditional edibles, you can find all manner of drinkables, so no matter your cannabinoid or flavor of choice, there’s something for everyone.
Specially Formulated Edibles
(Courtesy of 1906)
There are also solid edibles that are being formulated to hit you quicker. One such example comes from 1906, a Colorado-based producer of specially formulated chocolates intended to deliver a fast-acting high. The company claims the effects of these “rapid delivery” edibles can be felt as soon as 15–20 minutes after consumption.
Peter Barsoom, founder of 1906, explained in a recent Forbes article that due to his “proprietary lipid microencapsulation process,” the THC is able to “bypass the stomach and get into the small intestine faster. It also allows more of the THC to get into the blood.”
1906 offers a range of chocolates formulated for specific outcomes. There’s Midnight for sleep, Go for energy, Pause for relaxation, and High Love for lust. In addition to a balanced formula of THC and CBD, each chocolate also features a selection of additional botanicals that promote the sensation the chocolate is geared towards. For example, Go contains a blend of coffee and other natural stimulants for a buzzier high.
Increased Metabolism
(PeopleImages/iStock)
The final method in quickly bringing about the effects of edibles is to increase your metabolism so that the infused product can break down in your digestive tract and deliver the cannabinoids to your bloodstream as swiftly as possible. There are some general rules of thumb for keeping one’s metabolism sharp, such as consuming plenty of protein, drinking lots of water, working out, avoiding a sedentary lifestyle, and getting plenty of solid sleep.
However, if you’re seeking a quick fix and not a complete overhaul of your lifestyle, the winning ticket may be in consuming caffeine or tea. Green tea and oolong tea have been shown in some studies to increase metabolism by 4–5%. Likewise, the caffeine in coffee has been shown to increase metabolism by 3–11%. The next time you indulge in a traditional edible, try taking it alongside a cup of coffee or green tea to encourage increased metabolism and thus speedy digestion of your tasty treat.
5 Ways to Get the Most Out of Your Bargain Cannabis
PATRICK BENNETT
May 3, 2016

April 20th is officially behind us, leaving fond memories of blissful celebration and cannabis consumption in its wake. Although the holiday has come and gone, there's still one thing you can enjoy post-4/20: bargain cannabis deals.
Dispensaries make sure to stock their shelves with lots of extra inventory during the month of April in anticipation of the 4/20 rush. Many of them turn their unsold product into bargain cannabis deals. From shake ounce specials to top shelf BOGOS’s (buy one get one free), there's bound to be an enticing deal at a dispensary near you.
So what are we to do with all of our newfound loot? Whether you're looking to get the most out of your cannabis or create a product that will last much longer than its current shelf life, here are five ways you can transform your bargain cannabis purchase into something great.
1. Make Butter for Edibles

What better way to make use of that big bag of bargain cannabis than to throw it into a batch of butter? Even if the quality of your product is second-rate, the butter you make is bound to saturate whatever cannabinoids are present. Butter is an easy way to get started with edibles as it gives you a pre-infused base ingredient to work with. It's also relatively easy to measure, making it a preferable option for dosing recipes. Making edibles requires a good amount of starting material, so bulk deals are perfect for this one. Even a good deal on a 1/4 ounce will land you with enough to infuse a recipe or two.
https://www.leafly.com/news/lifestyle/recipe-how-to-make-basic-cannabutter
2. Make Rosin

Many dispensaries offer specials on shake or popcorn nugs. These slightly less aesthetically desirable products are still packed with flavor and can make a great solventless hash oil. Using the rosin technique is a relatively easy and inexpensive way to turn cannabis and hash into a dabbable full melt hash oil. You can get started with a basic hair straightener and some parchment paper. Lots of dispensaries offer bargain deals on hash products that can also be pressed into rosin. The versatility of this method makes it a great tool to keep in mind when shopping for deals.
https://www.leafly.com/news/cannabis-101/how-to-make-rosin
3. Make Cannabis Capsules

Like butter for edibles, canna caps do not require superior quality cannabis flowers, but they do require quantity. Canna caps are a fun project to utilize when you have an extra inventory and want to get the most out of the cannabinoids while leaving the less desirable plant material behind. Coconut oil is a fantastic agent for making cannabis capsules and this DIY project doesn't cost much.
If you go the extra mile and buy a capsule making kit, you may have to shell out a bit more up front. But all you really need to get started with this project is some coconut oil, a package of 00 gelatin capsules, and a double boiler or slow cooker. A bit of lecithin doesn't hurt. The whole project takes just a few hours and leaves you with a handful of potent caps to be ingested after they've cooled or stored for later.
https://www.leafly.com/news/cannabis-101/how-to-make-your-own-cannabis-infused-capsules
4. Make a Tincture

This is another terrific way to utilize bulk cannabis deals without having to worry about the quality compromise. Tinctures have a long history of being a highly preferable method of ingesting cannabinoids, though their popularity took a steep decline with prohibition. With the rise of cannabis legalization, tincture enthusiasm has made a vigorous comeback. Tinctures can be as easy or as complex to prepare as you want them to be. In the most basic concoction, tinctures can be made with nothing more than some cannabis and a strong drinking alcohol. If made correctly and stored properly, quality tinctures can last for years. Whenever “too good to miss” deals pop up on bulk cannabis, think tinctures for the long run.
https://www.leafly.com/news/cannabis-101/the-great-wide-world-of-cannabis-concentrates
5. Make Joint Art

Never has there been a better way to utilize a solid bag of shake than to twist up a few joints to enjoy. The great thing about having extra inventory is that you can afford to let your creative side take the wheel with some joint art. Something as simple as trying to roll a cross joint is a great way to use a bargain bag of shake. Get creative and experiment with different styles of rolling. Grind it up and roll away!
PATRICK BENNETT
May 3, 2016
April 20th is officially behind us, leaving fond memories of blissful celebration and cannabis consumption in its wake. Although the holiday has come and gone, there's still one thing you can enjoy post-4/20: bargain cannabis deals.
Dispensaries make sure to stock their shelves with lots of extra inventory during the month of April in anticipation of the 4/20 rush. Many of them turn their unsold product into bargain cannabis deals. From shake ounce specials to top shelf BOGOS’s (buy one get one free), there's bound to be an enticing deal at a dispensary near you.
So what are we to do with all of our newfound loot? Whether you're looking to get the most out of your cannabis or create a product that will last much longer than its current shelf life, here are five ways you can transform your bargain cannabis purchase into something great.
1. Make Butter for Edibles
What better way to make use of that big bag of bargain cannabis than to throw it into a batch of butter? Even if the quality of your product is second-rate, the butter you make is bound to saturate whatever cannabinoids are present. Butter is an easy way to get started with edibles as it gives you a pre-infused base ingredient to work with. It's also relatively easy to measure, making it a preferable option for dosing recipes. Making edibles requires a good amount of starting material, so bulk deals are perfect for this one. Even a good deal on a 1/4 ounce will land you with enough to infuse a recipe or two.
https://www.leafly.com/news/lifestyle/recipe-how-to-make-basic-cannabutter
2. Make Rosin
Many dispensaries offer specials on shake or popcorn nugs. These slightly less aesthetically desirable products are still packed with flavor and can make a great solventless hash oil. Using the rosin technique is a relatively easy and inexpensive way to turn cannabis and hash into a dabbable full melt hash oil. You can get started with a basic hair straightener and some parchment paper. Lots of dispensaries offer bargain deals on hash products that can also be pressed into rosin. The versatility of this method makes it a great tool to keep in mind when shopping for deals.
https://www.leafly.com/news/cannabis-101/how-to-make-rosin
3. Make Cannabis Capsules
Like butter for edibles, canna caps do not require superior quality cannabis flowers, but they do require quantity. Canna caps are a fun project to utilize when you have an extra inventory and want to get the most out of the cannabinoids while leaving the less desirable plant material behind. Coconut oil is a fantastic agent for making cannabis capsules and this DIY project doesn't cost much.
If you go the extra mile and buy a capsule making kit, you may have to shell out a bit more up front. But all you really need to get started with this project is some coconut oil, a package of 00 gelatin capsules, and a double boiler or slow cooker. A bit of lecithin doesn't hurt. The whole project takes just a few hours and leaves you with a handful of potent caps to be ingested after they've cooled or stored for later.
https://www.leafly.com/news/cannabis-101/how-to-make-your-own-cannabis-infused-capsules
4. Make a Tincture
This is another terrific way to utilize bulk cannabis deals without having to worry about the quality compromise. Tinctures have a long history of being a highly preferable method of ingesting cannabinoids, though their popularity took a steep decline with prohibition. With the rise of cannabis legalization, tincture enthusiasm has made a vigorous comeback. Tinctures can be as easy or as complex to prepare as you want them to be. In the most basic concoction, tinctures can be made with nothing more than some cannabis and a strong drinking alcohol. If made correctly and stored properly, quality tinctures can last for years. Whenever “too good to miss” deals pop up on bulk cannabis, think tinctures for the long run.
https://www.leafly.com/news/cannabis-101/the-great-wide-world-of-cannabis-concentrates
5. Make Joint Art
Never has there been a better way to utilize a solid bag of shake than to twist up a few joints to enjoy. The great thing about having extra inventory is that you can afford to let your creative side take the wheel with some joint art. Something as simple as trying to roll a cross joint is a great way to use a bargain bag of shake. Get creative and experiment with different styles of rolling. Grind it up and roll away!
*****
Question: I want to try growing and have heard outdoors is the easiest way to go. Can you give some tips about planning for spring planting?
Answer: The first step is to make sure you don’t get arrested and have your crop confiscated by law enforcement. Start by boning up on the state and local laws for growing cannabis. Type this search into Google: “Can I grow marijuana legally in (your state)” to get started. Don’t forget to check your local ordinances too. Once you’ve done your research on those particulars, start thinking about your personal options.
Cannabis can be grown in your backyard, on the terrace or patio, in a greenhouse and of course, indoors.
You can employ any of these cultivation techniques to grow a great crop of cannabis in any of the climate zones found in legalized America.
Mark your calendar: Check your local county extension website for general gardening information, including the average dates for the last freeze of the spring and first frost of the fall. Cannabis can grow outdoors in seasons as short as 90 days, but special precautions must be taken.
If you will be growing marijuana in an area where you’re not familiar with how much sun will be available during the season, or other environmental factors such as exposure to wind, consider starting with a small experimental plot or keep your plants in containers so they can be temporarily placed in various areas before going full-bore with a permanent plan.
Simple tricks to help your plants get a good start on life[/paste:font]
1. You can start seeds indoors or you may be able to purchase clones (small plants) from a dispensary locally. Nurture seedlings or clones under artificial light until they are 12- to 36-inches tall before setting them outdoors. Setting out big plants early in the season can give you a big jump on the season.
2. Clones are cut from known female “mother” plants. They are guaranteed to be females. Planting clones is one of the best ways to ensure you are growing female plants. Female cannabis plants have a much higher cannabinoid profile than male plants.
3. If you want to grow from seed, purchase “feminized” cannabis seeds. Feminized seed should produce only female cannabis plants. Feminized plants produce big juicy flower buds. If you plant “regular” seeds, about half of the plants will be female and half male. Male plants are easy to spot and must be culled so that they do not pollinate females. (Watch this video about how to identify male plants.)
4. In cooler climates, plant early-flowering varieties of cannabis that can be harvested earlier in the fall.
5. If it is cold at night outdoors, grow plants in containers and move them indoors at night. Just a few degrees of extra warmth at night will speed growth. If you want to grow plants in an outdoor garden, put them in a raised bed. Raised beds warm earlier in the spring and stay warm a month longer in the fall. Warmer roots will help transplanted cannabis grow faster.
6. Cover cannabis plants with a plastic cloche or makeshift plastic cold frame to protect from cold spring rains and cool nights. Make sure to include ventilation for this homemade greenhouse to supply fresh air to the plant.
The "Aquafarm"
This system was developed and popularized by General Hydroponics nearly twenty years ago as their first product. The original design, which is still in production, is known as the "Aquafarm". In recent years it has seen new embodiments named the "Watergarden" (a decorative version), the "Powergrower" (a revised version of the watergarden), the "Waterfarm" (a square version), and the "Megafarm" (a 20 gallon version). A similar bucket based system is also being sold by another company under the name of the "Universal Garden". These units are extremely reliable, easy to operate and are very simple to construct. All of these systems retail in the 50 dollar per unit range. This document will show you how to build this type of system for very low cost.
This system will accommodate several small plants or (as best suited for) hold one large plant. I personally have seen a 12 foot tall tree being grown in an aquafarm, as well as a very large banana tree, both indoors. The plants are grown in a chamber suspended above a reservoir (basically a bucket within a bucket) that holds the nutrient solution. A small aquarium pump powers a simple pumping mechanism which delivers nutrients from the reservoir up to the top of the growth chamber, where it trickles back down through the root zone and into the reservoir. This system is so effective it is not uncommon for tomato plants to grow over 4 inches per day! This system gives huge yields! I HIGHLY recommend this unit for the first time hydroponic grower.
Parts List to make one "Aquafarm"
Item
Cost
Notes
1 ea. 5 gallon bucket
$4.00
Get this at just about any hardware store or scrounge it - they are everywhere. Make sure you use a "standard" pail. See the detail drawings .
1 ea 3.5 gallon bucket
$4.00- 6.00
This is the most difficult part to find. This bucket is the same diameter as the 5 gallon size but several inches shorter. The criteria for this bucket is that it nests inside the 5 gallon bucket. See detail drawings.
1 ea. ½" rubber grommet
$0.69
You'll find this item in the electrical supply part of your hardware store. The ½" measurement refers to the inside diameter of the rubber grommet. See the detail drawings.
1 ea. 14" long piece of schedule 125 or 200 ½" dia. PVC pipe
$0.60 per ten feet
You'll find this near the sprinkler supply stuff in the plumbing section of the hardware store.
1 ea. 14" long white polyethylene tubing.
3/8" Outside diameter, 1/4" Inside diameter
$0.10 per foot
Once again, you'll find this in the plumbing section of your hardware store. The white polyethylene tubing is not a must, but it works the best (I have used 3/8" O.D. clear aquarium tubing). What is most important is the outside diameter, it must be small enough to fit inside the "tee". Secondly an inside diameter of 1/4" makes the pump perform best. The pump I made with the aquarium tubing (which had a larger inside diameter) did not perform as well.
1 ea. 15" long, 5/16" outside diameter vinyl tubing
$0.10 - $0.20 per foot
Plumbing section, right next to the poly tubing. Once again, you just have to get close. The important qualities of this part are first, the outside diameter of the tubing and secondly flexibility. 5/16" tubing makes a nice snug fit into the "tee", unfortunately this size tubing is not common. You can use 3/8" O.D. tubing and wrap it with tape to make a tight fit into the "tee". The tubing must be flexible enough to be bent into a ring without kinking.
1 ea. ½" Raindrip barbed "tee"
$0.55
Raindrip is a popular brand of drip irrigation product. You should be able to find this in the sprinkler section of you local hardware store. If you cannot find this part you can order it from one of the suppliers that I have listed. Also you may study the detail drawing that I have provided and make a substitution.
1 ea. ½" Raindrip barbed elbow
$0.55
Same thing as above, but an elbow.
1 ea. 10" long ½" I.D. tubing
$0.40 per foot
You'll need to find a transparent tubing as this is used to indicate the level of solution in the reservoir.
1 ea. 16" long 3/16" O.D. aquarium air tubing
$0.80 per 3 feet
You'll find this at the pet store, one three foot length will make two pump columns.
1 length of 3/16" I.D. aquarium pump tubing
$0.20 per foot
Pet store
1 small aquarium pump
$3.00 to $40.00
You can use any size aquarium pump. I have successfully used the smallest $3.00 cheapo pump. Although, I do recommend buying a pump a few notches up from bottom of the line. The small pumps provide enough air to run the system but they only last for about a year and they usually start humming after a few months. Another benefit to buying a larger air pump - the increased output is enough to run more that one Aquafarm. I have powered up to six aquafarms on one "mega" 30 dollar aquarium pump.
Assembly Instructions
1. Remove the handles from the buckets.

2. Drill drainage holes in the bottom of the 3.5 gallon bucket.
The size of the drainage holes is not critical, just keep them small enough to keep your growing medium from falling into the nutrient reservoir. I usually drill holes somewhere around 5/32" in diameter. Also, be sure to drill enough holes for adequate drainage. I usually drill about 30 to 40 holes in a pattern similar to the one pictured to the right.


3. Drill the pump column hole in the bottom of the 3.5 gallon bucket. Use a 13/16" diameter spade drill bit to do this. Drill this hole approximately two inches away from the outer edge of the bucket. Refer to the drawing at right for placement. Pictured at left you will see a diagram of the two types of spade bit available. Bit "A" has pointed outer teeth where bit "B" does not. I have found that type "A" works far better for drilling holes in plastic pails. The two outer teeth cut through the thickness of the pail before the main cutter engages. This makes for an easy cut resulting in a perfectly circular hole with no irregularities. Finally, when drilling the hole proceed with light pressure and, if you have a variable speed drill, a slow drill speed. Be ready to stop the drill as you break through the bucket, if you continue to drill after you have pierced the bucket, the bit will rattle in the hole and "hog" it out into a larger, triangular shaped hole. A perfect hole in the 5 gallon bucket is necessary for the grommet to seal properly, so it pays to practice here where it really doesn't count.

4. Drill the grommet hole in the side of the five gallon bucket. Drill this hole on the side of the bucket as close to the bottom as possible. Be careful not to pierce the bottom web of the bucket. Unfortunately I can't give you the exact size of the hole to drill because there are several types of rubber grommets which vary slightly in size. You will need to measure your grommet and determine what size hole to drill (this should be in the ballpark of 3/4" or 13/16"). I suggest that you drill a test hole in something other than your bucket and check the fit of the grommet. The diagram at right shows the 5 gallon bucket with the hole drilled, the rubber grommet fitted and the elbow pressed into place.
5. Insert the rubber grommet into the 5 gallon bucket. It is important that the grommet forms a water tight seal with the bucket, so you may have to remove any burrs left from the drilling process with a utility knife.
6. Insert the elbow into the rubber grommet. When you press the elbow into the grommet hold your hand on the grommets' back side to keep it from pushing through into the bucket. Insert the elbow about half way into the grommet so that is still has room to swivel. When you're done with this step you should have something that looks like the drawing above.
7. Attach the 10" long, ½" I.D. tube to the elbow. Attach this tubing to the part of the elbow on the outside of the bucket. This tubing will serve to indicate the level of nutrient in the Aquafarm. When it's time to change the solution it aslo acts as a drain, you simply swivel it down and let the solution drain out!

8. Insert the 3.5 gallon bucket into the 5 gallon bucket. At this point you have completed the body of the Aquafarm and you should have something that looks like the drawing at right.

9. Cut the pump column support tube. Following the diagram at right, cut the 1/2" pvc pipe to 14" in length measuring from the tip of the bevel. Make the cut at appoximately 45 degrees.
10. Insert the pump column support tube (from previous step) into it's hole (from step 3) in the bottom of the 3.5 gallon bucket. Insert it beveled end first and push it all the way in, until it bottoms out in the nutrient reservoir.
11. Cut the tee as shown. A small hacksaw works best. Discard the two small pieces.


12. Cut and drill the drip ring. Cut the 5/16" O.D. tubing to 15 inches long and drill seven 1/8" diameter holes equally spaced along its length (refer to the diagrams below).
13. Insert the drip ring into the "tee". Press the ends of the tubing into the cut ends of the "tee". Make sure the holes in the tubing point towards the stem of the "tee". Set this aside for later.


14. Heat the 3/16" aquarium tubing. Heat the tubing about 1" from the end until it is soft enough to bend. Rotate it just over the tip of a flame so it is evenly heated, just a few seconds will do the trick.
15. Bend the tubing. Make the bend to just a little less than 45 degrees. It is important that you do not kink the tubing as air must flow through it

16. Trim the tubing. Bevel the end of the tubing as shown. The length of the bent portion of the tubing should be about 1/4" long.

17. Drill the hole in the 3/8" O.D. pump column tube. Drill a 3/16" diameter hole in the side of the pump column tube, approximately 1 inch from the end.

18. Assemble the pump column. Insert the bent end of the 3/16" aquarium tubing into the hole in the pump column tube. Seal the joint with a non water soluable glue. Hot glue is wonderful, but something like epoxy works too. Spot glue the aquarium tube to the pump column tube in several places too.

19. Attach the pump column to the drip ring. Slip the drip ring over the pump column, don't glue it. Voila! You've completed the pump column!
20. Final step. Insert the pump column assembly into the pvc support tube. You should now have somthing like the drawing below. Congratulations on completing your first "aquafarm".

How to use your hydroponic unit.
Now comes the fun part! Growing!
First you need to select a growing medium. There are a whole host of different mediums that have been used over time. They include rockwool, sawdust, peat, pearlite, vermiculite, sand, gravel, and various inert mixtures. You could probably use most of these mediums successfully in this system but let me boil it down to two choices for you - pearlite and expanded clay pellets (baypour, grow rocks, geolite). Pearlite it great because it's dirt cheap, about 10 dollars for 4 cubic feet. That will fill over nine systems! Once your crop is done you can just throw it away and start with fresh pearlite. You don't have to worry about cleaning and stearlizing your medium. The clay pellets perform well too, they are THE choice for commercial hydroponic farmers in Holland (the land of hydroponics and greenhouses). They last quite a long time and they are garunteed to not affect your nutrient balance. The drawback to using the expanded clay is that it is expensive. They run 10 dollars for 3.5 gallons - that's nine times more expensive! Since you'll not be discarding the clay pellets I reccomend using them for long term crops.
Now that you have your medium in hand, along with your plants and your newly made "Aquafarm", we're ready to have fun. First off, the reason that we didn't glue the drip ring onto the pump column is so we could take it off and get it out of our way when we fill the growing chamber with medium and plants! So.....pop that sucker off now! Next, fill the growing chamber with your medium. Make sure not to fill it any higher that the level of the drip ring. You may adjust the level of the pump column and drip ring by moving the pvc support tube up and down (ahaaaa!!....that's why it fit so tighly in the hole) as necessary. If you are using pearlite I suggest thay you pre-wet it with plain old water. Give it a pretty good soaking with a hose and let the excess water drain off (be sure to dump the excess water out of the nutrient reservoir).
If you are transplanting from soil, gently wash as much of the soil out of the root ball as possible. It is not necessary to remove all of the soil, just as much as possilbe without mauling the root system. If you have started your plants in rockwool cubes, vegtable plugs or peat pellets just plant the whole thing.
Next, find that drip ring and hold in its place for a second. Use the exact science of guessing and get an idea of where the center of the ring is in relation to the bucket. Put the drip ring down and dig a hole wherever you determined the center to be. Gently place your plant into the hole, evenly distributing its roots. Backfill the hole. Find that drip ring again. Unplug one end of the ring from the tee. Put the ring back onto the pump column, wrap the ring around the stem of the plant, and plug it back into the tee.
Finally, fill the reservoir with 2.5 gallons of nutrient solution. Just slowly pour it right into the growing chamber. Connect the aquarium pump to the 3/16" tube on the pump column and plug the pump in. The column should immediatly start pumping nutrient up out of the reservoir and drip it around the base of the plant. It is best that you use a simple light timer to turn the pump on during daylight hours and off during the night time.
Happy Hydroponic Gardening!
This system was developed and popularized by General Hydroponics nearly twenty years ago as their first product. The original design, which is still in production, is known as the "Aquafarm". In recent years it has seen new embodiments named the "Watergarden" (a decorative version), the "Powergrower" (a revised version of the watergarden), the "Waterfarm" (a square version), and the "Megafarm" (a 20 gallon version). A similar bucket based system is also being sold by another company under the name of the "Universal Garden". These units are extremely reliable, easy to operate and are very simple to construct. All of these systems retail in the 50 dollar per unit range. This document will show you how to build this type of system for very low cost.
This system will accommodate several small plants or (as best suited for) hold one large plant. I personally have seen a 12 foot tall tree being grown in an aquafarm, as well as a very large banana tree, both indoors. The plants are grown in a chamber suspended above a reservoir (basically a bucket within a bucket) that holds the nutrient solution. A small aquarium pump powers a simple pumping mechanism which delivers nutrients from the reservoir up to the top of the growth chamber, where it trickles back down through the root zone and into the reservoir. This system is so effective it is not uncommon for tomato plants to grow over 4 inches per day! This system gives huge yields! I HIGHLY recommend this unit for the first time hydroponic grower.
Parts List to make one "Aquafarm"
Item
Cost
Notes
1 ea. 5 gallon bucket
$4.00
Get this at just about any hardware store or scrounge it - they are everywhere. Make sure you use a "standard" pail. See the detail drawings .
1 ea 3.5 gallon bucket
$4.00- 6.00
This is the most difficult part to find. This bucket is the same diameter as the 5 gallon size but several inches shorter. The criteria for this bucket is that it nests inside the 5 gallon bucket. See detail drawings.
1 ea. ½" rubber grommet
$0.69
You'll find this item in the electrical supply part of your hardware store. The ½" measurement refers to the inside diameter of the rubber grommet. See the detail drawings.
1 ea. 14" long piece of schedule 125 or 200 ½" dia. PVC pipe
$0.60 per ten feet
You'll find this near the sprinkler supply stuff in the plumbing section of the hardware store.
1 ea. 14" long white polyethylene tubing.
3/8" Outside diameter, 1/4" Inside diameter
$0.10 per foot
Once again, you'll find this in the plumbing section of your hardware store. The white polyethylene tubing is not a must, but it works the best (I have used 3/8" O.D. clear aquarium tubing). What is most important is the outside diameter, it must be small enough to fit inside the "tee". Secondly an inside diameter of 1/4" makes the pump perform best. The pump I made with the aquarium tubing (which had a larger inside diameter) did not perform as well.
1 ea. 15" long, 5/16" outside diameter vinyl tubing
$0.10 - $0.20 per foot
Plumbing section, right next to the poly tubing. Once again, you just have to get close. The important qualities of this part are first, the outside diameter of the tubing and secondly flexibility. 5/16" tubing makes a nice snug fit into the "tee", unfortunately this size tubing is not common. You can use 3/8" O.D. tubing and wrap it with tape to make a tight fit into the "tee". The tubing must be flexible enough to be bent into a ring without kinking.
1 ea. ½" Raindrip barbed "tee"
$0.55
Raindrip is a popular brand of drip irrigation product. You should be able to find this in the sprinkler section of you local hardware store. If you cannot find this part you can order it from one of the suppliers that I have listed. Also you may study the detail drawing that I have provided and make a substitution.
1 ea. ½" Raindrip barbed elbow
$0.55
Same thing as above, but an elbow.
1 ea. 10" long ½" I.D. tubing
$0.40 per foot
You'll need to find a transparent tubing as this is used to indicate the level of solution in the reservoir.
1 ea. 16" long 3/16" O.D. aquarium air tubing
$0.80 per 3 feet
You'll find this at the pet store, one three foot length will make two pump columns.
1 length of 3/16" I.D. aquarium pump tubing
$0.20 per foot
Pet store
1 small aquarium pump
$3.00 to $40.00
You can use any size aquarium pump. I have successfully used the smallest $3.00 cheapo pump. Although, I do recommend buying a pump a few notches up from bottom of the line. The small pumps provide enough air to run the system but they only last for about a year and they usually start humming after a few months. Another benefit to buying a larger air pump - the increased output is enough to run more that one Aquafarm. I have powered up to six aquafarms on one "mega" 30 dollar aquarium pump.
Assembly Instructions
1. Remove the handles from the buckets.
2. Drill drainage holes in the bottom of the 3.5 gallon bucket.
The size of the drainage holes is not critical, just keep them small enough to keep your growing medium from falling into the nutrient reservoir. I usually drill holes somewhere around 5/32" in diameter. Also, be sure to drill enough holes for adequate drainage. I usually drill about 30 to 40 holes in a pattern similar to the one pictured to the right.
3. Drill the pump column hole in the bottom of the 3.5 gallon bucket. Use a 13/16" diameter spade drill bit to do this. Drill this hole approximately two inches away from the outer edge of the bucket. Refer to the drawing at right for placement. Pictured at left you will see a diagram of the two types of spade bit available. Bit "A" has pointed outer teeth where bit "B" does not. I have found that type "A" works far better for drilling holes in plastic pails. The two outer teeth cut through the thickness of the pail before the main cutter engages. This makes for an easy cut resulting in a perfectly circular hole with no irregularities. Finally, when drilling the hole proceed with light pressure and, if you have a variable speed drill, a slow drill speed. Be ready to stop the drill as you break through the bucket, if you continue to drill after you have pierced the bucket, the bit will rattle in the hole and "hog" it out into a larger, triangular shaped hole. A perfect hole in the 5 gallon bucket is necessary for the grommet to seal properly, so it pays to practice here where it really doesn't count.
4. Drill the grommet hole in the side of the five gallon bucket. Drill this hole on the side of the bucket as close to the bottom as possible. Be careful not to pierce the bottom web of the bucket. Unfortunately I can't give you the exact size of the hole to drill because there are several types of rubber grommets which vary slightly in size. You will need to measure your grommet and determine what size hole to drill (this should be in the ballpark of 3/4" or 13/16"). I suggest that you drill a test hole in something other than your bucket and check the fit of the grommet. The diagram at right shows the 5 gallon bucket with the hole drilled, the rubber grommet fitted and the elbow pressed into place.
5. Insert the rubber grommet into the 5 gallon bucket. It is important that the grommet forms a water tight seal with the bucket, so you may have to remove any burrs left from the drilling process with a utility knife.
6. Insert the elbow into the rubber grommet. When you press the elbow into the grommet hold your hand on the grommets' back side to keep it from pushing through into the bucket. Insert the elbow about half way into the grommet so that is still has room to swivel. When you're done with this step you should have something that looks like the drawing above.
7. Attach the 10" long, ½" I.D. tube to the elbow. Attach this tubing to the part of the elbow on the outside of the bucket. This tubing will serve to indicate the level of nutrient in the Aquafarm. When it's time to change the solution it aslo acts as a drain, you simply swivel it down and let the solution drain out!
8. Insert the 3.5 gallon bucket into the 5 gallon bucket. At this point you have completed the body of the Aquafarm and you should have something that looks like the drawing at right.
9. Cut the pump column support tube. Following the diagram at right, cut the 1/2" pvc pipe to 14" in length measuring from the tip of the bevel. Make the cut at appoximately 45 degrees.
10. Insert the pump column support tube (from previous step) into it's hole (from step 3) in the bottom of the 3.5 gallon bucket. Insert it beveled end first and push it all the way in, until it bottoms out in the nutrient reservoir.
11. Cut the tee as shown. A small hacksaw works best. Discard the two small pieces.
12. Cut and drill the drip ring. Cut the 5/16" O.D. tubing to 15 inches long and drill seven 1/8" diameter holes equally spaced along its length (refer to the diagrams below).
13. Insert the drip ring into the "tee". Press the ends of the tubing into the cut ends of the "tee". Make sure the holes in the tubing point towards the stem of the "tee". Set this aside for later.
14. Heat the 3/16" aquarium tubing. Heat the tubing about 1" from the end until it is soft enough to bend. Rotate it just over the tip of a flame so it is evenly heated, just a few seconds will do the trick.
15. Bend the tubing. Make the bend to just a little less than 45 degrees. It is important that you do not kink the tubing as air must flow through it
16. Trim the tubing. Bevel the end of the tubing as shown. The length of the bent portion of the tubing should be about 1/4" long.
17. Drill the hole in the 3/8" O.D. pump column tube. Drill a 3/16" diameter hole in the side of the pump column tube, approximately 1 inch from the end.
18. Assemble the pump column. Insert the bent end of the 3/16" aquarium tubing into the hole in the pump column tube. Seal the joint with a non water soluable glue. Hot glue is wonderful, but something like epoxy works too. Spot glue the aquarium tube to the pump column tube in several places too.
19. Attach the pump column to the drip ring. Slip the drip ring over the pump column, don't glue it. Voila! You've completed the pump column!
20. Final step. Insert the pump column assembly into the pvc support tube. You should now have somthing like the drawing below. Congratulations on completing your first "aquafarm".
How to use your hydroponic unit.
Now comes the fun part! Growing!
First you need to select a growing medium. There are a whole host of different mediums that have been used over time. They include rockwool, sawdust, peat, pearlite, vermiculite, sand, gravel, and various inert mixtures. You could probably use most of these mediums successfully in this system but let me boil it down to two choices for you - pearlite and expanded clay pellets (baypour, grow rocks, geolite). Pearlite it great because it's dirt cheap, about 10 dollars for 4 cubic feet. That will fill over nine systems! Once your crop is done you can just throw it away and start with fresh pearlite. You don't have to worry about cleaning and stearlizing your medium. The clay pellets perform well too, they are THE choice for commercial hydroponic farmers in Holland (the land of hydroponics and greenhouses). They last quite a long time and they are garunteed to not affect your nutrient balance. The drawback to using the expanded clay is that it is expensive. They run 10 dollars for 3.5 gallons - that's nine times more expensive! Since you'll not be discarding the clay pellets I reccomend using them for long term crops.
Now that you have your medium in hand, along with your plants and your newly made "Aquafarm", we're ready to have fun. First off, the reason that we didn't glue the drip ring onto the pump column is so we could take it off and get it out of our way when we fill the growing chamber with medium and plants! So.....pop that sucker off now! Next, fill the growing chamber with your medium. Make sure not to fill it any higher that the level of the drip ring. You may adjust the level of the pump column and drip ring by moving the pvc support tube up and down (ahaaaa!!....that's why it fit so tighly in the hole) as necessary. If you are using pearlite I suggest thay you pre-wet it with plain old water. Give it a pretty good soaking with a hose and let the excess water drain off (be sure to dump the excess water out of the nutrient reservoir).
If you are transplanting from soil, gently wash as much of the soil out of the root ball as possible. It is not necessary to remove all of the soil, just as much as possilbe without mauling the root system. If you have started your plants in rockwool cubes, vegtable plugs or peat pellets just plant the whole thing.
Next, find that drip ring and hold in its place for a second. Use the exact science of guessing and get an idea of where the center of the ring is in relation to the bucket. Put the drip ring down and dig a hole wherever you determined the center to be. Gently place your plant into the hole, evenly distributing its roots. Backfill the hole. Find that drip ring again. Unplug one end of the ring from the tee. Put the ring back onto the pump column, wrap the ring around the stem of the plant, and plug it back into the tee.
Finally, fill the reservoir with 2.5 gallons of nutrient solution. Just slowly pour it right into the growing chamber. Connect the aquarium pump to the 3/16" tube on the pump column and plug the pump in. The column should immediatly start pumping nutrient up out of the reservoir and drip it around the base of the plant. It is best that you use a simple light timer to turn the pump on during daylight hours and off during the night time.
Happy Hydroponic Gardening!
Simple Hydroponics, The Wick System
Contributed by: Tricky Gnome

The Wick System is probably the simplest hydroponic system.It is a passive system by virtue of there being no moving parts and where the nutrient solution remaining static in one place.The solution is taken out of a container and led to the plants? roots through the growing medium by capillary action, conducted through one or more wicks.Normally in this system a mixture of of various growing media are used in order to increase to the utmost their capillary capacity.This system contains conventional soil supplemented with fertilizers, with plain water in a container solely for irrigation.As this very compact hydroponic system is so versatile especially in small home gardens for growing in small spaces as it can be set up on a very small scale.This system?s biggest limitation occurs with large plants which need large amounts of water which the wicks are unable to supply in adequate amounts.In this case, the number of wicks has to be increased to supply demand for water!Of course adding pumps would be advantages but this is just an example of the simplest method you can add your own thoughts and idea's at any stage.
Contributed by: Tricky Gnome
The Wick System is probably the simplest hydroponic system.It is a passive system by virtue of there being no moving parts and where the nutrient solution remaining static in one place.The solution is taken out of a container and led to the plants? roots through the growing medium by capillary action, conducted through one or more wicks.Normally in this system a mixture of of various growing media are used in order to increase to the utmost their capillary capacity.This system contains conventional soil supplemented with fertilizers, with plain water in a container solely for irrigation.As this very compact hydroponic system is so versatile especially in small home gardens for growing in small spaces as it can be set up on a very small scale.This system?s biggest limitation occurs with large plants which need large amounts of water which the wicks are unable to supply in adequate amounts.In this case, the number of wicks has to be increased to supply demand for water!Of course adding pumps would be advantages but this is just an example of the simplest method you can add your own thoughts and idea's at any stage.
What is Soil?
While this may appear to be a very basic question it is in actuality a very complex topic.
Traditional soils have five basic components:
Soil air refers to the gaseous phase of soil which is neither liquid nor solid. It is estimated that 25% of any given soil is composed of air that is a gaseous medium.
Water:
Soil Water or Soil Solution is the liquid phase of the soil. Soil water contains dissolved salts and chemicals (in the form of ions) that are free-floating and not attached to any solid particles (mineral surfaces). Water also comprises an estimated 25% of any given soil sample.
Mineral Particles:
The mineral part of soil is composed of varying amounts of sand, silt, and clay. On the whole these particles are not derived from materials that were once living, meaning that the minerals are inorganic. The characteristics of mineral particles greatly influence soil behavior and management needs.
Sand: The soil component sand is mainly small rock fragments and hard minerals such as quartz. It contains few plant nutrients and soils high in sand can be particularly arid due to high drainage low nutrient ratios.
Of the three types of soil particles, sand is the largest in size and provides the following benefits if used as a soil component in moderate amounts:
Improves drainage, aeration, and tilling quality.
Silt: Silt consists of ground up sand and rock minerals. Silt like sand contains few nutrients, but it can have nutrients clinging to its surface.
Silt is between sand and clay in terms of size.
Clay: Clays are aluminum-silicate minerals that also have varying amounts of nutrients important to plants such as potassium, calcium, magnesium, iron, etc. A good part of a soil's native fertility can come from its clay portion.
Clay particles are the smallest of the three soil mineral components and they have a negative charge which makes them attract all positive charged plant nutrients. This helps trace elements stay in the soil rather than being constantly leached away.
Too much clay can result in harder tilling, compaction (Lack of air) & poor drainage.
Organic Matter:
Organic matter in the soil includes plant and animal residues at various stages of decomposition. There are also the cells and tissues of soil organisms and substances synthesised by plant roots and soil microorganisms. It is estimated that organic matter makes up about 5% of most common soils. Despite this small proportion, organic matter has a remarkable effects on soil behavior and crop yields. Organic matter in the soil is frequently in the form of humus, partially decomposed organic matter that has become dark and crumbly and continues decomposing at a slow rate.
Biology:
While not actually a component of soil in the traditional sense, that is, mineral based there is a huge living component of soil. This includes the microorganisms in the soil, the earth worms and the myriad of other living things which help process organic and inorganic matter into soil. If we are to look at soil as a Gestalt then we must include the soil biology.
Here is a good link explaining what soil is which can be used for further reading if desired:
Four Major Components of Soil
If anyone finds any broken links in the FAQ then please do not hesitate to PM the author and get them to update or remove the link/links.
Peace...The Penguin.
While this may appear to be a very basic question it is in actuality a very complex topic.
Traditional soils have five basic components:
- Air
- Water
- Mineral Particles
- Organic Matter
- Biology
Soil air refers to the gaseous phase of soil which is neither liquid nor solid. It is estimated that 25% of any given soil is composed of air that is a gaseous medium.
Water:
Soil Water or Soil Solution is the liquid phase of the soil. Soil water contains dissolved salts and chemicals (in the form of ions) that are free-floating and not attached to any solid particles (mineral surfaces). Water also comprises an estimated 25% of any given soil sample.
Mineral Particles:
The mineral part of soil is composed of varying amounts of sand, silt, and clay. On the whole these particles are not derived from materials that were once living, meaning that the minerals are inorganic. The characteristics of mineral particles greatly influence soil behavior and management needs.
Sand: The soil component sand is mainly small rock fragments and hard minerals such as quartz. It contains few plant nutrients and soils high in sand can be particularly arid due to high drainage low nutrient ratios.
Of the three types of soil particles, sand is the largest in size and provides the following benefits if used as a soil component in moderate amounts:
Improves drainage, aeration, and tilling quality.
Silt: Silt consists of ground up sand and rock minerals. Silt like sand contains few nutrients, but it can have nutrients clinging to its surface.
Silt is between sand and clay in terms of size.
Clay: Clays are aluminum-silicate minerals that also have varying amounts of nutrients important to plants such as potassium, calcium, magnesium, iron, etc. A good part of a soil's native fertility can come from its clay portion.
Clay particles are the smallest of the three soil mineral components and they have a negative charge which makes them attract all positive charged plant nutrients. This helps trace elements stay in the soil rather than being constantly leached away.
Too much clay can result in harder tilling, compaction (Lack of air) & poor drainage.
Organic Matter:
Organic matter in the soil includes plant and animal residues at various stages of decomposition. There are also the cells and tissues of soil organisms and substances synthesised by plant roots and soil microorganisms. It is estimated that organic matter makes up about 5% of most common soils. Despite this small proportion, organic matter has a remarkable effects on soil behavior and crop yields. Organic matter in the soil is frequently in the form of humus, partially decomposed organic matter that has become dark and crumbly and continues decomposing at a slow rate.
Biology:
While not actually a component of soil in the traditional sense, that is, mineral based there is a huge living component of soil. This includes the microorganisms in the soil, the earth worms and the myriad of other living things which help process organic and inorganic matter into soil. If we are to look at soil as a Gestalt then we must include the soil biology.
Here is a good link explaining what soil is which can be used for further reading if desired:
Four Major Components of Soil
If anyone finds any broken links in the FAQ then please do not hesitate to PM the author and get them to update or remove the link/links.
Peace...The Penguin.
I'm a beginner and need a simple and easy soilless mix.
From your local Hydro store get some Promix, vermiculite and Perlite.
Mix in the portions of 50% promix, 35% perlite and 15% vermiculite. This mix is nice and loose and will promote great and fast root growth. All though it doesn't retain water that well it is good for beginners because it will help safeguard against over watering. Plus if a beginner runs into problems with PH or over fertilization the properties of this soil make it quick and easy to remedy.
How do I make a Marijuana Tincture?
Contributed by: MarcusVonBueler
Thanks to: ixnay007
A marijuana tincture is a solution of alcohol and THC. Tinctures are a much more concentrated version of the traditional drink known as "The Green Dragon.". The higher the ratio of alcohol to weed is, the greater the potential for THC to be drawn out is. And since all that extra grain alcohol isn't appetizing to anybody but mental patients,I always evaporate off the excess.
How do I make it?
(ixnay007) When you have green dragon that you aren't going to drink, you need to remember to store it in cool very dark places, as alcohol-extracted THC is fairly unstable, and will degrade quickly in light or when exposed to heat.
You can drink it straight, or mix it. The potency is high, and is similar to eating oil-extracted THC, yet is different at the same time. You'll just have to try it!
Contributed by: MarcusVonBueler
Thanks to: ixnay007
A marijuana tincture is a solution of alcohol and THC. Tinctures are a much more concentrated version of the traditional drink known as "The Green Dragon.". The higher the ratio of alcohol to weed is, the greater the potential for THC to be drawn out is. And since all that extra grain alcohol isn't appetizing to anybody but mental patients,I always evaporate off the excess.
How do I make it?
- If you want to make a marijuana tincture, you should use one whole bottle of everclear (a fifth) and at least an eighth of buds, but no more than a half ounce or you will be wasting weed.
(ixnay007) You need to use PGA (pure grain alcohol) because the more water present in your alcohol, the more nasty stuff ends up in your green dragon like tanins, etc (it'll end up brown).
- Grind the buds up well before mixing them with the alcohol.
- Let the mixture steep (covered) for anywhere from a week to a month. Shake the covered container (I use Tupperware, but the original bottle will work fine) once or twice a day, and remove the cover once a day to prevent any gases from building up. Beware though, if you steep for a month, (and I've known people who steep for longer) chances are the drink is just going to knock you out cold.
- After the mixture has been steeped to your satisfaction, strain out the plant material with cheese cloth (squeeze the cloth to get the remaining liquid out)
- Pour the liquid in a saucepan and heat on LOW heat using either a hot plate or an electrical stove. If you try doing this with a gas stove, you will burn your nuts off. Just continue heating until it has evaporated down to the amount of liquid you want.
(ixnay007) When you have green dragon that you aren't going to drink, you need to remember to store it in cool very dark places, as alcohol-extracted THC is fairly unstable, and will degrade quickly in light or when exposed to heat.
You can drink it straight, or mix it. The potency is high, and is similar to eating oil-extracted THC, yet is different at the same time. You'll just have to try it!
Grow Room Design Examples/Ideas
Information gathered from "www.progressive-growth.com"
These are some samples of rooms designed for our customers.
Come in the store or email your floor plan and let one of our experts help design the perfect room for you
2 light air cooled
In this room we are combining the carbon filter & exhaust system into air cooled lights.
Blowing the air through the lights instead of sucking through them assures that
no contaminated air (smell) gets out of the room.
 PARTS LIST:
4 x 8 Flood Table
40 Gallon Reservoir w/ Lid
Mag Drive 350 w/ Hoses & Fittings
24 Hour Digital Timer (pump)
Carbon Can 100 (840cfm)
Vortex 8" (747cfm)
2 - Light Cannon 8" Reflectors
25' 8" Flexible Ducting
2 - HPS Light Kits in Vented Box
Timer Board (for lights)
2 - 16" Oscillating Fans
Roll of Black n White Poly
Editors Notes: I disagree with the amount of moisture that would be pumped past the bulbs in this manor and see that this could cause troubles down the track.
4 light flood & drain
This system is easy to set up.
Just follow the diagram above when assembling the tables and hoses.
Designed for the "Sea of Green" method.
 Parts List
4 - ELD SUNRAY REFLECTORS
8" HURRICANE FAN
COCO CAN 1000
25' - 8" FLEXIBLE DUCTING
2 - 4X8 FLOOD TABLES
100 GALLON RESERVOIR
MAG DRIVE 350 PUMP
24 HOUR TIMER (FOR PUMP)
2 - ¾" THRUHULLS
2 - ¾" ELBOWS
2 - ¾" TEES
2 - ¾" VALVE'S
15' ¾" YELLOW HOSE
NUTRADIP PH METER
ELITE 803 AIR PUMP
10' AIR LINE & 2 - 12" AIR STONES
48 - 4" ROCKWOOL CUBES
12 - 8" ROCKWOOL SLABS
3 - 16" PEDISTAL FANS
there are 6 rockwool slabs per table with 4 plants in 4" cubes per slab.
The ideal plant height when finished is 2 - 3'.
The 2 valve system works great for draining of the reservoir.
Simply close the valve going the tables and open the valve going to the drain.
Now you can use the same pump that runs your system to drain your reservoir.
The Nutra-Dip Ph meter will give you constant accurate readings, maximizing your yield.
2 light power buckets
The "POWER BUCKET" system is one of the most efficient systems available today.
The nutrient solution is run 24 hours a day,
allowing the plants to drink and take in oxygen simultaneously.
Prop the buckets up 5" so that the water level in the bucket is about 1/3 to 1/2 ways up.
Water temperature is crucial in this system; maintain a water temperature of 68 - 72 degrees

PARTS LIST :
1 - ROLL BLACK N WHITE POLY 1 - TIMER BOARD 2 - HPS LIGHT KITS
2 - 4' FLAT REFLECTORS
1 - 10" AXIAL FAN (INTAKE)
1 - 8" VORTEX FAN (EXHAUST)
1 - CARBON CAN 75
1 - 25' BOX 8" DUCTING
2 - 16" PEDESTAL FANS
1 - 70 GALLON RESERVOIR
12 - 5 GALLON BUCKETS
12 - 10" BUCKET INSERTS
3 - 50L BAGS HYDRO-TON
14 - 1" THRU HULLS
14 - 1" HOSE CLAMPS
2 - 1" TEES
4 - 1" CROSSES
2 - 1" ELBOWS
35' - 1" HOSE (YELLOW)
1 - MAG DRIVE 500 (PUMP)
20' - ½" POLY HOSE
2 - ½" VALVES
1 - ½" TEE
2 - ½" PLUGS
12 - ¼" EMITTERS
36' - ¼" FEED LINE
12 - ALLIGATOR STAKES
8 light air cooled tables
 LIGHTING /AIR COOLED
8 Port Timer Board
8 x 1000W HPS Kits
8 x Light Cannons
50' x 8" Ducting
10"x8"x8" Duct Y
2000 cfm Blower
10' x 10" Ducting
RESERVOIR & IRRIGATION
2 x 100 Gal Reservoir
2 x Mag Drive 350
4 x ¾" Thruhulls
2 x ¾" Tees
40' x ¾" Hose
2 x Nutradip ph Meter
2 x Digital Timer
2 x Maxima Air Pump
4 x 12" Air Stones
25' x Air Line
VENTILATION
10" Vortex Fan
Carbon Can 100
10" Axial Fan
25' x 10" Ducting
9 x 16" Pedestal Fans
No need for expensive Air Conditioners in this room,
the 2000cfm blower will handle all 8 of the air cooled shades.
Blowing through the shades ensures that only air will leak out and no smell from the room will be picked up.
The Nutra Dip PH meter will ensure that you can keep your PH level exactly where you want it.
The 10" Vortex Fan will draw in plenty of fresh air for your plants and keep humidity levels down.
4 light soiless
This is a great beginners room, designed for 36 plants 3' - 4 1/2' tall when harvested.
A single 77 liter can will mix enough nutrients to water all 36 plants.

PARTS LIST
TIMER BOARD
4 x 1000Watt HPS LIGHT KITS
(wired in vented boxes)
4 x 4' PARABOLIC REFLECTORS
10" AXIAL FAN
(intake)
8" VORTEX FAN
(exhaust)
36 x 5 GALLON POTS
While this equipment is enough to run the whole room
you may want to consider adding the following:
Black & White poly - to seal up the room and add a reflective surface for the lights.
Carbon Can - If smell is a problem a carbon can will fix that!
Sulphur Evaporator - eliminates mold and mildew from the grow room.
There are a few things to keep in mind about grow room setup indoors.
Ventilation is a huge factor, you want to have lots of air coming in & out of the room. we can always slow a fan down but we cant speed one up so it is best to get one size bigger than you think you might need.
Seal your room up with black n white poly or some other reflective material that can also act as a vapor barrier. No light should get out and air should only come in and out where you want it.
As well as a good intake & exhaust, have lots of circulating fans in the room. We recommend 1 for every light & 1 on the floor pointing up. Keep all your electrical stuff neat, preferably in another room and always off the floor.
Keep the room clean! Dirty rooms / dead leaves on the floor create lots of problems from molds to bugs
Make it easy to be able to raise your lights. If your plant grows 2 inches today, you should raise the light 2 inches. Using chain link to hang lights works well, you just raise it to the appropriate link
Information gathered from "www.progressive-growth.com"
These are some samples of rooms designed for our customers.
Come in the store or email your floor plan and let one of our experts help design the perfect room for you
2 light air cooled
In this room we are combining the carbon filter & exhaust system into air cooled lights.
Blowing the air through the lights instead of sucking through them assures that
no contaminated air (smell) gets out of the room.
4 x 8 Flood Table
40 Gallon Reservoir w/ Lid
Mag Drive 350 w/ Hoses & Fittings
24 Hour Digital Timer (pump)
Carbon Can 100 (840cfm)
Vortex 8" (747cfm)
2 - Light Cannon 8" Reflectors
25' 8" Flexible Ducting
2 - HPS Light Kits in Vented Box
Timer Board (for lights)
2 - 16" Oscillating Fans
Roll of Black n White Poly
Editors Notes: I disagree with the amount of moisture that would be pumped past the bulbs in this manor and see that this could cause troubles down the track.
4 light flood & drain
This system is easy to set up.
Just follow the diagram above when assembling the tables and hoses.
Designed for the "Sea of Green" method.
4 - ELD SUNRAY REFLECTORS
8" HURRICANE FAN
COCO CAN 1000
25' - 8" FLEXIBLE DUCTING
2 - 4X8 FLOOD TABLES
100 GALLON RESERVOIR
MAG DRIVE 350 PUMP
24 HOUR TIMER (FOR PUMP)
2 - ¾" THRUHULLS
2 - ¾" ELBOWS
2 - ¾" TEES
2 - ¾" VALVE'S
15' ¾" YELLOW HOSE
NUTRADIP PH METER
ELITE 803 AIR PUMP
10' AIR LINE & 2 - 12" AIR STONES
48 - 4" ROCKWOOL CUBES
12 - 8" ROCKWOOL SLABS
3 - 16" PEDISTAL FANS
there are 6 rockwool slabs per table with 4 plants in 4" cubes per slab.
The ideal plant height when finished is 2 - 3'.
The 2 valve system works great for draining of the reservoir.
Simply close the valve going the tables and open the valve going to the drain.
Now you can use the same pump that runs your system to drain your reservoir.
The Nutra-Dip Ph meter will give you constant accurate readings, maximizing your yield.
2 light power buckets
The "POWER BUCKET" system is one of the most efficient systems available today.
The nutrient solution is run 24 hours a day,
allowing the plants to drink and take in oxygen simultaneously.
Prop the buckets up 5" so that the water level in the bucket is about 1/3 to 1/2 ways up.
Water temperature is crucial in this system; maintain a water temperature of 68 - 72 degrees
PARTS LIST :
1 - ROLL BLACK N WHITE POLY 1 - TIMER BOARD 2 - HPS LIGHT KITS
2 - 4' FLAT REFLECTORS
1 - 10" AXIAL FAN (INTAKE)
1 - 8" VORTEX FAN (EXHAUST)
1 - CARBON CAN 75
1 - 25' BOX 8" DUCTING
2 - 16" PEDESTAL FANS
1 - 70 GALLON RESERVOIR
12 - 5 GALLON BUCKETS
12 - 10" BUCKET INSERTS
3 - 50L BAGS HYDRO-TON
14 - 1" THRU HULLS
14 - 1" HOSE CLAMPS
2 - 1" TEES
4 - 1" CROSSES
2 - 1" ELBOWS
35' - 1" HOSE (YELLOW)
1 - MAG DRIVE 500 (PUMP)
20' - ½" POLY HOSE
2 - ½" VALVES
1 - ½" TEE
2 - ½" PLUGS
12 - ¼" EMITTERS
36' - ¼" FEED LINE
12 - ALLIGATOR STAKES
8 light air cooled tables
8 Port Timer Board
8 x 1000W HPS Kits
8 x Light Cannons
50' x 8" Ducting
10"x8"x8" Duct Y
2000 cfm Blower
10' x 10" Ducting
RESERVOIR & IRRIGATION
2 x 100 Gal Reservoir
2 x Mag Drive 350
4 x ¾" Thruhulls
2 x ¾" Tees
40' x ¾" Hose
2 x Nutradip ph Meter
2 x Digital Timer
2 x Maxima Air Pump
4 x 12" Air Stones
25' x Air Line
VENTILATION
10" Vortex Fan
Carbon Can 100
10" Axial Fan
25' x 10" Ducting
9 x 16" Pedestal Fans
No need for expensive Air Conditioners in this room,
the 2000cfm blower will handle all 8 of the air cooled shades.
Blowing through the shades ensures that only air will leak out and no smell from the room will be picked up.
The Nutra Dip PH meter will ensure that you can keep your PH level exactly where you want it.
The 10" Vortex Fan will draw in plenty of fresh air for your plants and keep humidity levels down.
4 light soiless
This is a great beginners room, designed for 36 plants 3' - 4 1/2' tall when harvested.
A single 77 liter can will mix enough nutrients to water all 36 plants.
PARTS LIST
TIMER BOARD
4 x 1000Watt HPS LIGHT KITS
(wired in vented boxes)
4 x 4' PARABOLIC REFLECTORS
10" AXIAL FAN
(intake)
8" VORTEX FAN
(exhaust)
36 x 5 GALLON POTS
While this equipment is enough to run the whole room
you may want to consider adding the following:
Black & White poly - to seal up the room and add a reflective surface for the lights.
Carbon Can - If smell is a problem a carbon can will fix that!
Sulphur Evaporator - eliminates mold and mildew from the grow room.
There are a few things to keep in mind about grow room setup indoors.
Ventilation is a huge factor, you want to have lots of air coming in & out of the room. we can always slow a fan down but we cant speed one up so it is best to get one size bigger than you think you might need.
Seal your room up with black n white poly or some other reflective material that can also act as a vapor barrier. No light should get out and air should only come in and out where you want it.
As well as a good intake & exhaust, have lots of circulating fans in the room. We recommend 1 for every light & 1 on the floor pointing up. Keep all your electrical stuff neat, preferably in another room and always off the floor.
Keep the room clean! Dirty rooms / dead leaves on the floor create lots of problems from molds to bugs
Make it easy to be able to raise your lights. If your plant grows 2 inches today, you should raise the light 2 inches. Using chain link to hang lights works well, you just raise it to the appropriate link
What is an Aerospring and how do I build one?
Contributed by: Contagis The "Aerospring Aeroponic Garden" is a kit now being sold by FutureGarden.com. Its a simple aeroponic system ready to go once set-up. I was building my own aero system a while ago and ended up buying their kit. While putting it all together I came across a problem or two and have workarounds here. The system is pretty simple and you can put it together in a few minutes. This is the parts list from FutureGardens website:
- (8) Grow sites with baskets
- (4) Grow site plugs
- Reservoir level indicator
- High performance mag drive pump
- LECA stone growing media
- 16oz. Above & Beyond starter kit (Vigor, Grow & Bloom)
- Tubing and garden hose fill/drain adapter
- Measures 32"x 20" x 17" tall
- Full color instructions
Here is the finished system.

Here are some of the main parts. The blue tubing doesn't fit over the RIO1100 pump.

I found some clear tubing at Home Depot which fits nicely over the pump, I also needed a half inch tube connector that attaches to the PVC ? it?s where all the small PVC parts are.

This is the manual diagram.

DIY Aerospring part-list:
- Reservoir
- Net cups
- 1/2" threaded PVC "T" Fitting
- 1/2" PVC Pipe
- Weather Stripping
- Pump
- Misters or sprayers
- Clamps
- 1/2" adapter to connect to one end of the tubing and the other to a hose to easily drain the system
- 1/2" End Cap
- A barbed adapter that has a 1/2" threaded side to go into the PVC T fitting in the other end-- make sure it fits the tube that is coming from the pump
- A drill bit for your misters and sprayers
- A 1/2" hole saw for the PVC holes and another (size dependant on type of cup) for your netcups.
DIY Aerospring building instructions:
Cut two pieces of 1/2" PVC to be a little longer than the length of your reservoir. Like the diagram, the threaded PVC fitting goes in the middle. Cut two 1/2" holes at each end so the PVC sticks out on one end, put the end cap on the other hose adapter. In the middle of the T fitting drill a hole for one mister and at each end another hole for the other two misters-- if you have more misters just line them up evenly and drill the hole. Wrap the bottom of the misters with Teflon tape and screw them in so they fit snugly. Under the T fitting, screw in the barbed adapter and put the tubing on it, then place the pump in the reservoir and connect the other end of tube to the pump.
The Aerospring has a level line that helps nutrient monitoring, its 1/2" blue tubing running up the side of the reservoir from the bottom. To make this you need a 1/2" tube grommet, a 1/2" barbed "L" fitting, a clamp and some tubing. Just drill a hole near the bottom and one threw the handle of your reservoir, place the grommet in the hole at the bottom and then place the L fitting threw it. Connect the tube, then put it threw the hole at the handle for support. Use some silicone and Teflon tape to make the seal waterproof. To finish, run weather stripping along the top of the reservoir, but not where the handles go. Silicone can be found at any pet supply store and the Teflon at HomeDepot

Contributed by: Contagis The "Aerospring Aeroponic Garden" is a kit now being sold by FutureGarden.com. Its a simple aeroponic system ready to go once set-up. I was building my own aero system a while ago and ended up buying their kit. While putting it all together I came across a problem or two and have workarounds here. The system is pretty simple and you can put it together in a few minutes. This is the parts list from FutureGardens website:
- (8) Grow sites with baskets
- (4) Grow site plugs
- Reservoir level indicator
- High performance mag drive pump
- LECA stone growing media
- 16oz. Above & Beyond starter kit (Vigor, Grow & Bloom)
- Tubing and garden hose fill/drain adapter
- Measures 32"x 20" x 17" tall
- Full color instructions
Here is the finished system.
Here are some of the main parts. The blue tubing doesn't fit over the RIO1100 pump.
I found some clear tubing at Home Depot which fits nicely over the pump, I also needed a half inch tube connector that attaches to the PVC ? it?s where all the small PVC parts are.
This is the manual diagram.
DIY Aerospring part-list:
- Reservoir
- Net cups
- 1/2" threaded PVC "T" Fitting
- 1/2" PVC Pipe
- Weather Stripping
- Pump
- Misters or sprayers
- Clamps
- 1/2" adapter to connect to one end of the tubing and the other to a hose to easily drain the system
- 1/2" End Cap
- A barbed adapter that has a 1/2" threaded side to go into the PVC T fitting in the other end-- make sure it fits the tube that is coming from the pump
- A drill bit for your misters and sprayers
- A 1/2" hole saw for the PVC holes and another (size dependant on type of cup) for your netcups.
DIY Aerospring building instructions:
Cut two pieces of 1/2" PVC to be a little longer than the length of your reservoir. Like the diagram, the threaded PVC fitting goes in the middle. Cut two 1/2" holes at each end so the PVC sticks out on one end, put the end cap on the other hose adapter. In the middle of the T fitting drill a hole for one mister and at each end another hole for the other two misters-- if you have more misters just line them up evenly and drill the hole. Wrap the bottom of the misters with Teflon tape and screw them in so they fit snugly. Under the T fitting, screw in the barbed adapter and put the tubing on it, then place the pump in the reservoir and connect the other end of tube to the pump.
The Aerospring has a level line that helps nutrient monitoring, its 1/2" blue tubing running up the side of the reservoir from the bottom. To make this you need a 1/2" tube grommet, a 1/2" barbed "L" fitting, a clamp and some tubing. Just drill a hole near the bottom and one threw the handle of your reservoir, place the grommet in the hole at the bottom and then place the L fitting threw it. Connect the tube, then put it threw the hole at the handle for support. Use some silicone and Teflon tape to make the seal waterproof. To finish, run weather stripping along the top of the reservoir, but not where the handles go. Silicone can be found at any pet supply store and the Teflon at HomeDepot
Indoor Cannabis Cultivation Guide Version 1.2
Section 1: Choosing a space to grow
Choosing a space to grow indoors is just as important as choosing the proper space outdoors. Your garden should be located in an out of the way place (not the bedroom). Basements, attics, and closets are all great places. Once you have a few possibilities in mind make sure the have access to electrical outlets. Plan ahead for anything that might require a repairman to visit your house. If your garden is located in the same room as the furnace, and the furnace explodes, your in big trouble. Once the permanent garden location has been selected it is time to prepare it. (For the rest of this document I will assume you have chosen a closet as the grow space) Paint the walls flat white. Do not use tin foil because it can actually focus light like little laser beams and burn holes through the leaves. Next, cover the floor of the closet with plastic. This will help stop water damage to the floor.
Section 2: Containers
Your plants will need to be grown in some kind of cannabis or container. Large plastic pots (like the ones bushes come in) work best. Fill the bottom inch with large gravel to help drainage. And the rest with high quality potting soil with some sand mixed in. Buckets can also be used but drill drainage holes in the bottom. If your containers previously held other plants then they must be sterilized with bleach or alcohol.
Section 3: Ligthing
Since there is no sun in your closet you will have to provide a sun loving plant like cannabis with alot of artificial light. There are three options available to the grower: flourescent lights are cheap, efficient, and don't put out much heat. Metal halide, or MH bulbs, are more expensive but put out much more light than flourescents. They also put out more heat so ventilation is needed. MH bulbs also require a separate ballst in order to work. High Pressure Sodium lamps, or HPS, put out as much light as MH lamps but with a little less heat. Ventilation and a separate ballast are also required.
Flourescent lights
Flourescent lights are the cheapest light to use. They run at about $2 a tube. They produce little heat so ventilation may not be needed unless the space is very small. The light spectrum put out by these lights is suitable for all stages of growing. Because flourescents disperse light over a large area, they need to be kept within three inches of the tops for the plants to receive enough light. This means you will have to mount the lights in a way that the can be raised everyday.
Metal Halide Lights
Metal halide lamps put out the most light. They also produce alot of heat. A strong fan is needed to keep room tempertures down. MH lamps put out light mostly in the blue spectrum. Blue light is used best by the plant during vegative growth. MH lights can also be used for flowering with no adverse effects. A separate ballast is required for these lights to work. They come in sizes from 40 to 1000W. One 1000W lamp will provide enough light in a closet to grow four plants.
High Pressure Sodium Lights
High pressure sodium lamps put out almost as much light as MH and with less heat. Good ventilation is still required though. HPS lamps produce light in mostly the red and orange end of the spectrum. The plants uses this light best when flowering. HPS lamps can also be used for vegative growth with little slow down in foliage production. HPS lamps require a separate ballast for operation.
Some growers switch between MH and HPS depending on what stage the plants are in. MH is used in vegative growth and then the light is swithched over to HPS once flowering begins. Most growers use flourescents to start seedlings and root clones. The flourescents are weaker than the MH and HPS lamps and therefore do not stress them too much. Choose whatever light is best suited for your situation. If your are growing in your attic go with MH or HPS. If your growing in the closet like us, then use flourecents. (For the rest of ths document I will assume the reader is using flourescent lighting)
Section 4: Factors affecting the rate of photosynthesis
There are other factors other than the obvious amount of light that reaches the plants that affect the rate of photosynthesis. These can be manipulated by the grower to achieve maximum speed of growth and larger yields in a shorter period of time.
Humidity
The humidity in the enviroment is the amount of water vapor present in the air. Most growers know that humidity in excess of 85% percent increases the probability of the appearance of bud mold. The humidity is also critical during germanation when the seedlings are extremely fragile. Humidty should be kept over 80% at this stage in the plants life to prevent the soil from drying too fast. Experimentation has shown that a relative humidity of 65% to 80% increases growth rate. Below this level the plants develop extremely narrow and tissue paper thin leaves to try to prevent excess loss of water. Above 80% relative humidity the plant have trouble disposing of toxic chemicals through evaporation.
Temperture
Cannabis can survive tempertures from 32 degrees F to over 100 degrees F. Cannabis will grow best with a temperture of 70 to 75 degrees F day and night. Higher than 90 degrees F the enzymes within the plant begin to breakdown and photosynthesis is affected. The same is true for low tempertures.
Carbon dioxide
Carbon dioxide is a gas that is essential for the light reactions in all plants that carry on photosynthesis. CO2 is absorbed through the leafs stomates and is combined with water and light energy to form glucose (used by the plant as energy) and oxygen (which is released). Therefore supplementing CO2 to the existing amount in the air will speed up photosynthesis and therefore, growth will occur faster. Experimentation has also shown that CO2 can help cannabistoloerate higher tempertures (up to 95 degrees F) with little affect on the rate of photosynthesis.
Water
Although only a small portion of water absorbed by the plant is used in photosynthesis a shortage of water does affect the rate photosynthesis occurs. This happens because when the plant is low on water the stomates on the leaves close preventin the release of waste gases and other toxic chemicals. This closure will severely slow down or even stop photosynthesis from occuring.
Section 5: Sea of green
Sea of green, or SOG, is the theory of harvesting many small plants frequently, instead of large plants less frequently. In an SOG setup the closet is divided into two light tight spaces. In the top space the lights are permanently set on a 12/12 light/dark timer. On the bottom the lights are kept on for 18 hours per day. Flourescent lights are used throughout. The bottom shelf is used to start seedlings and root clones. The top shelf is used for flowering. Using this setup harvesting can take place once a month.
Section 6:Ventilation
Cannabis like all other plants puts out waste through the stomata on it's leaves. Outdoors wind, rain and sun are present to evaporate these toxins from the leaf surface. Indoors the grower must create an enviroment. The best way to do this is with a fan of some kind. If the grow room is large enough then an regualar cooling fan can be placed inside and left on all the time. If you are running a small closet operation then just opening the door twice a day to look at them will create enough air movement for healthy growth. A fan controlled by a thermostat will also work well. These can be found at most electronics stores.
If a large number of plants are to be kept a dehumidifier may be needed. If humidity levels are too high then the chances of mold will dramaticly increase. A dehumidifier will cost a grower about $100 so it isn,t really practical for the closet grower.
Section 7: C02 supplementation
Some growers add C02 to their grow rooms to increase growth rate. This has proved itself to be effective in many experiments. C02 supplementation also helps the plants withstand higher tempertures of up to 95 degrees without slowing down growth. There have been complaints however, that C02 supplementation during flowering reduces potency. Therefore, C02 should be stopped when the lights are turned to 12/12.
Section 8: Early sexing
Since you control the light cycle in an indoor operation it is easy to sex the plants early and eliminate all the males. Just turn the lights down to 12/12 when the plants are eight inches high. Use a magnifying glass to examine the flowers and eliminate all the males.

Here is a female plant. Notice the white hairs.
Section 9: Obtaining seed
If you do want to pollenate some females to produce seed for the next crop it can be done so that only a few buds are pollenated and the rest remain as sinsemilla. First collect pollen from a male. The male should show desirable characteristics, like fast growth, potency and resistence to pest and mold. To collect the pollen just shake the branches into a plactic bag. Black paper can also be used to collect pollen. Just lie it on the floor around the plant, in a few days the paper will have quite a bit of pollen on it. The pollen can be stored in film canisters until it is needed. When needed, use a paintbrush to brush on the pollen to the LOWER branches of the female. The best way to be sure that all the seeds are mature before harvest is to just never harvest the pollenated branches. Let them die naturally so you can be sure they produce viable seed.
Section 10: Harvesting and drying
When you want you plants to start flowering just turn the lights down to 12 hours light and 12 hours dark. Then be patient and wait for flowering to complete. It helps the drying process a little if you don't water the week before harvesting. When you cut the plants remove the large fan leaves the and add them to your compost pile as they are not usable for smoking. Place the plants in shoe boxes or paper bags and stir them around daily. In about three weeks the buds should be totally dry and ready to smoke.
Section 1: Choosing a space to grow
Choosing a space to grow indoors is just as important as choosing the proper space outdoors. Your garden should be located in an out of the way place (not the bedroom). Basements, attics, and closets are all great places. Once you have a few possibilities in mind make sure the have access to electrical outlets. Plan ahead for anything that might require a repairman to visit your house. If your garden is located in the same room as the furnace, and the furnace explodes, your in big trouble. Once the permanent garden location has been selected it is time to prepare it. (For the rest of this document I will assume you have chosen a closet as the grow space) Paint the walls flat white. Do not use tin foil because it can actually focus light like little laser beams and burn holes through the leaves. Next, cover the floor of the closet with plastic. This will help stop water damage to the floor.
Section 2: Containers
Your plants will need to be grown in some kind of cannabis or container. Large plastic pots (like the ones bushes come in) work best. Fill the bottom inch with large gravel to help drainage. And the rest with high quality potting soil with some sand mixed in. Buckets can also be used but drill drainage holes in the bottom. If your containers previously held other plants then they must be sterilized with bleach or alcohol.
Section 3: Ligthing
Since there is no sun in your closet you will have to provide a sun loving plant like cannabis with alot of artificial light. There are three options available to the grower: flourescent lights are cheap, efficient, and don't put out much heat. Metal halide, or MH bulbs, are more expensive but put out much more light than flourescents. They also put out more heat so ventilation is needed. MH bulbs also require a separate ballst in order to work. High Pressure Sodium lamps, or HPS, put out as much light as MH lamps but with a little less heat. Ventilation and a separate ballast are also required.
Flourescent lights
Flourescent lights are the cheapest light to use. They run at about $2 a tube. They produce little heat so ventilation may not be needed unless the space is very small. The light spectrum put out by these lights is suitable for all stages of growing. Because flourescents disperse light over a large area, they need to be kept within three inches of the tops for the plants to receive enough light. This means you will have to mount the lights in a way that the can be raised everyday.
Metal Halide Lights
Metal halide lamps put out the most light. They also produce alot of heat. A strong fan is needed to keep room tempertures down. MH lamps put out light mostly in the blue spectrum. Blue light is used best by the plant during vegative growth. MH lights can also be used for flowering with no adverse effects. A separate ballast is required for these lights to work. They come in sizes from 40 to 1000W. One 1000W lamp will provide enough light in a closet to grow four plants.
High Pressure Sodium Lights
High pressure sodium lamps put out almost as much light as MH and with less heat. Good ventilation is still required though. HPS lamps produce light in mostly the red and orange end of the spectrum. The plants uses this light best when flowering. HPS lamps can also be used for vegative growth with little slow down in foliage production. HPS lamps require a separate ballast for operation.
Some growers switch between MH and HPS depending on what stage the plants are in. MH is used in vegative growth and then the light is swithched over to HPS once flowering begins. Most growers use flourescents to start seedlings and root clones. The flourescents are weaker than the MH and HPS lamps and therefore do not stress them too much. Choose whatever light is best suited for your situation. If your are growing in your attic go with MH or HPS. If your growing in the closet like us, then use flourecents. (For the rest of ths document I will assume the reader is using flourescent lighting)
Section 4: Factors affecting the rate of photosynthesis
There are other factors other than the obvious amount of light that reaches the plants that affect the rate of photosynthesis. These can be manipulated by the grower to achieve maximum speed of growth and larger yields in a shorter period of time.
Humidity
The humidity in the enviroment is the amount of water vapor present in the air. Most growers know that humidity in excess of 85% percent increases the probability of the appearance of bud mold. The humidity is also critical during germanation when the seedlings are extremely fragile. Humidty should be kept over 80% at this stage in the plants life to prevent the soil from drying too fast. Experimentation has shown that a relative humidity of 65% to 80% increases growth rate. Below this level the plants develop extremely narrow and tissue paper thin leaves to try to prevent excess loss of water. Above 80% relative humidity the plant have trouble disposing of toxic chemicals through evaporation.
Temperture
Cannabis can survive tempertures from 32 degrees F to over 100 degrees F. Cannabis will grow best with a temperture of 70 to 75 degrees F day and night. Higher than 90 degrees F the enzymes within the plant begin to breakdown and photosynthesis is affected. The same is true for low tempertures.
Carbon dioxide
Carbon dioxide is a gas that is essential for the light reactions in all plants that carry on photosynthesis. CO2 is absorbed through the leafs stomates and is combined with water and light energy to form glucose (used by the plant as energy) and oxygen (which is released). Therefore supplementing CO2 to the existing amount in the air will speed up photosynthesis and therefore, growth will occur faster. Experimentation has also shown that CO2 can help cannabistoloerate higher tempertures (up to 95 degrees F) with little affect on the rate of photosynthesis.
Water
Although only a small portion of water absorbed by the plant is used in photosynthesis a shortage of water does affect the rate photosynthesis occurs. This happens because when the plant is low on water the stomates on the leaves close preventin the release of waste gases and other toxic chemicals. This closure will severely slow down or even stop photosynthesis from occuring.
Section 5: Sea of green
Sea of green, or SOG, is the theory of harvesting many small plants frequently, instead of large plants less frequently. In an SOG setup the closet is divided into two light tight spaces. In the top space the lights are permanently set on a 12/12 light/dark timer. On the bottom the lights are kept on for 18 hours per day. Flourescent lights are used throughout. The bottom shelf is used to start seedlings and root clones. The top shelf is used for flowering. Using this setup harvesting can take place once a month.
Section 6:Ventilation
Cannabis like all other plants puts out waste through the stomata on it's leaves. Outdoors wind, rain and sun are present to evaporate these toxins from the leaf surface. Indoors the grower must create an enviroment. The best way to do this is with a fan of some kind. If the grow room is large enough then an regualar cooling fan can be placed inside and left on all the time. If you are running a small closet operation then just opening the door twice a day to look at them will create enough air movement for healthy growth. A fan controlled by a thermostat will also work well. These can be found at most electronics stores.
If a large number of plants are to be kept a dehumidifier may be needed. If humidity levels are too high then the chances of mold will dramaticly increase. A dehumidifier will cost a grower about $100 so it isn,t really practical for the closet grower.
Section 7: C02 supplementation
Some growers add C02 to their grow rooms to increase growth rate. This has proved itself to be effective in many experiments. C02 supplementation also helps the plants withstand higher tempertures of up to 95 degrees without slowing down growth. There have been complaints however, that C02 supplementation during flowering reduces potency. Therefore, C02 should be stopped when the lights are turned to 12/12.
Section 8: Early sexing
Since you control the light cycle in an indoor operation it is easy to sex the plants early and eliminate all the males. Just turn the lights down to 12/12 when the plants are eight inches high. Use a magnifying glass to examine the flowers and eliminate all the males.
Here is a female plant. Notice the white hairs.
Section 9: Obtaining seed
If you do want to pollenate some females to produce seed for the next crop it can be done so that only a few buds are pollenated and the rest remain as sinsemilla. First collect pollen from a male. The male should show desirable characteristics, like fast growth, potency and resistence to pest and mold. To collect the pollen just shake the branches into a plactic bag. Black paper can also be used to collect pollen. Just lie it on the floor around the plant, in a few days the paper will have quite a bit of pollen on it. The pollen can be stored in film canisters until it is needed. When needed, use a paintbrush to brush on the pollen to the LOWER branches of the female. The best way to be sure that all the seeds are mature before harvest is to just never harvest the pollenated branches. Let them die naturally so you can be sure they produce viable seed.
Section 10: Harvesting and drying
When you want you plants to start flowering just turn the lights down to 12 hours light and 12 hours dark. Then be patient and wait for flowering to complete. It helps the drying process a little if you don't water the week before harvesting. When you cut the plants remove the large fan leaves the and add them to your compost pile as they are not usable for smoking. Place the plants in shoe boxes or paper bags and stir them around daily. In about three weeks the buds should be totally dry and ready to smoke.
What is pH?
The pH scale measures how acidic, or how alkali a given solution is.
The term pH can be broken down into two parts; the first is the [p], this represents the mathematical symbol for -log (negative logarithm) of the number in question. The "H" stands for Hydrogen, and is represented by the chemical symbol [H] So the correct way to write this down is a small p, and a capital H (pH).
The pH scale is basically a rough guide as to how many Hydrogen ions are present in any given substance; the more hydrogen ions are present, the more acidic the substance becomes. The pH of distilled water is 7.0, this is neutral. Any solution with a pH below 7.0 (i.e. pH 1.0 to pH 6.9) is an acid and any solution with a pH above 7 (i.e. pH 7.1 to pH 14) is an alkali. The pH scale is logrithmic, that is, a pH 6.0 solution is 10 times more acidic than a pH 7.0 solution (pH 5.0 is 100x more than 7.0!).
Acidic solutions have a pH between 1 and 6.9 (your stomach contains HCl it is pH2).
Alkaline solutions have a pH between 7.1 and 14. (your small intestine is pH 9).
Neutral solutions are neither acidic nor alkaline so their pH is 7.
Acids all produce Hydrogen ions (H+). Acids like Hydrochloric acid produce lots of Hydrogen ions; this is because when Hydrogen Chloride gas dissolves in water the molecules of Hydrogen Chloride dissociate into Hydrogen ions and Chloride ions.
HCl = H+ + Cl-
Water also dissociates to produce ions, this time it is Hydrogen ions and Hydroxyl ions.
H2O = H+ + OH-
Sodium Hydroxide also dissociates to produce ions when it is dissolved in water, this time it is Sodium ions and Hydroxyl ions.
NaOH = Na+ + OH-
In each case, we can measure or calculate the concentration of Hydrogen ions present. We use the symbol [H+], we use square brackets to mean that it is the concentration of Hydrogen ions.
In HCl Hydrogen Chloride solution or Hydrochloric acid [H+] = 0.01
In H2O water [H+] = 0.0000001
In NaOH Sodium Hydroxide solution [H+] = 0.00000000000001
We count the decimal places from the first number, and that is where the pH scale is derived from.
HCl = pH2
H2O = pH7
NaOH = pH14
So to recap if the pH is low, it means that there is a high concentration of Hydrogen ions and if the pH is high it means that there is very low concentration of Hydrogen ions or none at all. Water and other neutral solutions are in the middle at pH7.
What does pH mean?
The degree of acidity/alkalinity of a solution is identified on the ph scale of 0 to 14, with a pH of 7 representing the neutral point. The pH scale is logarithmic, meaning small changes in pH represent large changes in the degree of acidity or alkalinity. For example, a solution with a pH of 5 is ten times as acidic as a solution with a pH of 6, but a solution with a pH of 5 is 100 times as acidic as a solution with a pH of 7. The pH of the nutrient solution is a major determinant of nutrient uptake by the plant.
The degree of acidity/alkalinity of a solution is identified on the ph scale of 0 to 14, with a pH of 7 representing the neutral point. The pH scale is logarithmic, meaning small changes in pH represent large changes in the degree of acidity or alkalinity. For example, a solution with a pH of 5 is ten times as acidic as a solution with a pH of 6, but a solution with a pH of 5 is 100 times as acidic as a solution with a pH of 7. The pH of the nutrient solution is a major determinant of nutrient uptake by the plant.
Carbon scrubber design(can filter style)
Let me start by saying this project is based off some recovered text from OG that provided me a parts list and basic direction. Since that tutorial is now unfortunately gone I decided to document my build so all you pictorial learners have something to see.
I think this design because it is relatively cheap, pretty easy to build, and offers flexibility. Depending on your grow room size you can make it longer or larger in diameter. I have a small chamber so I will be doing a short and small design.
Parts list:
6" Duct cap
4" Duct cap(I couldn't find one of these so I used a 4" collar and folded the tabs done and taped it closed)
4" Collar
6"X4" reducer
(2) 6" worm clamps
(2) 4" worm clamps
Hardware cloth (its in the fencing section, looks like chicken wire with 1/2" squares)
Lady's stocking(or Pantyhose doubled up)
Aluminum tap(or duct tape, aluminum sticks better)
Activated Carbon(for smaller filters you can get containers at the pet store, if you need alot look around to order bulk), it took one of the larger 28oz containers and one of the smaller ones to fill my design up.
EDIT: Some numbers you help you estimate the liters of carbon required(since it tends to be sold in containers maked by metric volume in the pet store, I may crunch the conversion to oz, later). To use these numbers multiple the side wall length you desire(in inches) by the number to get an estimated volume needed in liters(bank on needing a tad more to fill the space in the reducer cone):
8x6"= .36
6x4"=.258
Optional(for a fill/emptying port that doesn't require taking the bottom off.
1/2"x3/8" pipe reducer
3/8" pipe plug
1/2" conduit lock nut
Tools
Tin snips, wire cutters, or pliers
Screw driver
As I mentioned I am building a shorter filter so I am triming down the length of the caps and reducer where they meet the hardware cloth, if you have a larger design this step likely isn't needed. I used some masking tap to lay down a cutting path, I figure the width of the tap is plenty to secure a clamp to(see pics).


Since I couldn't find a 4" cap I bought an extra 4" collar and bend the taps flat and then tapped the end shut(see pics).
Next I cut the hardware wire to the length and width needed. For my design I choose a 10" sidewall lenth. The width needed is the diameter plus a little over lap. I left 2" of overlap on mine which is 4 squares. Either measure or wrap teh cloth around your end caps to determine the appropriate width. Cut the wire so it is flush with the wire crossing it so the aren't wires poking out. I went ahead and doubled some duct tap over the top, bottom, and outter flap on the wire to minimize any snagging issues when putting the tights over.


Next make a tube out of the wire and slip the clamps loosely over, then stick on the end cap and either collar or reducer depending on which piece you are working with(The wire goes on the outside). Side the worm clamp over the wire and ducting and snug it up. For a more compact design I used some plieres to snug up the grating and got the squares snug and inline. Then used some trash twist ties to tie up a few areas(I figure this will allow me to remove the clamps the apply the tights and but the clamps over the tights). See pics.


Next I removed the worm clamps from the inside piece(the wire held its shape due to the twist ties) put the appropriate fittings on each end and slide the stocking over. Due to my short design I was able to double the legs up and use the lower leg for the inside and upper leg for the outside. Slide the worm clamp over the stocking to the appropriate place and tighten down and trim. Stick the tab end of the collar on the inside piece into the inside of the duct reducer. Use foil tap on the inside to secure it. Repeat the same process for appling the stocking to the large piece as you did for the inside.

An option I decided to add to mine was a filling port, thus I can fill it when its fully assembled. I happened to have a 7/8" hole saw to drill the hold in the bottom. Make sure the hole lines up where the carbon will be when assembled. The fat end of the reducer goes on the outside and lock nut on the inside, the plug for when its filled. I used a funnel to fill it up, kinda a time consuming shake the carbon around process but its over with now .
EDIT: On retrospect I think if I was building another I'd bag the pipe fittings and just drill the hole. After filling it a couple pieced of aluminum tape would probably hold the carbon in fine.
Well there it is. I can't comment on the effectiveness at this point since I am still waiting for my first seeds to arrive.


Actually if you look on ebay it seems there are a few sellers already pumping them out. I didn't want to add any ebay purchases to my trail, it was a bit cheaper to do it myself, and I like tinkering.
Let me start by saying this project is based off some recovered text from OG that provided me a parts list and basic direction. Since that tutorial is now unfortunately gone I decided to document my build so all you pictorial learners have something to see.
I think this design because it is relatively cheap, pretty easy to build, and offers flexibility. Depending on your grow room size you can make it longer or larger in diameter. I have a small chamber so I will be doing a short and small design.
Parts list:
6" Duct cap
4" Duct cap(I couldn't find one of these so I used a 4" collar and folded the tabs done and taped it closed)
4" Collar
6"X4" reducer
(2) 6" worm clamps
(2) 4" worm clamps
Hardware cloth (its in the fencing section, looks like chicken wire with 1/2" squares)
Lady's stocking(or Pantyhose doubled up)
Aluminum tap(or duct tape, aluminum sticks better)
Activated Carbon(for smaller filters you can get containers at the pet store, if you need alot look around to order bulk), it took one of the larger 28oz containers and one of the smaller ones to fill my design up.
EDIT: Some numbers you help you estimate the liters of carbon required(since it tends to be sold in containers maked by metric volume in the pet store, I may crunch the conversion to oz, later). To use these numbers multiple the side wall length you desire(in inches) by the number to get an estimated volume needed in liters(bank on needing a tad more to fill the space in the reducer cone):
8x6"= .36
6x4"=.258
Optional(for a fill/emptying port that doesn't require taking the bottom off.
1/2"x3/8" pipe reducer
3/8" pipe plug
1/2" conduit lock nut
Tools
Tin snips, wire cutters, or pliers
Screw driver
As I mentioned I am building a shorter filter so I am triming down the length of the caps and reducer where they meet the hardware cloth, if you have a larger design this step likely isn't needed. I used some masking tap to lay down a cutting path, I figure the width of the tap is plenty to secure a clamp to(see pics).
Since I couldn't find a 4" cap I bought an extra 4" collar and bend the taps flat and then tapped the end shut(see pics).
Next I cut the hardware wire to the length and width needed. For my design I choose a 10" sidewall lenth. The width needed is the diameter plus a little over lap. I left 2" of overlap on mine which is 4 squares. Either measure or wrap teh cloth around your end caps to determine the appropriate width. Cut the wire so it is flush with the wire crossing it so the aren't wires poking out. I went ahead and doubled some duct tap over the top, bottom, and outter flap on the wire to minimize any snagging issues when putting the tights over.
Next make a tube out of the wire and slip the clamps loosely over, then stick on the end cap and either collar or reducer depending on which piece you are working with(The wire goes on the outside). Side the worm clamp over the wire and ducting and snug it up. For a more compact design I used some plieres to snug up the grating and got the squares snug and inline. Then used some trash twist ties to tie up a few areas(I figure this will allow me to remove the clamps the apply the tights and but the clamps over the tights). See pics.
Next I removed the worm clamps from the inside piece(the wire held its shape due to the twist ties) put the appropriate fittings on each end and slide the stocking over. Due to my short design I was able to double the legs up and use the lower leg for the inside and upper leg for the outside. Slide the worm clamp over the stocking to the appropriate place and tighten down and trim. Stick the tab end of the collar on the inside piece into the inside of the duct reducer. Use foil tap on the inside to secure it. Repeat the same process for appling the stocking to the large piece as you did for the inside.
An option I decided to add to mine was a filling port, thus I can fill it when its fully assembled. I happened to have a 7/8" hole saw to drill the hold in the bottom. Make sure the hole lines up where the carbon will be when assembled. The fat end of the reducer goes on the outside and lock nut on the inside, the plug for when its filled. I used a funnel to fill it up, kinda a time consuming shake the carbon around process but its over with now .
EDIT: On retrospect I think if I was building another I'd bag the pipe fittings and just drill the hole. After filling it a couple pieced of aluminum tape would probably hold the carbon in fine.
Well there it is. I can't comment on the effectiveness at this point since I am still waiting for my first seeds to arrive.
Actually if you look on ebay it seems there are a few sellers already pumping them out. I didn't want to add any ebay purchases to my trail, it was a bit cheaper to do it myself, and I like tinkering.
First time growers frequently mistakes:
Overwater their medium based plants. When you pot your plant, judge its weight dry by hefting. Then, water the plant thoroughly, until water runs through the drain holes. Heft it again. When your pot feels as nearly as light as it did dry, its time to water again.
Overfeed their plants. As MrSoul says, beginners rarely under do anything. When all else fails, follow the directions on the fertilizer bottle. [Editor's note: dont follow GH's instructions! Use @ 1/4 their recommended strength, or follow recipes in the FAQ]
Overanalyze their grow. A first grow is like a first born child: you pay attention to every little thing that happens. Further, you worry at the first sign something may be wrong. Pay attention to what happens in your grow, but do not try and find a remedy for every yellow leaf. Frequently, the remedy of flushing your medium causes more problems than it solves. Be responsive when things go wrong, but be conservative in your remedies.
Overspend on grow supplies. New growers frequently commit themselves to unrealistic and expensive first grows. It is much more efficient to learn to grow and then invest in high end equipment rather than the other way around. Most experienced growers don't have room for all of the grow paraphernalia they aren't using. As you will see throughout this FAQ: K-I-S-S.
Overpost. Try the search engine first. Chances are good that any question you can think of has been asked and answered before.
Talk about their grow. Don't tell anybody that does not have to know. How can you expect anybody else to keep a secret that you cannot.
1. Don't Overwater
Overwatering kills marijuana plants. Water once the top few inches of the soil dries out.
Hydroponics is harder to over-water than soil, due to the abundance of water roots.
2. Don't Tell People
Why? They will only be jealous. People love to feel important and that is why they will tell other people; because others will listen to them.
Keep it to yourself.
3. Touch/kill Germinating Seeds
It can take up to 10 days for a seed to sprout. The paper towel method is not recommended because you must handle the seeds when transferring them from the paper towel to your growing medium.
4. Grow seeds from seeded marijuana (hermaphrodite seeds)
Unless you are prepared for possible disappointments don't use "unknown" seeds. This is why people buy seeds from seedbanks.
Self-seeding MJ is produced from hermaphrodite plants or a very stunted and late flowering male the grower did not notice. Flowered hermi seeds will produce tall late flowering females coupled with early flowering males.
5. Don't Over-fertilize
Fertilize after first 2 spiked leaves appear.
Start with 25% of recommended label strengths and work your way up. If the leaves suddenly twist or fold under, Leach and Spray with pure water for several days!
Don't fertilize your plants every time you water! (Soil)
A common watering schedule is to fertilize at full strength, then water at half or quarter strength. This prevents excess salt buildup, leaf and root burn. In addition, don't water at full strength if the medium is too dry — root burn can occur.
As a precaution, leach the plants with lots of pure water every 2-4 weeks.
6. Don't Under-fertilize
Under-fertilizing is less common. If you prefer to give the plant 'just enough nutrients', use a organic soil mixture with blood meal and bone meal or some slow release fertilizer with micro nutrients.
7. Don't Start with Clones
Start with seeds. Bugs are a pain, as are plant diseases. Many growers are able to grow indoors without pest problems for years. Another grower's cuttings are almost guaranteed to have diseases &/or pests.
8. Don't Provide A Bad Environment
Always provide air circulation and fresh air even during the night cycle. All the air indoors should be replaced every 5-10 minutes.
Humidity between 30-70% temp aim for around 75-85' Even seedlings need a gentle fan to strengthen the stems.
9. Don't Harvest Too Early
25% of the weight will form in the last 2 weeks. Begin flushing with 100% pH'd water when the pistil are 25% brown. Harvest when the plants have totally stopped growing and the white pistils are at least 50-75% brown.
*NOTE: Outdoors if security is a factor make your own call on when to sacrifice the fields. Also take buds continuously in case of thieves.
Common questions:
Q. Can marijuana grow in a northern climate?
Marijuana plants can grow anywhere corn can grow. All it needs is three growing months - seed to harvest. 2 if started indoors!
Q. Why do I have to buy seeds? Why can't I use my own that I picked from my own stash?
Most people desire, and want to be guaranteed, certain characteristics in their mature female plants. The seeds from any weed will all grow into something different. This is unprofitable and inefficient. As opposed to knowing the single set of requirements for your entire crop, you must provide a different set of requirements for each of your plants.
Q. What is better for a new grower - hydroponics or soil?
I believe the all around "better", more convenient setup is soil. Hydro makes plants grow faster, but won't make your buds more potent than soil. Hydro should be attempted after you have a few successful soil crops under your belt.
If you are starting from seed and growing for personal, soil is the practical growing medium. If the crop is started with clones and is commercial, a hydroponics setup is more practical.
Q. Why are my seedlings stretching?
Low light conditions. They also need a gentle wind. Plants will also stretch when subjected to conditions of high humidity.
Q. What kind of lights should I use?
Cheap 4 ft. cool white fluorescent tubes : for germination/seedlings
400 watt Metal halide/HPS : for personal home growers
1000 watt Metal halide/HPS : for some personal growers and commercial growers.
*Use at least 40 watts per sq. foot of grow space.
Q. How far should the lights be from the plants?
Fluorescent: tips of leaves almost touching bulbs
400 watt halide : two feet away from seedlings and one foot away from grown plants
1000 watt halide: four feet away from seedlings and two feet away from grown plants
Q. How often should you water?
Once a week or once every two week for soil and twice a day with a hydroponic flood and drain system.
*When top 2 inches of the soil dry out.* Occasionally provide periods of extra dry and wet soil.
*Allow 10% extra water to drain out of the bottom of the tray.* This will prevent toxic fertilizer build up.
Q. How long do your seeds last? What's the best way to keep them?
Seeds can last over 5 years if kept cool and dry. They may last up to 10 years if sealed and frozen, but fewer will germinate.
Growing in soil and adjusting pH levels
A lot of gardeners have trouble with the pH of their soil. A high pH can lock out needed nutrients and mimic other problems like Fe and Mg deficiencies. The biggest mistake new growers make is to try and correct pH problems too quickly. The first step in determining if high pH is the real problem, is to pick up a good pH tester. Don't be afraid to shell out the cash for a good one, it's well worth it!
Here are some recommendations: (All sell for under $100.00)
1. Milwaukee makes two styles of hand-held pH meters. A small "pen" called the Sharp and the larger Smart Meter. Both are easy to use. The Sharp pens are splash-proof (although not totally waterproof), and have a large easy to read display. They also have a detachable, replaceable probe.
2. Oakton - Same type of pH tester as Milwaukee makes, but it's made a little better imho. These are totally waterproof. (It floats.)
3. Shindengen ISFET pH Meters are state-of-the-art pH pens and work with a totally different method of measurement. This pen uses a solid state Ion Sensitive Field Effect Transistor (ISFET) instead of the fragile glass electrodes used by traditional pH pens. They have replaceable tips that change from opaque to clear when they need to be changed.
What is pH, and what do the terms acidic and alkaline mean?
The acidity or alkalinity of the soil is measured by pH (potential Hydrogen ions). Basically it's a measure of the amount of lime (calcium) contained in your soil, and the type of soil that you have. A soil with a pH lower than 7.0 is an acidic soil and one with a pH higher than 7.0 is considered to be alkaline. A pH of 7.0 is neutral.
Adjusting your soil pH:
Once you have determined the pH of your soil with a good tester, you can amend the soil if needed to accommodate the plants in your garden using inexpensive materials commonly available at your local garden center.
* Adjust soil pH slowly over several days time, and check pH often as you go. Radical changes in pH may cause osmotic shock damage to the roots.
Raising soil pH: (to make it more alkaline)
It is generally easier to make soil mixes more alkaline than it is to make them more acidic. The addition of dolomite lime, hardwood ash, bone meal, crushed marble, or crushed oyster shells will help to raise the soil pH.
by MisterIto
In soil: add dolomite limestone to the soil; use small amounts of hydrated lime.
Raising hydroponic pH: (to make it more alkaline)
In hydroponics: use potassium silicate, provides silicon at an effective doseage.
In bioponics/hydro-organics: add small amounts of sodium bicarbonate or lime.
Lowering soil pH: (to make it more acidic)
If your soil needs to be more acidic, sawdust, composted leaves, wood chips, cottonseed meal, leaf mold and especially peat moss, will lower the soil pH.
by MisterIto
bloodmeal/cottonseed meal during vegetative; bonemeal during flowering.
Lowering hydroponic pH: (to make it more acidic)
In hydroponics: use nitric acid during vegetative; phosphoric acid during flowering.
Contributed by: Spiritual.Fa
Stabilizing pH with Dolomite lime
The best way to stable PH is by adding 1 ounce of Dolomite Lime per 1 gallon of planting soil.
Dolomite Lime is available in garden nurseries. Buy the fine Dolomite powder (There may be several kinds of Dolomite like Rough, Medium, Fine)
Dolomite Lime has been a useful PH stabilizer for years, since it has a neutral PH of 7 when added to your soil it stabilizes your soil at PH 7.
Mix the dry soil medium and dolomite together really well, give the mix a good watering then after the water has had chance to settle and leech into the soil a bit give the mix a really good stir. Then water the soil/lime mix and give it another stir
Best plan is to mix fine dolomite lime into your mix before planting. Fine Dolomite will help stabilize your pH; however, if the ph becomes unstable or changes, you can then use Hydrated Dolomite Lime. Add some of the hydrated lime to luke warm water and give it a good stir then water your plants with it. Give the plants a good watering with this hydrated lime added and your PH should fall or rise back to 7
Other Benefits of Dolomite Lime
Dolomite lime is also high in two secondary nutes that can often be overlooked by fertilizers; dolomite is high in both (Mg) Magnesium and (Ca) Calcium.
7 Excellent NorCal Cannabis Extracts You’ve Got to Try

(Courtesy of Utopia)
Throughout the summer, California producers have struggled with bottlenecks at testing laboratories, revamping packaging for child-resistance, and scaling up to provide steady supplies to retailers. But now there’s finally clean, tasty, and incredibly potent hashes and concentrates available that you’ve just got to try!
This round-up of seven amazing cannabis concentrates compliments our Great Cannabis Concentrates of Southern California, with most of these brands primarily found up north around San Francisco, San Jose, and Santa Cruz. Sample premium cold-water hashes along with the purest live resins, shatters, sauces, and diamonds made by extract artists at the top of their game.
Utopia

(Courtesy of Utopia)
Places to Find It: Caliva in San Jose, Santa Cruz Naturals in Aptos, Elemental Wellness in San Jose
All of the flowers used to make these connoisseur-quality extracts are sourced from Utopia’s own garden or from certified greenhouses and indoor farms in Santa Cruz and Mendocino counties. Each batch of C. Banana, Golden Lemons or Clementine extract is single-source, meaning product is never blended from different gardens or harvests. Utopia captures the unique flavor profile of each cannabis flower through their refined extraction methods, resulting in cannabinoid and terpene levels as high as 97% and 16% respectively. Look for their limited “Diamond Line” extracts, featuring big chunks of THC-rich diamonds in a flavorful terp sauce.
Beezle Extracts

(Courtesy of Beezle Extracts)
Places to Find It: Magnolia Wellness in Oakland, Berkeley Patients Group in Berkeley, Humboldt Patient Resource Center in Arcata
With a proven track record for producing award-winning cannabis products, Beezle continues to raise the bar for the industry with their super-premium “Black Label” product line. Going beyond their usual offerings of shatter, batter, budder, and sugar made from either live or cured resin, the Black Label distinguishes itself with enormous diamonds of THCA that can weigh up to two grams each, floating in a sauce of terpene-rich oils. Get ready for incredibly tasty dabs with mind-melting potency, featuring strains like Banana Fire OG, Creamsicle, and Bay 11.
710 Labs

(Courtesy of 710 Labs)
Places to Find It: Bloom Room in San Francisco, Airfield Supply in San Jose, Left Coast Collective in San Diego
Based in Colorado, 710 Labs recently established a presence in California, with products on the menu at many Bay Area dispensaries garnering rave reviews. Look for live rosin and “live badder,” a type of budder / batter blended to perfection. Expect to enjoy single source extracts that express a strain’s ratio of terpenes in a naturally concentrated proportion, preserving the essence of the flower as much as possible. Recently featured strains include Lemon Meringue, Gorilla Dosha, and East Coast Sour Diesel, made into tasty water hash, live resin, rosin, sauce and more for your dabbing pleasure.
Biscotti

(Courtesy of Biscotti)
Places to Find It: Magnolia Wellness in Oakland, Barbary Coast in San Francisco, Caliva in San Jose
An Italian cannabis brand flourishing in the U.S., the dedicated hashmakers behind Biscotti specialize in producing ice water hash made using age-old techniques. Their Resina bubble hash is a loose collection of trichomes, jarred in glass, and sealed with distinctive black wax. Biscotti also makes pressed hash called “biscottinis,” (like a little cookie), and a rosin called “Olio,” that’s their highest-potency offering, along with hash-infused pre-rolled joints.
Nasha

(Courtesy of Nasha)
Places to Find It: KindPeoples in Santa Cruz, Airfield Supply in San Jose, From the Earth in Port Hueneme
Producing cold-water hash in the traditional style, the founder of Nasha spent time living in the Indian Himalayas to learn about ancient extraction techniques as well as the culture surrounding hashish. This type of hash is sometimes called “solventless,” meaning that no petrochemical solvents such as butane were used in its production. It’s just ice and water agitated along with flowers to separate the THC-rich trichomes away from the cannabis plant. Look for Nasha’s temple balls, an old-school form of hash that’s been formed into a resinous, shining ball—somewhat of a rarity in a modern marketplace crowded with new innovations.
Terp Preservation Society

(Courtesy of Terp Preservation Society)
Places to Find It: The Heart of Humboldt in Arcata, Satori Wellness in McKinleyville, Kind Courier in San Francisco, Barbary Coast in San Francisco
Straight outta Humboldt, the amazing flavors of extracts from Terp Preservation Society made it worth the extra effort to track down these products. Using unique local strains including Sour Epoxy, Mendo Breath, and Harry’s Wonder to create sauce, diamonds, and live resin, this brand has successfully transitioned into compliance and is back on shelves in the Emerald Triangle and Bay Area.
Loudpack

(Courtesy of Loudpack)
Places to Find It: KindPeoples in Santa Cruz, Harborside in Oakland, Santa Cruz Mountain Herb in Santa Cruz
An all-star team of growers and extractors works behind the scenes at Loudpack, which uses award-winning cannabis strains from DNA Genetics and Crockett Family Farms to create their line of live resin and sauce. After a recent, devastating fire at their greenhouse in Monterey County, Loudpack has recovered and is getting back to producing quality extracts, flowers, and pre-rolls for Cali connoisseurs. Look for Larry OG live resin in stores now, along with Strawberry Banana, Gelato, and Pacific Frost extracts.
If you’re new to consuming cannabis, start with very small amounts of extracts, since these products are much stronger than flowers.
(Courtesy of Utopia)
Throughout the summer, California producers have struggled with bottlenecks at testing laboratories, revamping packaging for child-resistance, and scaling up to provide steady supplies to retailers. But now there’s finally clean, tasty, and incredibly potent hashes and concentrates available that you’ve just got to try!
This round-up of seven amazing cannabis concentrates compliments our Great Cannabis Concentrates of Southern California, with most of these brands primarily found up north around San Francisco, San Jose, and Santa Cruz. Sample premium cold-water hashes along with the purest live resins, shatters, sauces, and diamonds made by extract artists at the top of their game.
Utopia
(Courtesy of Utopia)
Places to Find It: Caliva in San Jose, Santa Cruz Naturals in Aptos, Elemental Wellness in San Jose
All of the flowers used to make these connoisseur-quality extracts are sourced from Utopia’s own garden or from certified greenhouses and indoor farms in Santa Cruz and Mendocino counties. Each batch of C. Banana, Golden Lemons or Clementine extract is single-source, meaning product is never blended from different gardens or harvests. Utopia captures the unique flavor profile of each cannabis flower through their refined extraction methods, resulting in cannabinoid and terpene levels as high as 97% and 16% respectively. Look for their limited “Diamond Line” extracts, featuring big chunks of THC-rich diamonds in a flavorful terp sauce.
Beezle Extracts
(Courtesy of Beezle Extracts)
Places to Find It: Magnolia Wellness in Oakland, Berkeley Patients Group in Berkeley, Humboldt Patient Resource Center in Arcata
With a proven track record for producing award-winning cannabis products, Beezle continues to raise the bar for the industry with their super-premium “Black Label” product line. Going beyond their usual offerings of shatter, batter, budder, and sugar made from either live or cured resin, the Black Label distinguishes itself with enormous diamonds of THCA that can weigh up to two grams each, floating in a sauce of terpene-rich oils. Get ready for incredibly tasty dabs with mind-melting potency, featuring strains like Banana Fire OG, Creamsicle, and Bay 11.
710 Labs
(Courtesy of 710 Labs)
Places to Find It: Bloom Room in San Francisco, Airfield Supply in San Jose, Left Coast Collective in San Diego
Based in Colorado, 710 Labs recently established a presence in California, with products on the menu at many Bay Area dispensaries garnering rave reviews. Look for live rosin and “live badder,” a type of budder / batter blended to perfection. Expect to enjoy single source extracts that express a strain’s ratio of terpenes in a naturally concentrated proportion, preserving the essence of the flower as much as possible. Recently featured strains include Lemon Meringue, Gorilla Dosha, and East Coast Sour Diesel, made into tasty water hash, live resin, rosin, sauce and more for your dabbing pleasure.
Biscotti
(Courtesy of Biscotti)
Places to Find It: Magnolia Wellness in Oakland, Barbary Coast in San Francisco, Caliva in San Jose
An Italian cannabis brand flourishing in the U.S., the dedicated hashmakers behind Biscotti specialize in producing ice water hash made using age-old techniques. Their Resina bubble hash is a loose collection of trichomes, jarred in glass, and sealed with distinctive black wax. Biscotti also makes pressed hash called “biscottinis,” (like a little cookie), and a rosin called “Olio,” that’s their highest-potency offering, along with hash-infused pre-rolled joints.
Nasha
(Courtesy of Nasha)
Places to Find It: KindPeoples in Santa Cruz, Airfield Supply in San Jose, From the Earth in Port Hueneme
Producing cold-water hash in the traditional style, the founder of Nasha spent time living in the Indian Himalayas to learn about ancient extraction techniques as well as the culture surrounding hashish. This type of hash is sometimes called “solventless,” meaning that no petrochemical solvents such as butane were used in its production. It’s just ice and water agitated along with flowers to separate the THC-rich trichomes away from the cannabis plant. Look for Nasha’s temple balls, an old-school form of hash that’s been formed into a resinous, shining ball—somewhat of a rarity in a modern marketplace crowded with new innovations.
Terp Preservation Society
(Courtesy of Terp Preservation Society)
Places to Find It: The Heart of Humboldt in Arcata, Satori Wellness in McKinleyville, Kind Courier in San Francisco, Barbary Coast in San Francisco
Straight outta Humboldt, the amazing flavors of extracts from Terp Preservation Society made it worth the extra effort to track down these products. Using unique local strains including Sour Epoxy, Mendo Breath, and Harry’s Wonder to create sauce, diamonds, and live resin, this brand has successfully transitioned into compliance and is back on shelves in the Emerald Triangle and Bay Area.
Loudpack
(Courtesy of Loudpack)
Places to Find It: KindPeoples in Santa Cruz, Harborside in Oakland, Santa Cruz Mountain Herb in Santa Cruz
An all-star team of growers and extractors works behind the scenes at Loudpack, which uses award-winning cannabis strains from DNA Genetics and Crockett Family Farms to create their line of live resin and sauce. After a recent, devastating fire at their greenhouse in Monterey County, Loudpack has recovered and is getting back to producing quality extracts, flowers, and pre-rolls for Cali connoisseurs. Look for Larry OG live resin in stores now, along with Strawberry Banana, Gelato, and Pacific Frost extracts.
If you’re new to consuming cannabis, start with very small amounts of extracts, since these products are much stronger than flowers.
How to Make Cannabis Tincture: Best Recipes
DIY
Contents
What is a Cannabis Tincture?
Using alcohol, oils, or glycerin as a base, marijuana can be extracted and made into concentrated extracts called tinctures. Many people ask how to make marijuana tincture with Everclear as it has a high-volume of grain alcohol and preserved cannabis tinctures. There are also several other ways to make effective cannabis tinctures that we will explore.
Benefits of Cannabis Tinctures
Before learning how to make a tincture, let’s go over the reasons for using potent drops of hemp over other forms of the cannabis plant.
Choosing a specific stain can affect the potency and after effects of a tincture. This tincture will take on the medicinal properties of the strain. If you choose an indica plant, then you will experience a relaxed state through a body high. This can help with insomnia, body pain, nausea, and depression. A sativa strain will have the opposite effect of high energy and an appetite stimulate. A hybrid can combine both of these qualities depending on the need of the tincture.
There is also the option of a CBD strain that is used to make purely medicinal, non-psychoactive tinctures. Making your own CBD tincture will allow you to increase the amount of beneficial cannabinoids, which will be much higher than tinctures for sale at dispensaries.
How to Make Cannabis Tinctures
The basic science behind making cannabis tinctures, otherwise known as golden dragon for its rich yellow-green color, is the fusion of the flavor and potency of alcohol or oil with cannabis. The alcohol or oil base acts as an extraction machine to absorb the cannabinoids and terpenes. This will make liquid THC drops that can be used in recipes or by itself in small doses.
If the intention is to get high from the tincture drops, then decarboxylation is necessary prior to starting any recipe. Heat the cannabis bud, trimmings, or stems in an oven at 250 degrees F for at least 30 minutes to activate the THC. If this is not done, then the tincture will not produce a high.
Recipes
Cannabis Tincture Recipe Everclear
If you are wondering how to make weed alcohol tincture, this is the most potent green dragon tincture recipe as it contains grain alcohol. Other liquors like vodka can also be used based your flavor preference. This is how to make a THC tincture: the longer you steep your cannabis in alcohol the more potent it will become. This golden dragon recipe can be adjusted according to how long you want to soak your pot, anywhere from 2 weeks up to a year.
Equipment
Ingredients
Any vegetable oil can be used as a base, but coconut oil has the highest amounts of fatty acid, which binds with the cannabinoids the best. It is also a magical substance to use in cooking and can be stored as a hash solid for other uses like lotions or to add inside capsules for easy consumption.
Equipment
If you do not want to use alcohol and prefer not to get high, a CDB tincture using glycerin will include neither. Glycerin is a chemical that is safe to consume and is used to absorb and lock in liquid. It has a sweet flavor, so it is perfect for cannabis syrup as well. This makes it a great mechanism for extracting CBD cannabinoids from a marijuana plant. This type of tincture treats several aliments like seizures, anxiety, and severe pain.
Equipment
Golden dragon tinctures come in handy when you want to add a concentrated dose to your meal. You can also use it to make cannabis butter instead of using full buds to infuse your magic brownies. Tinctures work well for home-made gummy edibles or infused cocktails as well.
Cannabis extracts like tinctures save time and money, and their usefulness is endless. The price of using a small amount tincture is a fraction of the cost of smoking or vaping weed, plus its effects last longer.
How to Avoid Overdose
Making your own golden dragon tincture is exciting and rewarding, but it is important to review your dosage requirements before consuming. If you are new to cannabis, then small amounts are recommended. Start with one drop under the tongue, wait 15 minutes, and monitor its effects. You can always increase the dosage afterward.
DIY
Contents
What is a Cannabis Tincture?
Using alcohol, oils, or glycerin as a base, marijuana can be extracted and made into concentrated extracts called tinctures. Many people ask how to make marijuana tincture with Everclear as it has a high-volume of grain alcohol and preserved cannabis tinctures. There are also several other ways to make effective cannabis tinctures that we will explore.
Benefits of Cannabis Tinctures
Before learning how to make a tincture, let’s go over the reasons for using potent drops of hemp over other forms of the cannabis plant.
- Easy medical use by placing drops under the tongue known as sublingual dosing
- Fast acting as it absorbs quickly
- Simple to store and odorless
- Controls dosage amount
- Long-lasting and is preserved in the alcohol or other base
- For sale at dispensary or online shops
- Healthy alternative to smoking
- Can be used for edibles
Choosing a specific stain can affect the potency and after effects of a tincture. This tincture will take on the medicinal properties of the strain. If you choose an indica plant, then you will experience a relaxed state through a body high. This can help with insomnia, body pain, nausea, and depression. A sativa strain will have the opposite effect of high energy and an appetite stimulate. A hybrid can combine both of these qualities depending on the need of the tincture.
There is also the option of a CBD strain that is used to make purely medicinal, non-psychoactive tinctures. Making your own CBD tincture will allow you to increase the amount of beneficial cannabinoids, which will be much higher than tinctures for sale at dispensaries.
How to Make Cannabis Tinctures
The basic science behind making cannabis tinctures, otherwise known as golden dragon for its rich yellow-green color, is the fusion of the flavor and potency of alcohol or oil with cannabis. The alcohol or oil base acts as an extraction machine to absorb the cannabinoids and terpenes. This will make liquid THC drops that can be used in recipes or by itself in small doses.
If the intention is to get high from the tincture drops, then decarboxylation is necessary prior to starting any recipe. Heat the cannabis bud, trimmings, or stems in an oven at 250 degrees F for at least 30 minutes to activate the THC. If this is not done, then the tincture will not produce a high.
Recipes
Cannabis Tincture Recipe Everclear
If you are wondering how to make weed alcohol tincture, this is the most potent green dragon tincture recipe as it contains grain alcohol. Other liquors like vodka can also be used based your flavor preference. This is how to make a THC tincture: the longer you steep your cannabis in alcohol the more potent it will become. This golden dragon recipe can be adjusted according to how long you want to soak your pot, anywhere from 2 weeks up to a year.
Equipment
- One-quart mason jar
- Grinder or food processor
- Cheese cloth
- Brown or dark glass eye dropper
- Baking sheet
Ingredients
- 1 quart of grain alcohol
- 1 ounce of cannabis
- Grind the cannabis into small pieces using a grinder or food processor.
- Use the decarboxylation pre-cooking method above using a cookie sheet.
- Place 1 quart of grain alcohol and your marijuana in a mason jar.
- Close the lid tightly, so no air can get it.
- Store in a cabinet or a cool dark place.
- Shake the jar every few days.
- Wait a least 2 weeks, then strain the mixture using a cheese cloth.
- Place the tincture in the eye dropper and keep it in the refrigerator or a cool location.
Any vegetable oil can be used as a base, but coconut oil has the highest amounts of fatty acid, which binds with the cannabinoids the best. It is also a magical substance to use in cooking and can be stored as a hash solid for other uses like lotions or to add inside capsules for easy consumption.
Equipment
- Double boiler or sauce pan and small pot
- Cheese cloth
- Jar or container for storage
- 1 cup of coconut oil
- 1 cup of cannabis
- Grind the bud, stems, or trim into small pieces.
- Add the cannabis and coconut oil to the double boiler.
- Heat for 6-8 hours stirring occasionally and adding a little water if needed. This will be the decarboxylation process.
- Drain and strain your oil using a cheese cloth once cooled.
- Place it in a jar or container.
- Tincture will last for 2 months or longer if refrigerated.
If you do not want to use alcohol and prefer not to get high, a CDB tincture using glycerin will include neither. Glycerin is a chemical that is safe to consume and is used to absorb and lock in liquid. It has a sweet flavor, so it is perfect for cannabis syrup as well. This makes it a great mechanism for extracting CBD cannabinoids from a marijuana plant. This type of tincture treats several aliments like seizures, anxiety, and severe pain.
Equipment
- 1-quart mason jar
- Cheese cloth
- Grinder or food processor
- Brown or dark glass eye dropper
- 1 ounce of CBD cannabis
- 8-ounce bottle of glycerin
- Grind the CBD bud to a powder using a grinder or food processor.
- Place the weed and enough glycerin to almost fill the mason jar.
- Sit the jar on a window sill or near natural light.
- Let it sit for 4-5 weeks, shaking it once a day to release the cannabinoids.
- Strain the mixture using a cheese cloth.
- Pour the tincture in an eye dropper.
- Keep it refrigerated for best results.
Golden dragon tinctures come in handy when you want to add a concentrated dose to your meal. You can also use it to make cannabis butter instead of using full buds to infuse your magic brownies. Tinctures work well for home-made gummy edibles or infused cocktails as well.
Cannabis extracts like tinctures save time and money, and their usefulness is endless. The price of using a small amount tincture is a fraction of the cost of smoking or vaping weed, plus its effects last longer.
How to Avoid Overdose
Making your own golden dragon tincture is exciting and rewarding, but it is important to review your dosage requirements before consuming. If you are new to cannabis, then small amounts are recommended. Start with one drop under the tongue, wait 15 minutes, and monitor its effects. You can always increase the dosage afterward.
What am I looking at?

Bruh, Im not an expert but it looks like you have a male plant.. Did you sex them out??
No I didn't. Honestly, I don't even really know what the fuck I'm doing. I think that's the only one that's like that out of the 8 or 10 plants I have.Bruh, Im not an expert but it looks like you have a male plant.. Did you sex them out??

If it is a male, which it likely is, I'll harvest the seeds from it. That's about all you can do with a male plant, right? This is another one I have. That one is about 3+ feet tall. I have another that's almost 6' tall

What am I looking at?
male plant. kill it.
No I didn't. Honestly, I don't even really know what the fuck I'm doing. I think that's the only one that's like that out of the 8 or 10 plants I have.
If it is a male, which it likely is, I'll harvest the seeds from it. That's about all you can do with a male plant, right? This is another one I have. That one is about 3+ feet tall. I have another that's almost 6' tall
thats a female.
kill the male
I've got one other male. There's no use for males at all? Not even for pollination?male plant. kill it.
thats a female.
kill the male
Pollination sure, but if you want to breed with it you should separate it from your females that you have right now so that when it does drop it's pollen you can just collect it and later use it to pollinate a lady. You don't just want the male to release it's pollen in the open on all your shit.
Also you don't collect the seeds from the male, you collect it's pollen. You use the pollen on a female plant and when she produces seeds that will be your new cross.
Another use
3. Concentrate Production
It may come as a surprise that male plants can be psychoactive in nature—though much less potent than females. The plants do not produce buds, but small amounts of cannabinoids can be found in the leaves, stems, and sacs, which can be extracted to produce hash or other oils.
I've got one other male. There's no use for males at all? Not even for pollination?
If ur into cross breeding then you can save the pollen. But I doubt it'll be worth it in ur case. Also if they pollinate ur girls then ur bud will get seeds
Legalization of Recreational Pot Gaining Momentum in the United States

It is clear: Americans want legal weed, whether it be for medical reasons, recreational use, or both. Currently, medical marijuana is legal in 29 states and the District of Columbia, with the remaining states quickly following suite. Legalization of recreational pot is spreading slower, but spreading it is nonetheless. Many states are holding referendums with adult-use marijuana on the ballot.
Six out of every 10 Americans, or 61 percent to be exact, now support the legalization of recreational weed. According to the Pew Research Center, this is double what it was back in 2000. It is also nearly five percent higher than it was just a year ago. The survey, conducted in October last year, shows voter support for weed increasing at an unignorably steady rate across the United States.
Current Weed-Friendly States
Marijuana is now legal recreationally in nine states and Washington D.C. Some are enjoying skyrocketing economic benefits, including more tax money for infrastructure and other government-funded programs. Employment is higher, tourism booming. Although there are challenges, such as meeting demand and competing with the black market, these states all allow recreational pot in some way:
Colorado
Colorado was the first state to legalize recreational cannabis. Tourists flock to the state to enjoy the many pot-friendly activities on offer, such as tours, classes, events, and more. Colorado is doing well. Crime rates are down, employment is high, and people there are healthier and happier.
Washington
Washington State soon followed Colorado’s example. Although pot is legal across the state, including in Washington D.C., only state-licensed outlets can sell it. There are restrictions in place, which mimic its liquor laws, but if you comply with them, then you will be a happy stoner indeed.
Alaska
Anyone 21-years and older can light up legally in Alaska. The state legalized recreational use in 2015 and its first weed shop opened the next year. Alaska is enjoying a roaring pot tourism trade. Over two million people visited the state lastyear and spent nearly $2 billion on weed-related products and activities.
California
Although recreational weed is legal in California, since New Year’s Day this year, you cannot find it everywhere. Some cities, particularly in the Central Valley area, such as Bakersfield and Fresno, put a ban on sales. Despite this, the state allows legal adults to buy, use and grow limited quantities of pot.
Maine
Maine is more liberal with its weed use regulations than other states are. Mainers can possess as much as 2.5 ounces of cannabis; more than double what others allow. However, you cannot get it anywhere in the state. Governor Paul LePage just recently vetoed a bill that would permit recreational sales.
Massachusetts
Massachusetts residents can grow as many as 12 cannabis plants at home and carry an ounce of pot on them. Lawmakers postponed its legal market, however, from January this year to July. The state is still busy getting its recreational marijuana industry in order.
Nevada
Since Nevada launched its recreational market in July 2017, it has $20 million more in its coffers. The state does not permit anyone to grow their own, however, unless they live 25 miles from a retail outlet. You can still buy pot and use it, while supplies last anyway. Stores quickly run out of stock to sell.
Oregon
Oregon legalized recreational weed in 2015. Since then, it has paid $85 million in cannabis taxes to fund public health initiatives, schools, local government, and police departments. You can carry an ounce of weed there and grow up to four plants at home. You can even gift edibles, if privately ingested.
Vermont
Vermont is the first state to legalize weed through its legislature, instead of through a ballot initiative. You can carry an ounce there and have two plants growing at home. However, the state’s lawsdo not establish a legal market for either the production or sale of marijuana.
Soon-To-Be Weed-Friendly States, Hopefully
Some other states are considering whether to legalize or not, while some are just waiting for their legal laws to come into effect. Michigan, New Jersey, New York, Virginia and Wisconsin are states experts think will legalize weed fully soon. Thirteen states already decriminalized marijuana, so you will not go to jail if police catch you with it, only pay a fine of between $100 and $500. These states are:
Despite the federal government stubbornly refusing to legalize marijuana in any capacity, it will not be able to stave off public pressure for too much longer. More and more states are legalizing weed, ultimately rendering federal law irrelevant. However, even though pot is legal already in some states, it is important to remember that they still have regulatory laws. Do not break them when visiting!
It is clear: Americans want legal weed, whether it be for medical reasons, recreational use, or both. Currently, medical marijuana is legal in 29 states and the District of Columbia, with the remaining states quickly following suite. Legalization of recreational pot is spreading slower, but spreading it is nonetheless. Many states are holding referendums with adult-use marijuana on the ballot.
Six out of every 10 Americans, or 61 percent to be exact, now support the legalization of recreational weed. According to the Pew Research Center, this is double what it was back in 2000. It is also nearly five percent higher than it was just a year ago. The survey, conducted in October last year, shows voter support for weed increasing at an unignorably steady rate across the United States.
Current Weed-Friendly States
Marijuana is now legal recreationally in nine states and Washington D.C. Some are enjoying skyrocketing economic benefits, including more tax money for infrastructure and other government-funded programs. Employment is higher, tourism booming. Although there are challenges, such as meeting demand and competing with the black market, these states all allow recreational pot in some way:
Colorado
Colorado was the first state to legalize recreational cannabis. Tourists flock to the state to enjoy the many pot-friendly activities on offer, such as tours, classes, events, and more. Colorado is doing well. Crime rates are down, employment is high, and people there are healthier and happier.
Washington
Washington State soon followed Colorado’s example. Although pot is legal across the state, including in Washington D.C., only state-licensed outlets can sell it. There are restrictions in place, which mimic its liquor laws, but if you comply with them, then you will be a happy stoner indeed.
Alaska
Anyone 21-years and older can light up legally in Alaska. The state legalized recreational use in 2015 and its first weed shop opened the next year. Alaska is enjoying a roaring pot tourism trade. Over two million people visited the state lastyear and spent nearly $2 billion on weed-related products and activities.
California
Although recreational weed is legal in California, since New Year’s Day this year, you cannot find it everywhere. Some cities, particularly in the Central Valley area, such as Bakersfield and Fresno, put a ban on sales. Despite this, the state allows legal adults to buy, use and grow limited quantities of pot.
Maine
Maine is more liberal with its weed use regulations than other states are. Mainers can possess as much as 2.5 ounces of cannabis; more than double what others allow. However, you cannot get it anywhere in the state. Governor Paul LePage just recently vetoed a bill that would permit recreational sales.
Massachusetts
Massachusetts residents can grow as many as 12 cannabis plants at home and carry an ounce of pot on them. Lawmakers postponed its legal market, however, from January this year to July. The state is still busy getting its recreational marijuana industry in order.
Nevada
Since Nevada launched its recreational market in July 2017, it has $20 million more in its coffers. The state does not permit anyone to grow their own, however, unless they live 25 miles from a retail outlet. You can still buy pot and use it, while supplies last anyway. Stores quickly run out of stock to sell.
Oregon
Oregon legalized recreational weed in 2015. Since then, it has paid $85 million in cannabis taxes to fund public health initiatives, schools, local government, and police departments. You can carry an ounce of weed there and grow up to four plants at home. You can even gift edibles, if privately ingested.
Vermont
Vermont is the first state to legalize weed through its legislature, instead of through a ballot initiative. You can carry an ounce there and have two plants growing at home. However, the state’s lawsdo not establish a legal market for either the production or sale of marijuana.
Soon-To-Be Weed-Friendly States, Hopefully
Some other states are considering whether to legalize or not, while some are just waiting for their legal laws to come into effect. Michigan, New Jersey, New York, Virginia and Wisconsin are states experts think will legalize weed fully soon. Thirteen states already decriminalized marijuana, so you will not go to jail if police catch you with it, only pay a fine of between $100 and $500. These states are:
- Connecticut
- Delaware
- Illinois
- Maryland
- Michigan
- Minnesota
- Mississippi
- Nebraska
- New Hampshire
- New York
- North Carolina
- Ohio
- Rhode Island
Despite the federal government stubbornly refusing to legalize marijuana in any capacity, it will not be able to stave off public pressure for too much longer. More and more states are legalizing weed, ultimately rendering federal law irrelevant. However, even though pot is legal already in some states, it is important to remember that they still have regulatory laws. Do not break them when visiting!
No I didn't. Honestly, I don't even really know what the fuck I'm doing. I think that's the only one that's like that out of the 8 or 10 plants I have.
If it is a male, which it likely is, I'll harvest the seeds from it. That's about all you can do with a male plant, right? This is another one I have. That one is about 3+ feet tall. I have another that's almost 6' tall
Thats okay, bruh.. Its all about learning and perfecting the art of growing those lovely ladies!!
Get rid of those males unless your into breeding.. Anyway, your girl looks good so far.. Ill post sum more info on sexing the plants apart..
male plant. kill it.
thats a female.
kill the male
If ur into cross breeding then you can save the pollen. But I doubt it'll be worth it in ur case. Also if they pollinate ur girls then ur bud will get seeds
Right on, bruh!! Thanks for sharing the info..
Marijuana Life Stages & Gender: Only Female Cannabis Plants Make Buds
Did you know there are both male and female marijuana plants? Yes, marijuana plants show gender, and the sex matters a lot to the grower.
That’s because only female plants produce buds. How do you grow female plants?


Regular marijuana seeds will be 50% male, and 50% female. That means half of the seeds will be unusable as far as growing buds.
One way around this is to purchased feminized seeds online. These seeds are available from all reputable online seedbanks, and the plants produced by these seeds are always female.
Questions about buying seeds online?
You can also make your own feminized seeds, but you have to start with two known female plants.
When do marijuana plants reveal their gender?
Cannabis plants go through two stages of life, the “vegetative” stage and the “flowering stage.”
They first go through the vegetative life stage, which you can sort of consider its “childhood” since the plant is only focusing on growing bigger and taller, and gender doesn’t matter. At the beginning of this stage you usually can’t tell what the plant’s gender is.
However, once the plant is about 6 weeks old, it will usually show signs of “pre-flowers” which will alert you to the gender before the beginning of the flowering stage.
Pre-Flowers usually reveal the gender around week 6 from seed

Otherwise you must wait for the flowering stage
Next, cannabis plants switch to the flowering stage which means they stop growing bigger and taller, and instead spend all their effort growing flowers (the buds we want are flowers!). The flowering stage is like the “adult” stage of a cannabis plant since at this point it’s only interested in adult stuff like growing their male and female parts, then pollinating In the flowering stage, plants start growing buds or pollen sacs in earnest. The buds we want are female flowers, so growers generally only want to grow female plants.
Growers Want Female Cannabis Plants – These Produce Bud
Regular Marijuana plants reveal their gender in two situations:
Female Plants & Pre-Flower Pictures


Click on thumbnails for larger picture
In this pic, you can see white pistils emerging from the calyxes. Female pistils are white and wispy, never green.

This pre-flower doesn’t have a pistil sticking out at first, but the shape helps tell you it’s a female plant. If you’re not sure about gender after spotting a pre-flower, it’s a good idea to wait and see for a little while, just to see if a white hair appears (which means it’s definitely a girl)


Adult Female Cannabis Plant Pictures


Those buds turn into this!


A small male pre-flower – this is what male plants look like when they first reveal their gender


These male pre-flowers are basically immature pollen sacs. When the plant starts flowering, they will grow and turn into bunches that almost look like grapes.


Click on thumbnails for larger picture
What about plants that display both male and female parts?
Sometimes it takes a day or two for a female pre-flower to release her first pistil, and the female calyx can look like the beginning of a pollen sac. Generally the more “pointy” ones tend to be female, but sometimes you have to wait and see a few more flowers to know for sure.
 * Most indoor growers use a timer to turn their lights on and off automatically.

Vegetative Stage
The first stage, “Vegetative” begins when they first sprout, at the beginning of their life.
Most growers give their plants 18-24 hours of light a day during the vegetative stage.
When a plant is about half the final size you want it to be, you should change it over to the “Flowering” stage.
Flowering Stage
The second life stage, “Flowering,” is the stage your plant will remain in until harvest..
You get marijuana plants start flowering (making buds) by changing your light schedule to 12-12.
That means you use an electric timer to automatically shine your grow lights for 12 hours a day, with 12 hours of uninterrupted TOTAL darkness during the plant’s “night period.”
Marijuana plants should reveal the first signs of their gender within 2-3 weeks after being changed to 12-12.
How Light Schedules Affect Marijuana Life Stages
Marijuana plants have an internal process where they can detect how long they receive uninterrupted darkness each day.
In the wild, as the days get shorter and nights get longer, the marijuana plant “realizes” that winter is coming and will start budding/flowering as it approaches the end of it’s lifecycle.
When growing marijuana outdoors, a grower doesn’t need to do anything to induce flowering because the sun will take care of things on its own. All you need to do is make sure your plant isn’t directly under a street light or other light source, so that the plant receives complete darkness at night.
 However, when growing marijuana indoors, a marijuana gardener will have to “fool” their plants into thinking winter is coming to induce flowering and kickstart the creation of buds.
This is done by changing the plant’s light schedule to 12-12, where the weed plants gets 12 hours of light a day and 12 hours of total darkness.
It’s easier to ensure the plant gets the 12 full hours of darkness each night when the start and end time for your lights to turn on and off is exactly the same each day. This is why most growers end up getting a timer to turn their lights on and off automatically.
I tend to set my timer in flowering to shine line from 7pm-7am. This gives me time to check on my plants at night when the lights first come on, and I can also check them quickly in the morning before I go to work. It also keeps things cooler since the lights are on at night. Some people (like myself) also get discounts on electricity that’s used at night.
But ANY 12 hour dark period will work, as long as you prevent your plant from getting light leaks during their “night.”
In fact, with marijuana plants, the length of night period, not the length of day period, seems to make the biggest difference. This makes sense if you consider that in the wild, a stormy or cloudy day could shorten the light period a plant receives, but few things in the wild will interrupt the darkness of night.
This has been experimentally verified by some out-of-the-box thinkers. They gave marijuana plants different amounts of light and dark, then watched what happened.
What they found is that a marijuana plant will stay flowering as long as she gets 12+ hours of darkness on a regular basis. The length of day period didn’t seem to matter at all. In fact, you could give plants 12 hours of dark followed by 24 hours of light, on a regular basis, and plants would continue to flower as long as their darkness was uninterrupted for 12 hours at a time.
Check out my marijuana grow light guide for more info about picking out the right grow lights for your situation!
Photoperiod dependent strains vs. auto-flowering strains
So all strains of cannabis that respond to light in this way (where the light period effects what stage they’re in) are called “Photoperiod dependent” strains.
“Auto-flowering” marijuana strains pretty much ignore how much light they get each day. Generally you don’t run into these unless you buy them particularly from a cannabis seed bank.
Learn more about auto-flowering cannabis strains
Marijuana plants have a gender: Is my plant Male or Female?
(Some marijuana plants can also be hermaphrodites, which means they display both male and female parts on the same plant)
Most growers prefer to grow female plants, as only female plant produce buds/flowers.
Note: Once the plant is about 6 weeks old from seed, it will usually show signs of “pre-flowers” which will alert you to the gender before the beginning of the flowering stage.
Pre-Flowers usually reveal the gender around week 6 from seed, or you can wait until the plant switches to the flowering stage.
After 2-3 weeks of the 12-12 light schedule, most marijuana plants will reveal the first signs of their gender (they either are a female plant and start growing buds, YAY! or they are a male plant and start growing balls, NO!).
What about plants that display both male and female parts?
Why do I not want male marijuana plants?
Only a female marijuana plant makes flowers/buds that contain a usable amount of THC. Male marijuana plants only make pollen sacs that they use to fertilize the females. Most growers will throw away any male plants that they encounter to keep them from fertilizing the female plants. If your female plants do get fertilized, they will use all their energy to produce seeds instead of making buds. This is good if you want seeds, but you will run into the same problem since half of the seeds will also be male.
If you would like to start a breeding program to make your own hybrids, I recommend using a method that creates all-female (feminized) seeds so that you don’t waste time having to identify and throw out male plants.
 Getting clones of female marijuana plants or buying feminized seeds online from a seed bank are other ways you can ensure that all your marijuana plants are female.
If you don’t have a choice of seeds, and some of your seeds may be male (like if you just found seeds) than you will want to get your plants to reveal their gender right away so you don’t have to waste time and energy on male plants.
For most marijuana strains, the male plants don’t produce usable amounts of THC, so most growers toss them on sight. Unfortunately, 50% of all regular seeds will become male plants.
These male plants can also impregnate your female plants, which causes them not to produce as many buds, so unless you’re breeding, destroy male plants as soon as you notice them growing grape-like balls where their buds would normally be.
A vigilant grower can carefully watch their plants and remove males when they develop the first signs of pollen sacs.
Pre-Flowers reveal the gender of your plant by around week 6 from seed, and as early as 3 weeks from seed for some plants.
In this area you’ll find pre-flowers nestled where the “joints” of the plant are.
Learn exactly where to look to find preflowers
Tactic 2: Taking a clone and flowering it
The following method can help you identify gender for plants that are taking a while to show their pre-flowers.
If you’re just growing 1, 2, or 3 plants, it can be heartbreaking to find out all your plants are male, and you need to start over in order to make buds.
When marijuana plants are seedlings (or when they’re just seeds), there’s no way to tell which plants are male and which plants are female.
You have to “wait and see.” Male marijuana plants develop pollen sacs (look like little balls or nuts). Female marijuana plants start growing white hairs that develop into the marijuana buds (sensimilla) that contain THC and other cannabinoids. Lots of pictures of male and female parts above.
However, you may want to be more proactive and get rid of the male plants before they enter the flowering stage so you don’t have to waste the time and energy in caring for plants that you will eventually get rid of. If so, then you can use to following technique to identify and remove all the males from your grow.
How to Determine Sex of a Marijuana Plant
Did you know there are both male and female marijuana plants? Yes, marijuana plants show gender, and the sex matters a lot to the grower.
That’s because only female plants produce buds. How do you grow female plants?
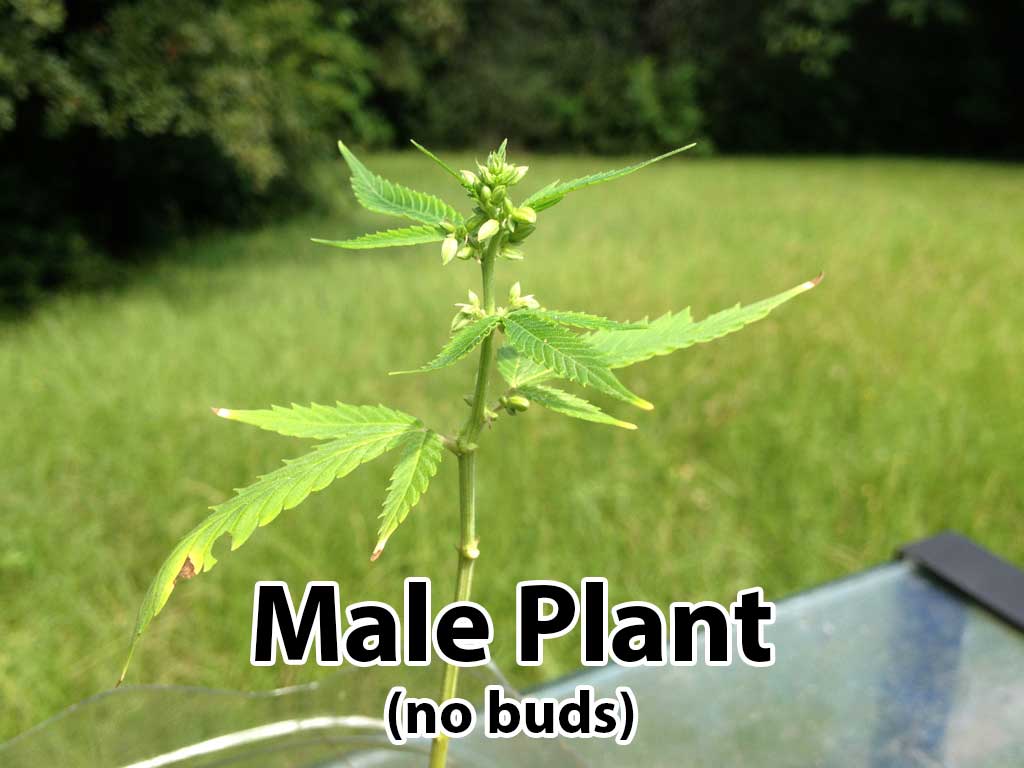
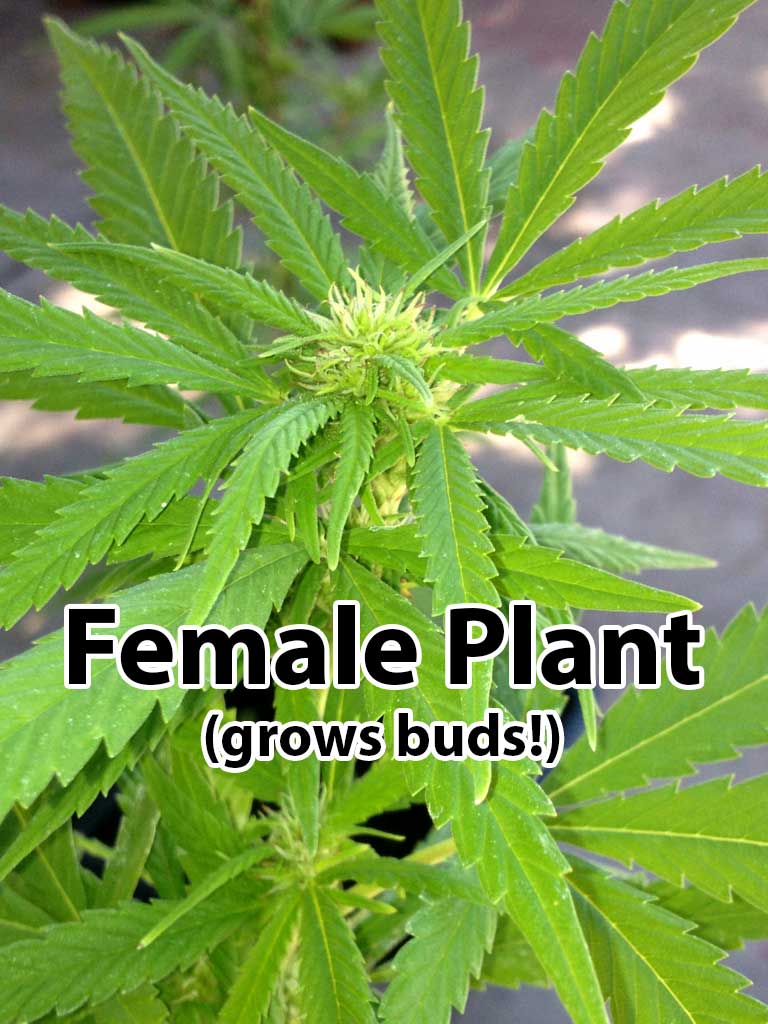
Regular marijuana seeds will be 50% male, and 50% female. That means half of the seeds will be unusable as far as growing buds.
One way around this is to purchased feminized seeds online. These seeds are available from all reputable online seedbanks, and the plants produced by these seeds are always female.
Questions about buying seeds online?
You can also make your own feminized seeds, but you have to start with two known female plants.
When do marijuana plants reveal their gender?
Cannabis plants go through two stages of life, the “vegetative” stage and the “flowering stage.”
They first go through the vegetative life stage, which you can sort of consider its “childhood” since the plant is only focusing on growing bigger and taller, and gender doesn’t matter. At the beginning of this stage you usually can’t tell what the plant’s gender is.
However, once the plant is about 6 weeks old, it will usually show signs of “pre-flowers” which will alert you to the gender before the beginning of the flowering stage.
Pre-Flowers usually reveal the gender around week 6 from seed
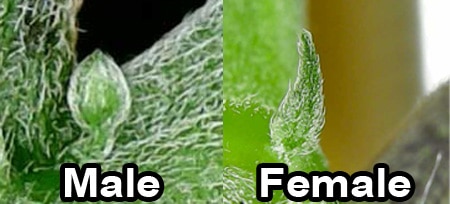
Otherwise you must wait for the flowering stage
Next, cannabis plants switch to the flowering stage which means they stop growing bigger and taller, and instead spend all their effort growing flowers (the buds we want are flowers!). The flowering stage is like the “adult” stage of a cannabis plant since at this point it’s only interested in adult stuff like growing their male and female parts, then pollinating In the flowering stage, plants start growing buds or pollen sacs in earnest. The buds we want are female flowers, so growers generally only want to grow female plants.
Growers Want Female Cannabis Plants – These Produce Bud
Regular Marijuana plants reveal their gender in two situations:
- After spending a long time in the vegetative stage – some strains/plants will show preflowers (pistils for girls and “balls” for boys) during the vegetative stage if they grow old enough, even when they are constantly kept under a vegetative light schedule. For example, clones can come from plants that are several years old, so you’ll see a lot of clones have female pistils showing, yet will not continue to flower any more than that until after they’ve been switched to a Flowering (12-12) light schedule
- Otherwise, all remaining plants will reveal their gender in the first 1-3 weeks after lights are switched to 12-12, and plants enter the flowering stage of life.
Female Plants & Pre-Flower Pictures
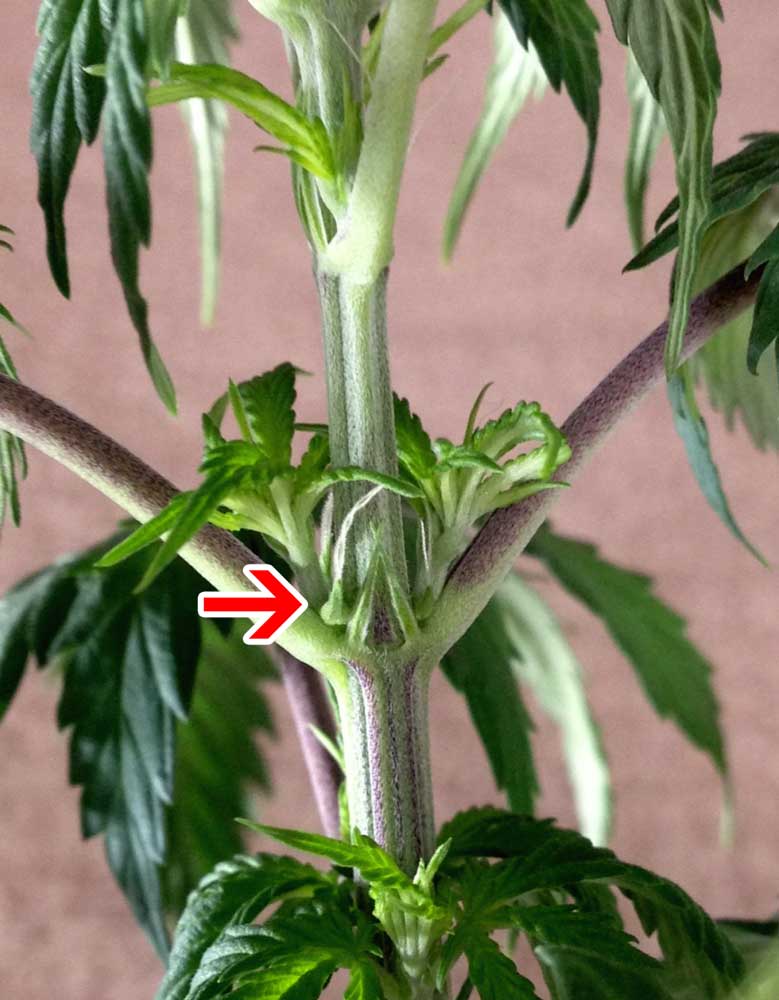
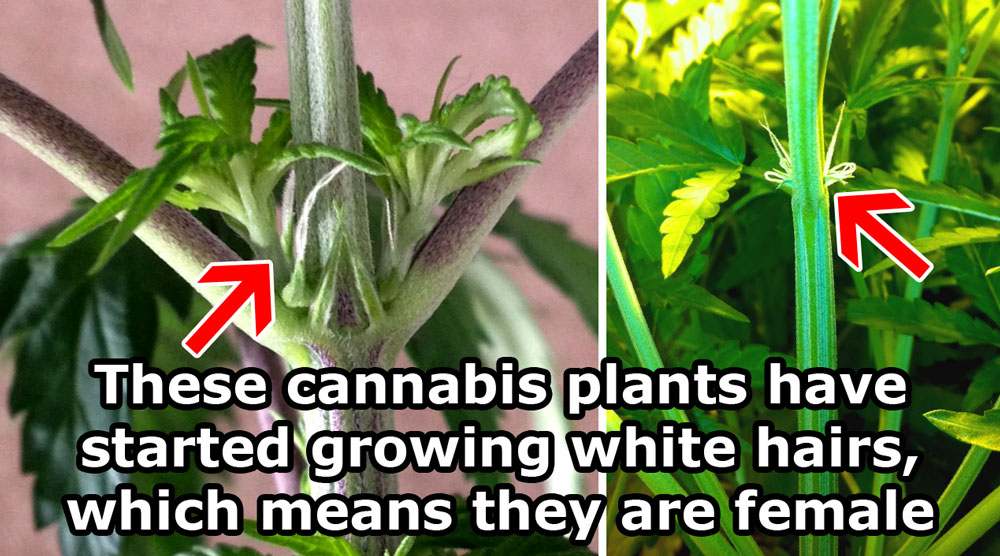
Click on thumbnails for larger picture
In this pic, you can see white pistils emerging from the calyxes. Female pistils are white and wispy, never green.
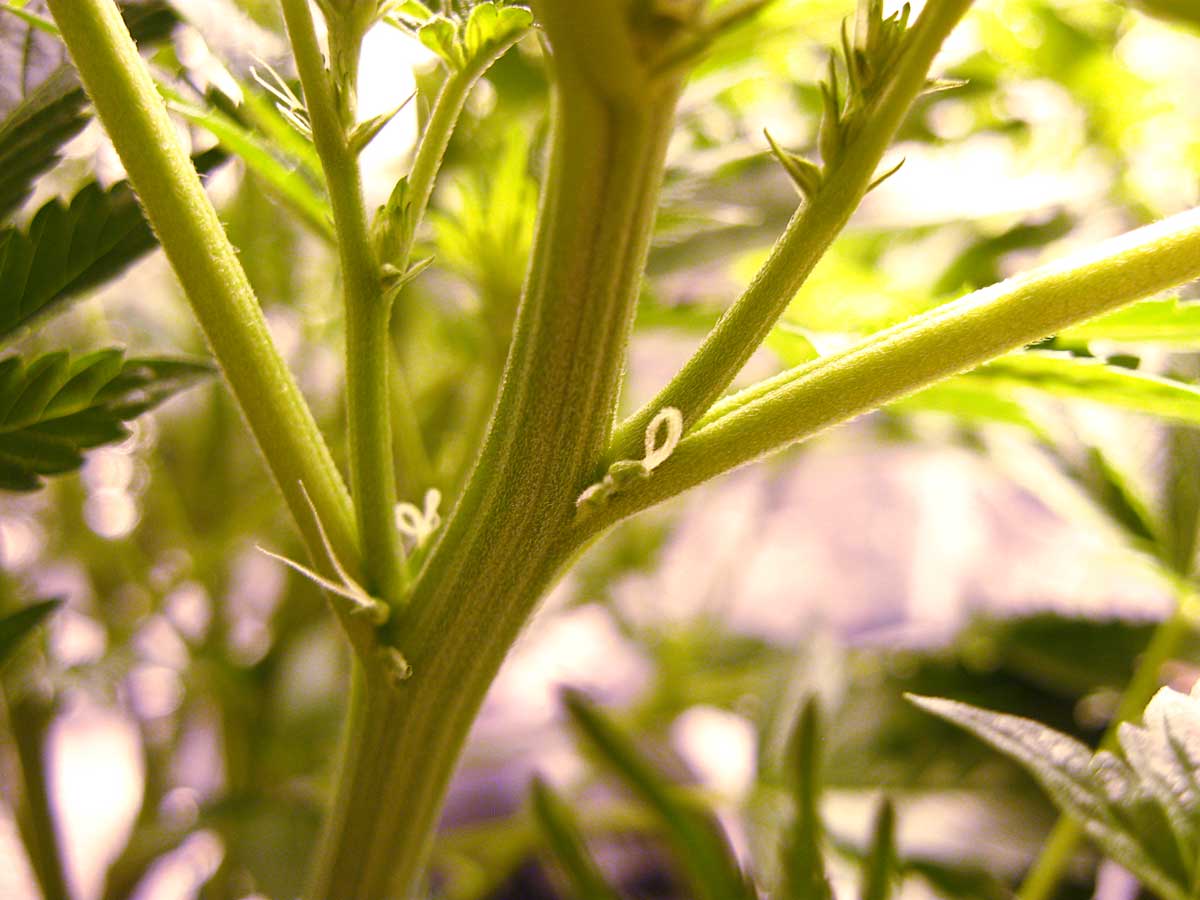
This pre-flower doesn’t have a pistil sticking out at first, but the shape helps tell you it’s a female plant. If you’re not sure about gender after spotting a pre-flower, it’s a good idea to wait and see for a little while, just to see if a white hair appears (which means it’s definitely a girl)
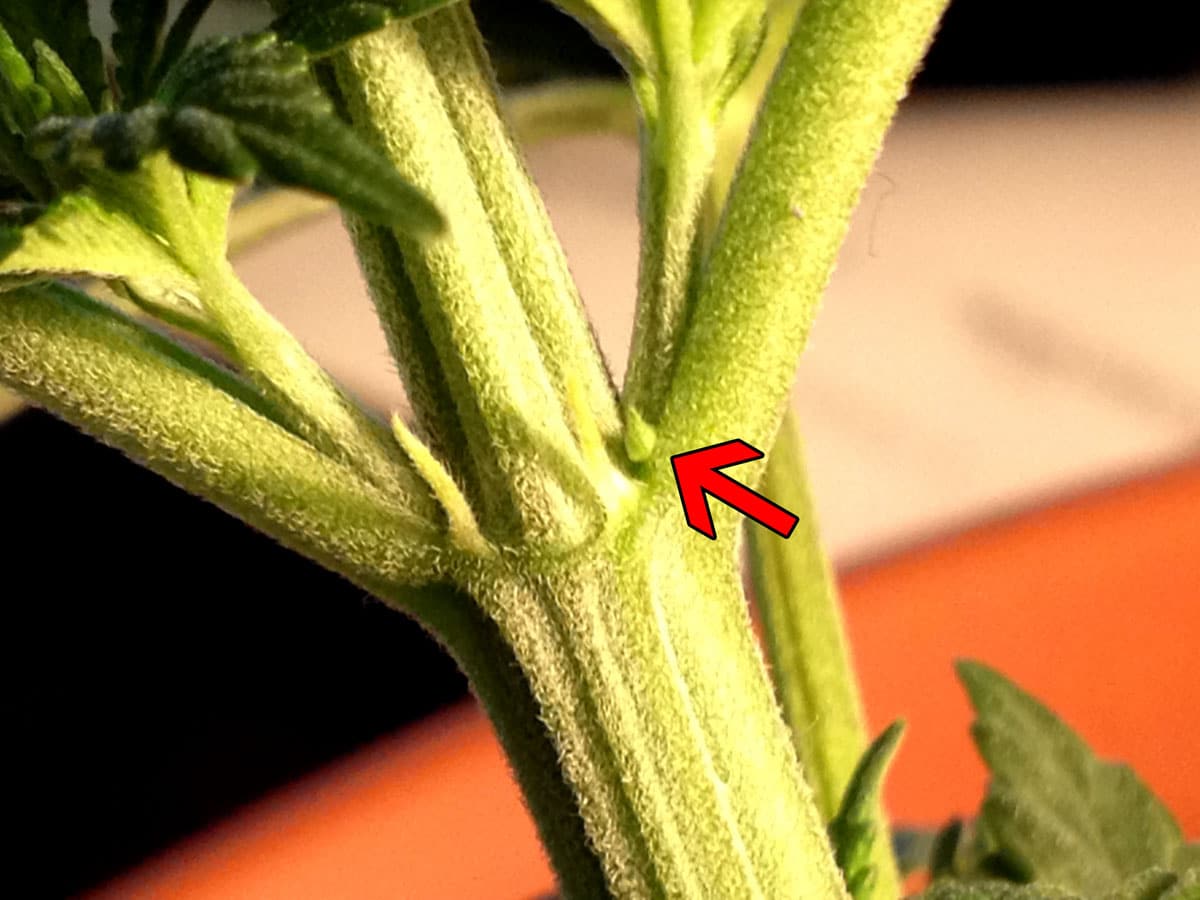
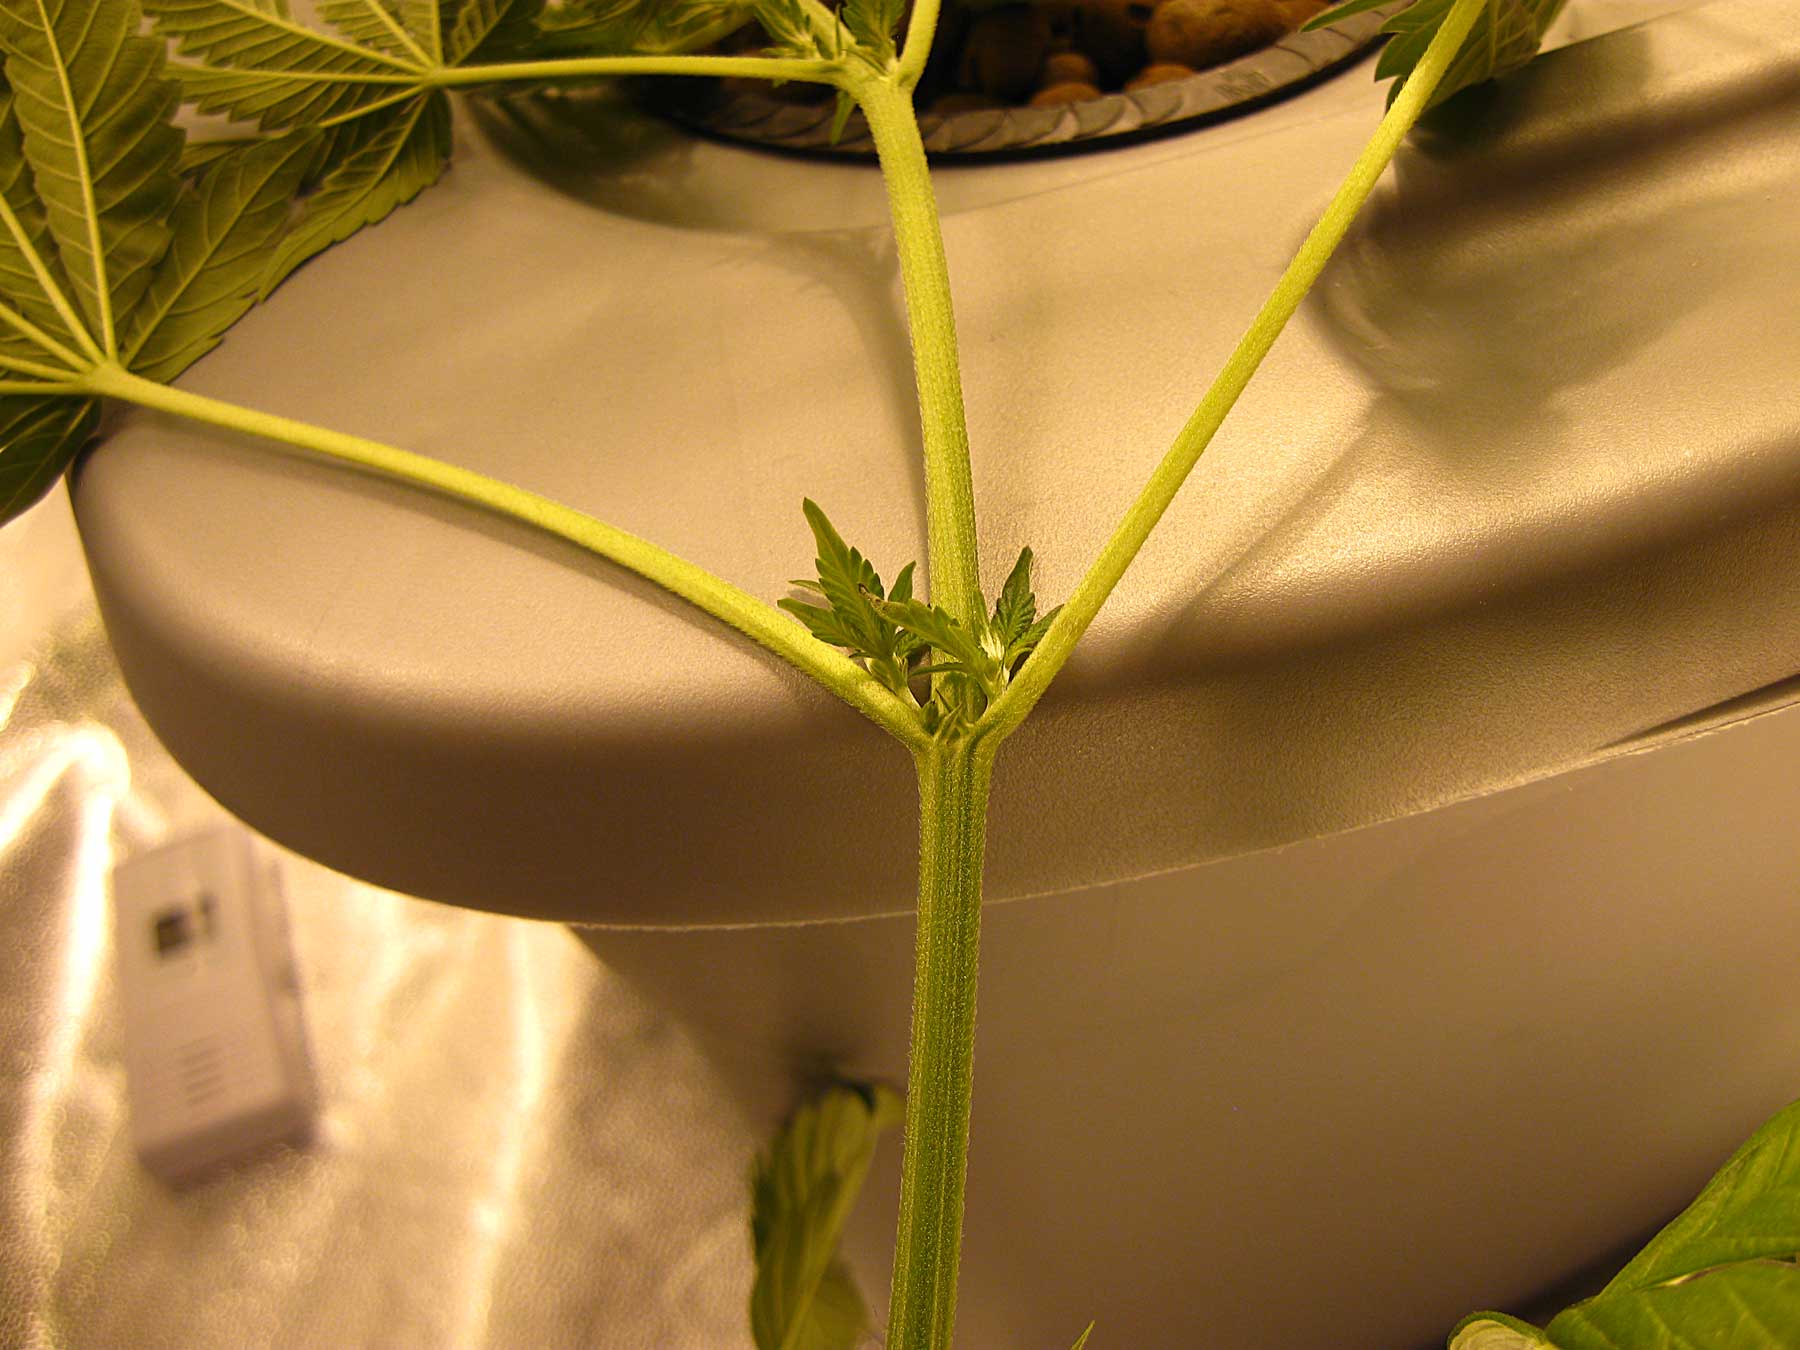
Adult Female Cannabis Plant Pictures
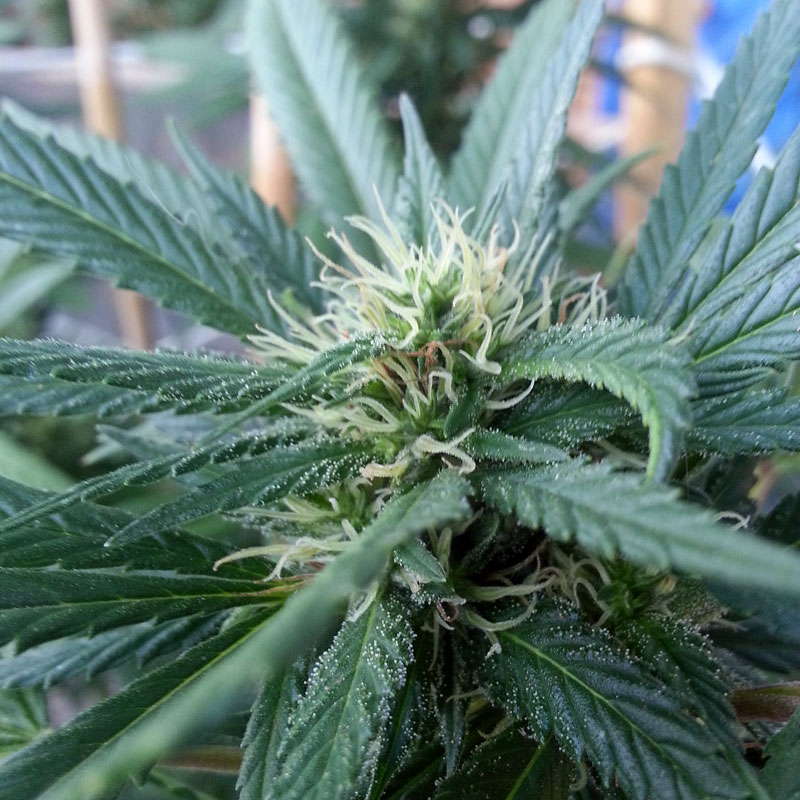
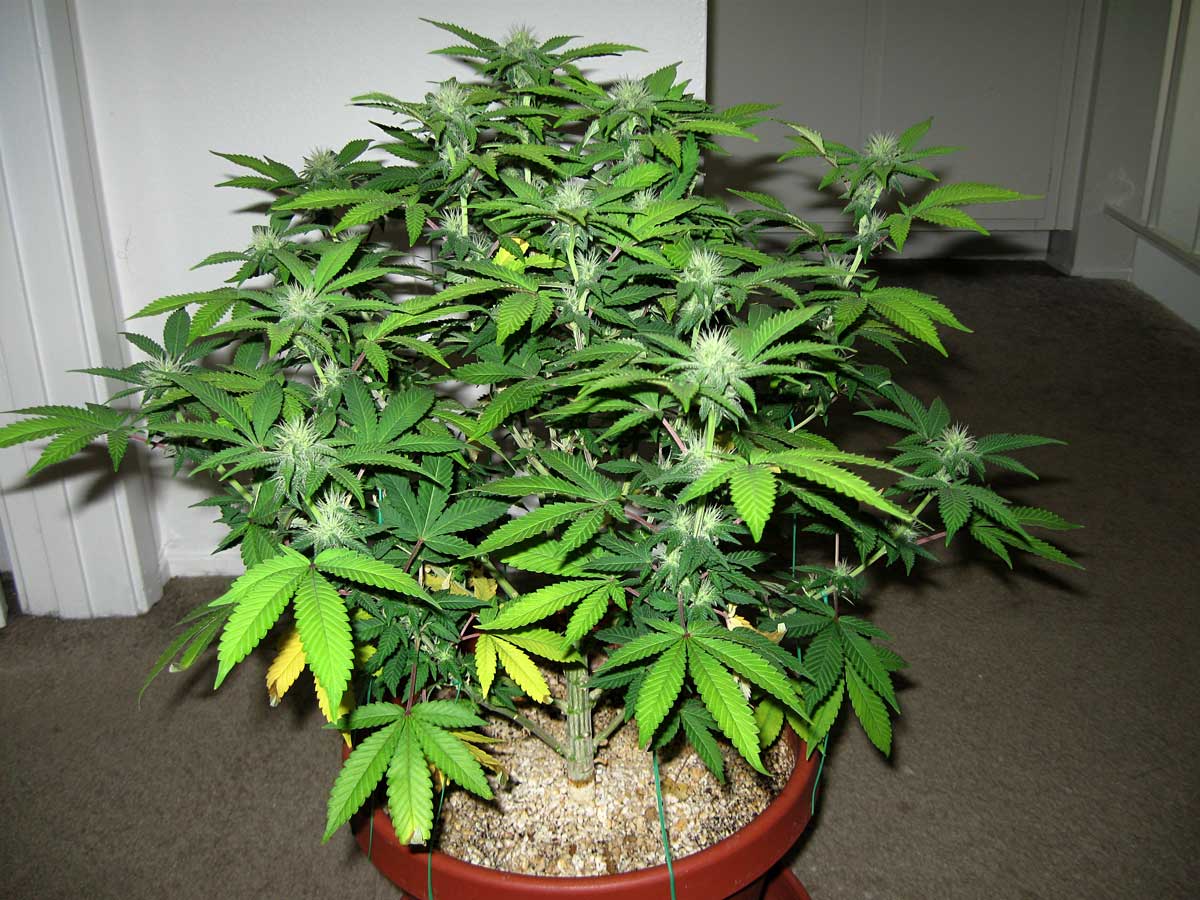
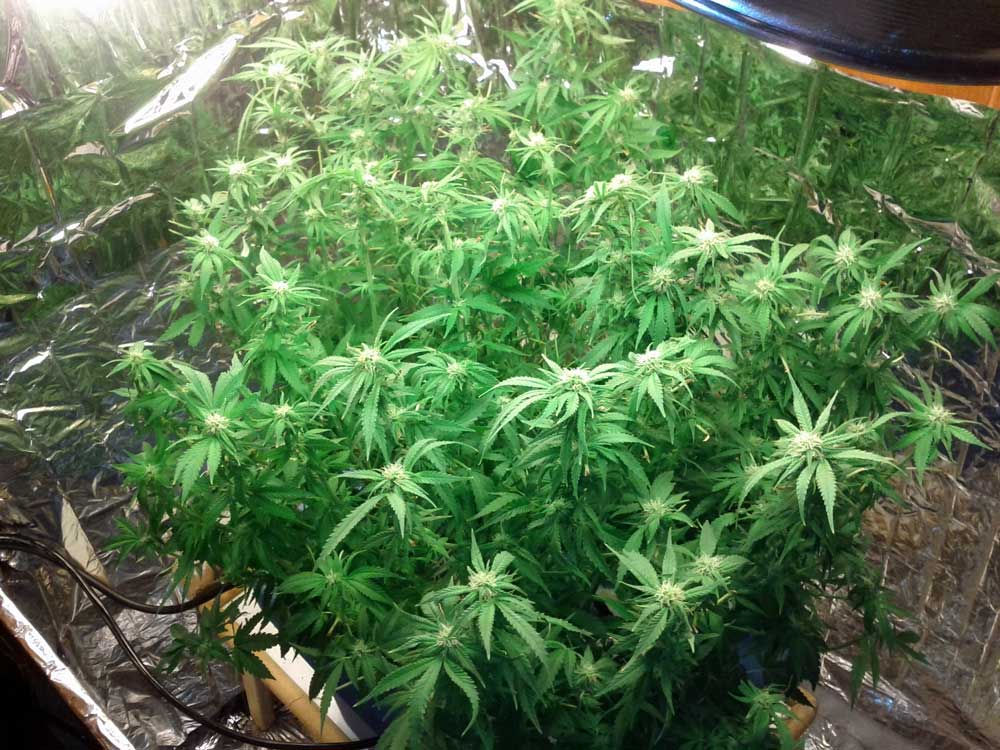
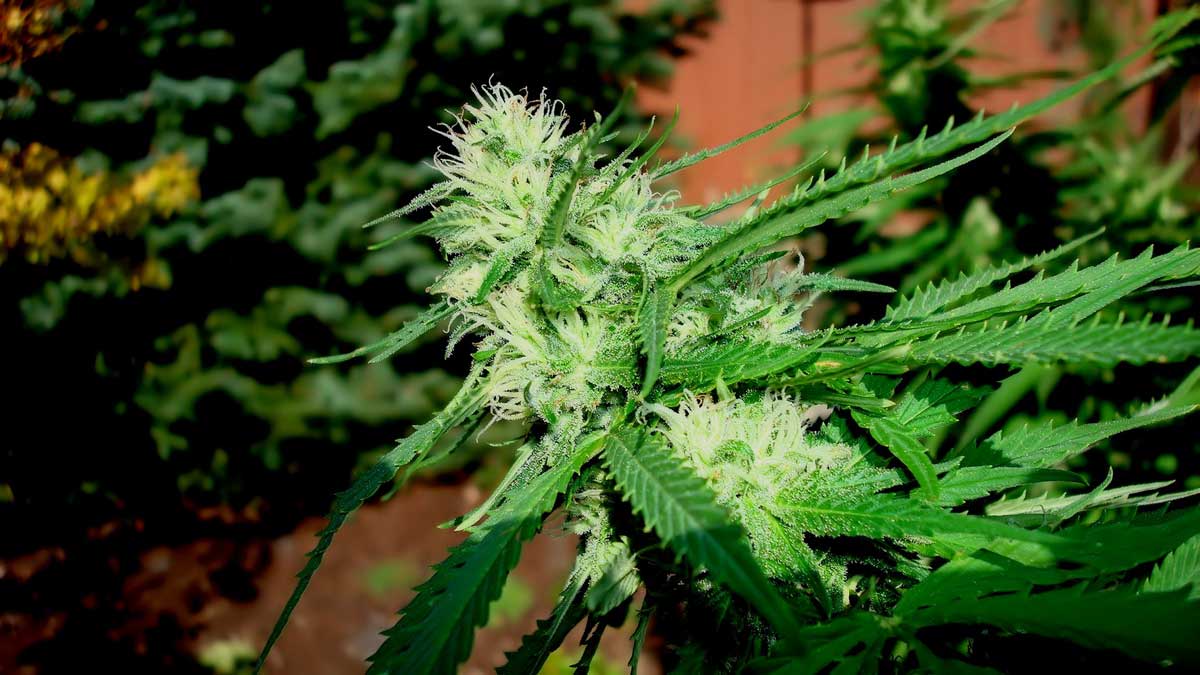
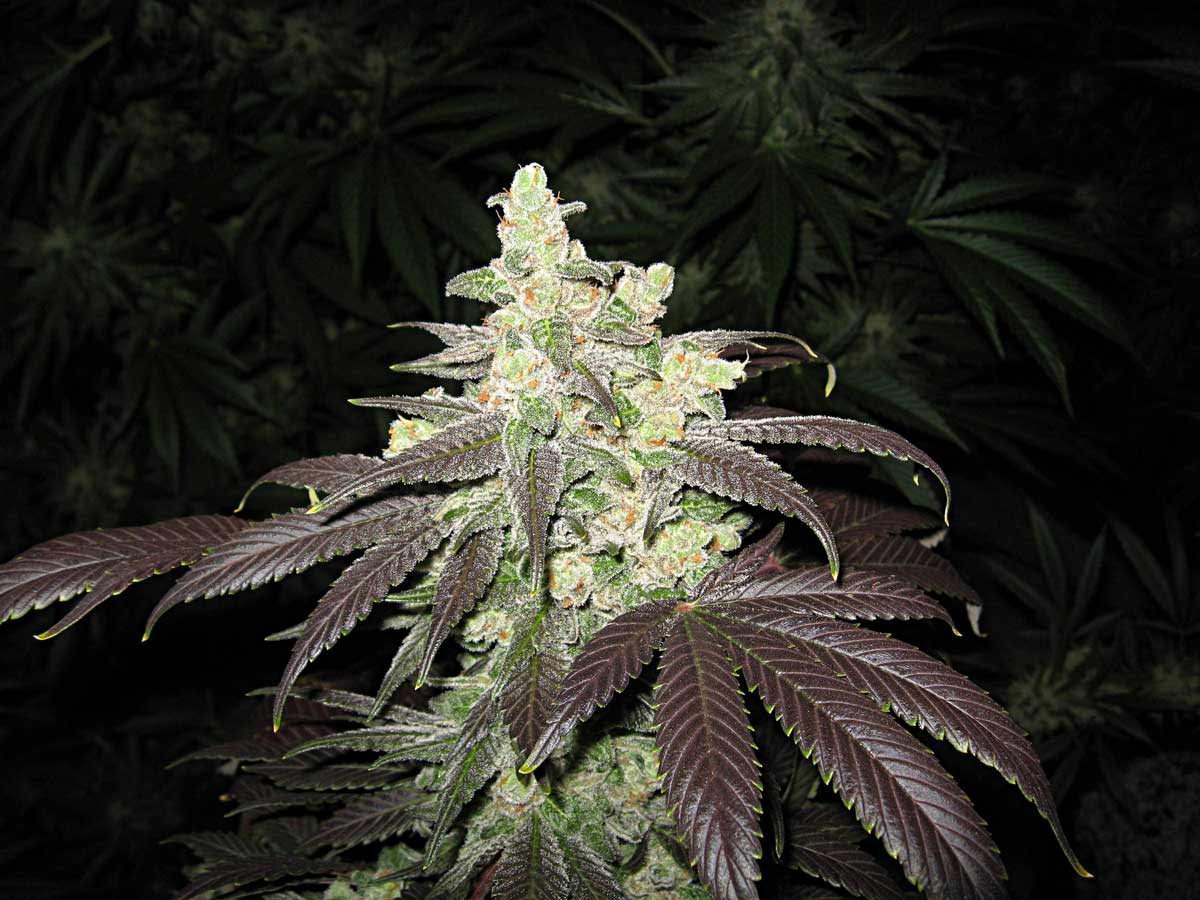
Those buds turn into this!

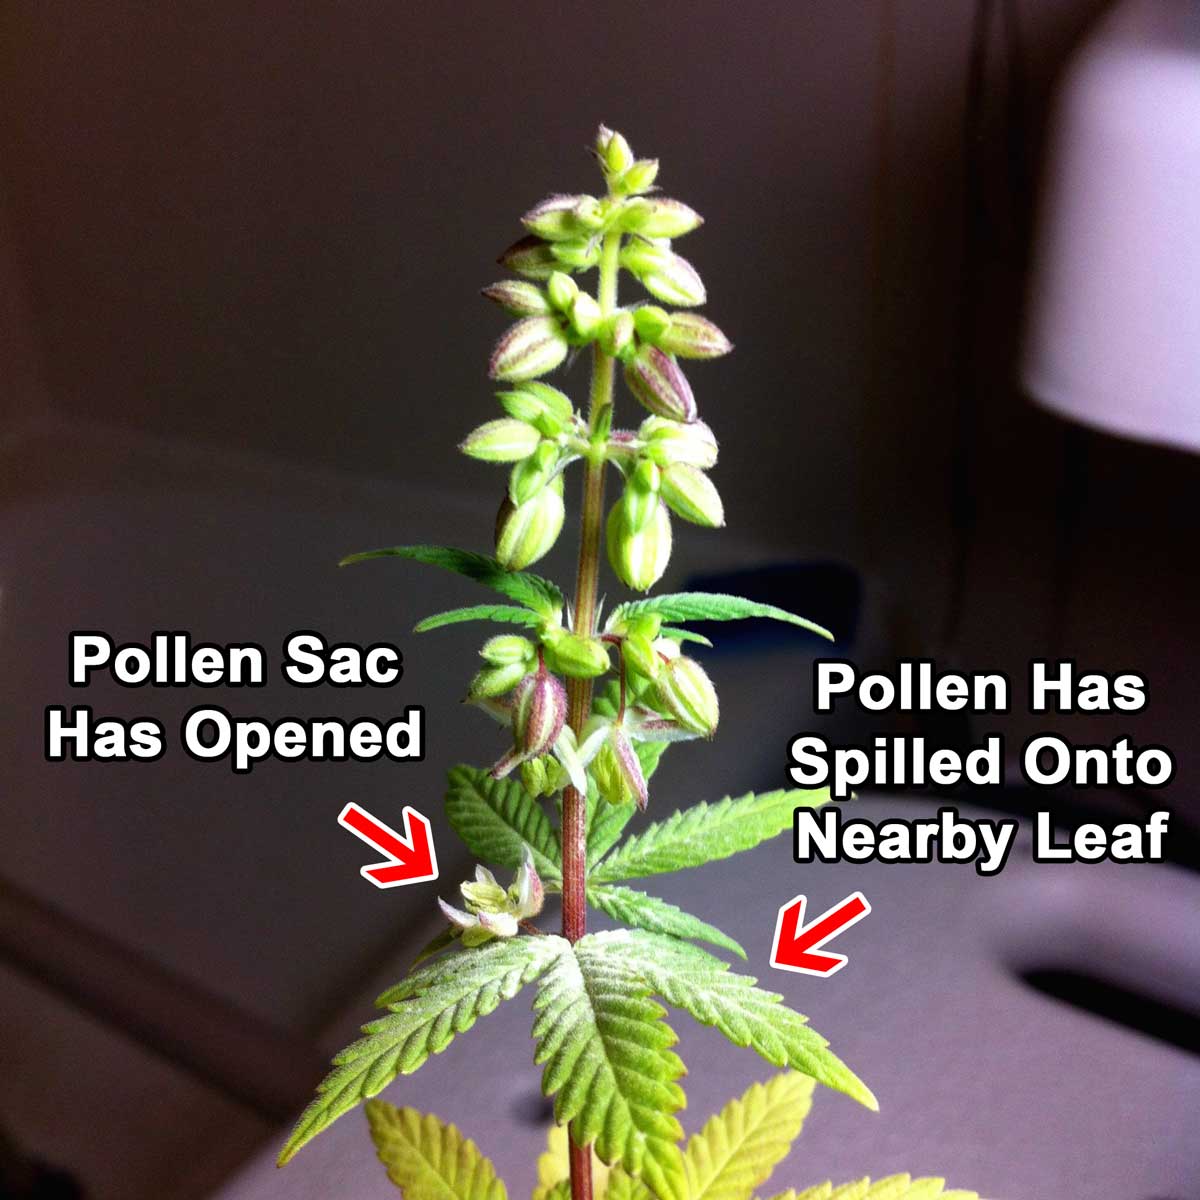
A small male pre-flower – this is what male plants look like when they first reveal their gender
These male pre-flowers are basically immature pollen sacs. When the plant starts flowering, they will grow and turn into bunches that almost look like grapes.
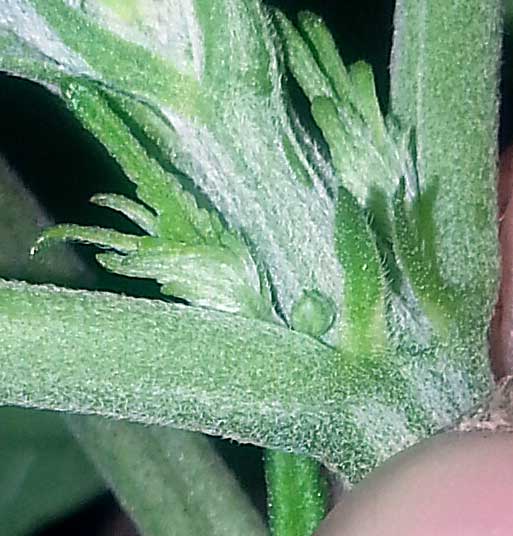

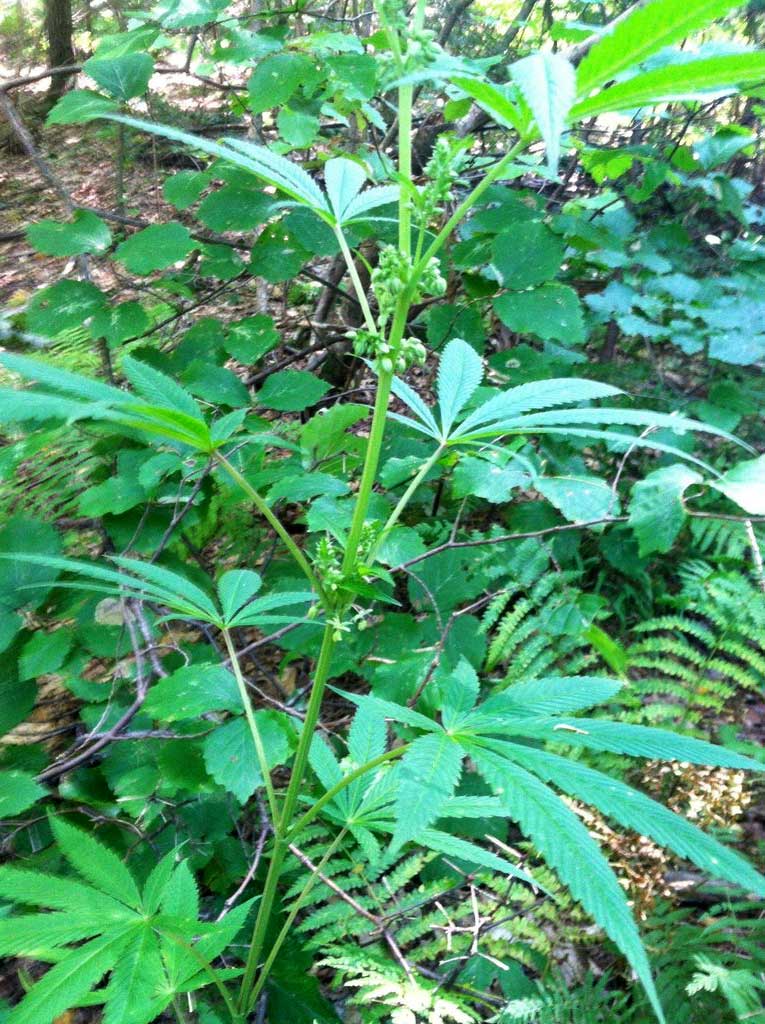
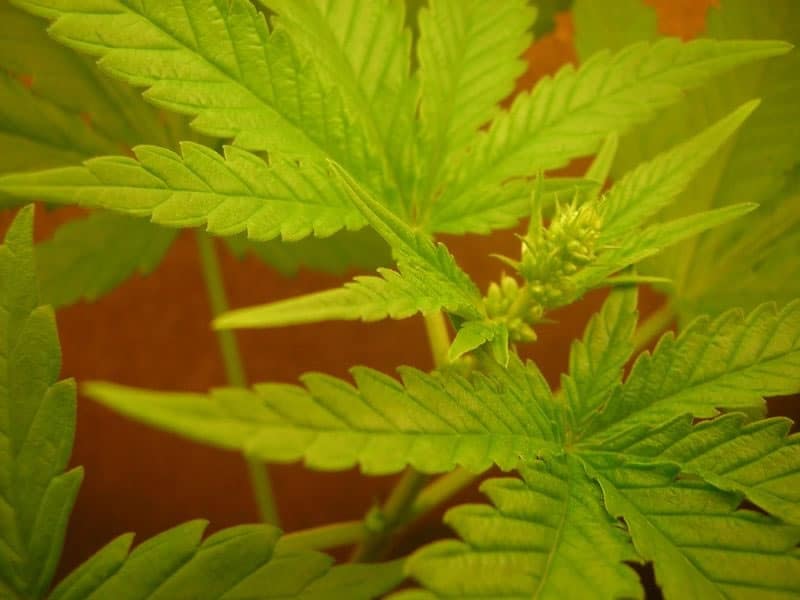

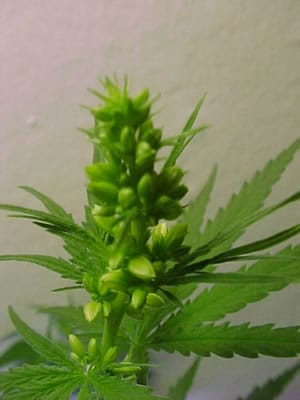
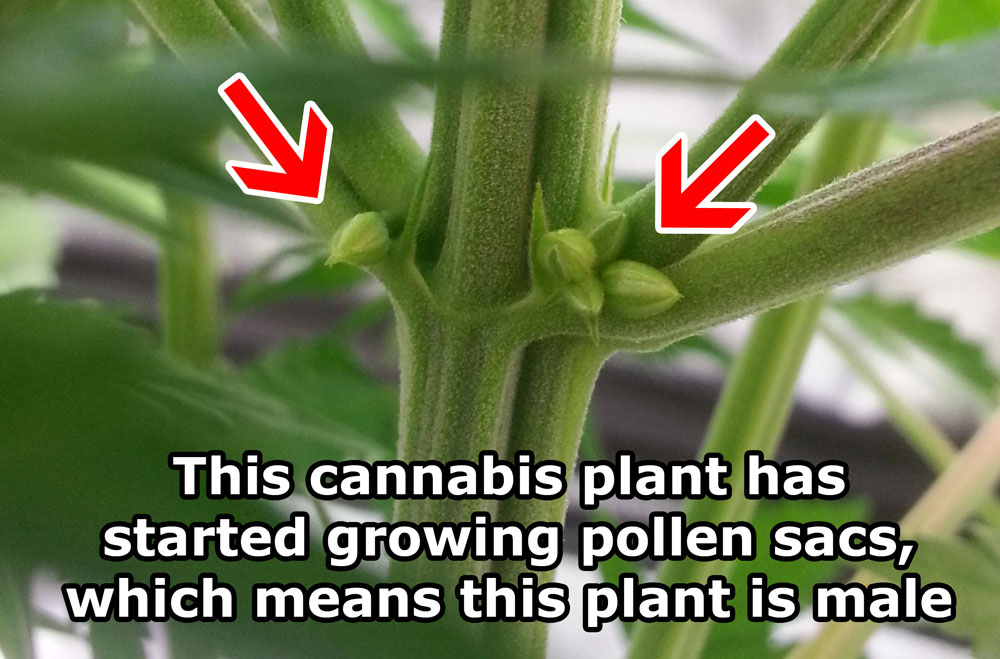
Click on thumbnails for larger picture
What about plants that display both male and female parts?
Sometimes it takes a day or two for a female pre-flower to release her first pistil, and the female calyx can look like the beginning of a pollen sac. Generally the more “pointy” ones tend to be female, but sometimes you have to wait and see a few more flowers to know for sure.
* Most indoor growers use a timer to turn their lights on and off automatically.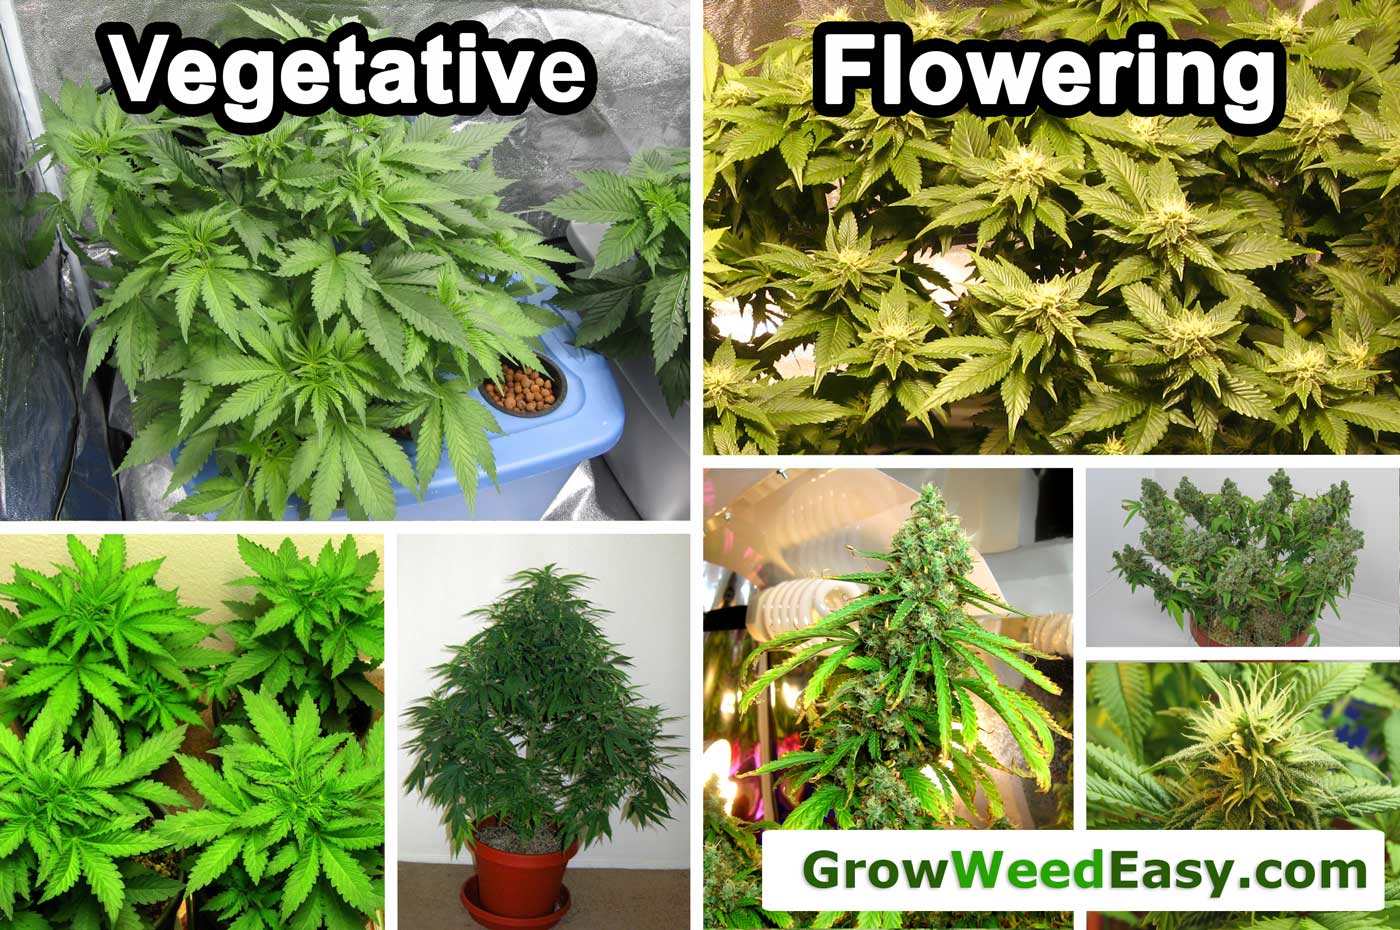
Vegetative Stage
The first stage, “Vegetative” begins when they first sprout, at the beginning of their life.
Most growers give their plants 18-24 hours of light a day during the vegetative stage.
When a plant is about half the final size you want it to be, you should change it over to the “Flowering” stage.
Flowering Stage
The second life stage, “Flowering,” is the stage your plant will remain in until harvest..
You get marijuana plants start flowering (making buds) by changing your light schedule to 12-12.
That means you use an electric timer to automatically shine your grow lights for 12 hours a day, with 12 hours of uninterrupted TOTAL darkness during the plant’s “night period.”
Marijuana plants should reveal the first signs of their gender within 2-3 weeks after being changed to 12-12.
How Light Schedules Affect Marijuana Life Stages
Marijuana plants have an internal process where they can detect how long they receive uninterrupted darkness each day.
In the wild, as the days get shorter and nights get longer, the marijuana plant “realizes” that winter is coming and will start budding/flowering as it approaches the end of it’s lifecycle.
When growing marijuana outdoors, a grower doesn’t need to do anything to induce flowering because the sun will take care of things on its own. All you need to do is make sure your plant isn’t directly under a street light or other light source, so that the plant receives complete darkness at night.
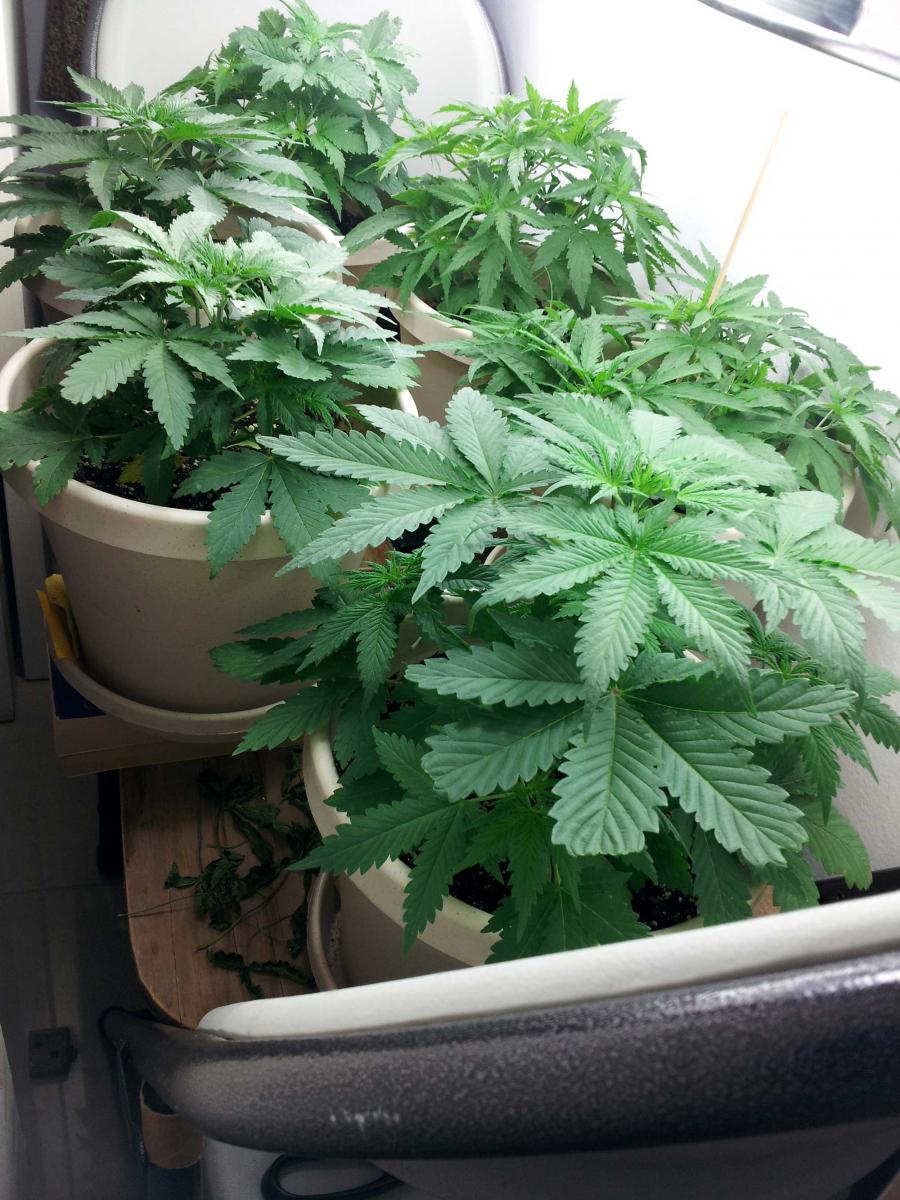 However, when growing marijuana indoors, a marijuana gardener will have to “fool” their plants into thinking winter is coming to induce flowering and kickstart the creation of buds.
This is done by changing the plant’s light schedule to 12-12, where the weed plants gets 12 hours of light a day and 12 hours of total darkness.
It’s easier to ensure the plant gets the 12 full hours of darkness each night when the start and end time for your lights to turn on and off is exactly the same each day. This is why most growers end up getting a timer to turn their lights on and off automatically.
I tend to set my timer in flowering to shine line from 7pm-7am. This gives me time to check on my plants at night when the lights first come on, and I can also check them quickly in the morning before I go to work. It also keeps things cooler since the lights are on at night. Some people (like myself) also get discounts on electricity that’s used at night.
But ANY 12 hour dark period will work, as long as you prevent your plant from getting light leaks during their “night.”
In fact, with marijuana plants, the length of night period, not the length of day period, seems to make the biggest difference. This makes sense if you consider that in the wild, a stormy or cloudy day could shorten the light period a plant receives, but few things in the wild will interrupt the darkness of night.
This has been experimentally verified by some out-of-the-box thinkers. They gave marijuana plants different amounts of light and dark, then watched what happened.
What they found is that a marijuana plant will stay flowering as long as she gets 12+ hours of darkness on a regular basis. The length of day period didn’t seem to matter at all. In fact, you could give plants 12 hours of dark followed by 24 hours of light, on a regular basis, and plants would continue to flower as long as their darkness was uninterrupted for 12 hours at a time.
Check out my marijuana grow light guide for more info about picking out the right grow lights for your situation!
Photoperiod dependent strains vs. auto-flowering strains
So all strains of cannabis that respond to light in this way (where the light period effects what stage they’re in) are called “Photoperiod dependent” strains.
“Auto-flowering” marijuana strains pretty much ignore how much light they get each day. Generally you don’t run into these unless you buy them particularly from a cannabis seed bank.
Learn more about auto-flowering cannabis strains
Marijuana plants have a gender: Is my plant Male or Female?
(Some marijuana plants can also be hermaphrodites, which means they display both male and female parts on the same plant)
Most growers prefer to grow female plants, as only female plant produce buds/flowers.
Note: Once the plant is about 6 weeks old from seed, it will usually show signs of “pre-flowers” which will alert you to the gender before the beginning of the flowering stage.
Pre-Flowers usually reveal the gender around week 6 from seed, or you can wait until the plant switches to the flowering stage.
After 2-3 weeks of the 12-12 light schedule, most marijuana plants will reveal the first signs of their gender (they either are a female plant and start growing buds, YAY! or they are a male plant and start growing balls, NO!).
What about plants that display both male and female parts?
Why do I not want male marijuana plants?
Only a female marijuana plant makes flowers/buds that contain a usable amount of THC. Male marijuana plants only make pollen sacs that they use to fertilize the females. Most growers will throw away any male plants that they encounter to keep them from fertilizing the female plants. If your female plants do get fertilized, they will use all their energy to produce seeds instead of making buds. This is good if you want seeds, but you will run into the same problem since half of the seeds will also be male.
If you would like to start a breeding program to make your own hybrids, I recommend using a method that creates all-female (feminized) seeds so that you don’t waste time having to identify and throw out male plants.
 Getting clones of female marijuana plants or buying feminized seeds online from a seed bank are other ways you can ensure that all your marijuana plants are female.
If you don’t have a choice of seeds, and some of your seeds may be male (like if you just found seeds) than you will want to get your plants to reveal their gender right away so you don’t have to waste time and energy on male plants.
For most marijuana strains, the male plants don’t produce usable amounts of THC, so most growers toss them on sight. Unfortunately, 50% of all regular seeds will become male plants.
These male plants can also impregnate your female plants, which causes them not to produce as many buds, so unless you’re breeding, destroy male plants as soon as you notice them growing grape-like balls where their buds would normally be.
A vigilant grower can carefully watch their plants and remove males when they develop the first signs of pollen sacs.
Pre-Flowers reveal the gender of your plant by around week 6 from seed, and as early as 3 weeks from seed for some plants.
In this area you’ll find pre-flowers nestled where the “joints” of the plant are.
Learn exactly where to look to find preflowers
Tactic 2: Taking a clone and flowering it
The following method can help you identify gender for plants that are taking a while to show their pre-flowers.
If you’re just growing 1, 2, or 3 plants, it can be heartbreaking to find out all your plants are male, and you need to start over in order to make buds.
When marijuana plants are seedlings (or when they’re just seeds), there’s no way to tell which plants are male and which plants are female.
You have to “wait and see.” Male marijuana plants develop pollen sacs (look like little balls or nuts). Female marijuana plants start growing white hairs that develop into the marijuana buds (sensimilla) that contain THC and other cannabinoids. Lots of pictures of male and female parts above.
However, you may want to be more proactive and get rid of the male plants before they enter the flowering stage so you don’t have to waste the time and energy in caring for plants that you will eventually get rid of. If so, then you can use to following technique to identify and remove all the males from your grow.
How to Determine Sex of a Marijuana Plant
- You can wait until your plants naturally show the first signs of their gender and then remove all the males, but that means you have to watch the plants closely. You also will waste time and energy growing plants only to find out that some or all are male and have to throw them away. If you want to be more proactive and get rid of all male plants right away, then use this technique.
- Take a clone from the unverified marijuana plant
- Label both the clone and the mother plant so you know which clone came from which corresponding mother. If you don’t label them clearly, then all your effort will go to waste!
- Once the clones have established roots, change just the clones into flowering mode by providing them with a light schedule of 12 hours on, 12 hours off
- The clones should start revealing their gender in a week or two. Males will start developing balls and females will start developing white hairs. Click on the pictures below to see some examples of male and female plants.
- Once you have determined the gender of your clones, you should make sure you throw away any corresponding male plants.